
If you’re craving something sweet but want it to be simple and gluten-free, these 3-ingredient peanut butter cookies are a game-changer! They’re delicious, easy to make, and perfect for any occasion. Read Interesting article: The Ultimate Fudgy Gluten-Free Brownies (From Scratch)
Overview of 3-Ingredient Gluten-Free Peanut Butter Cookies
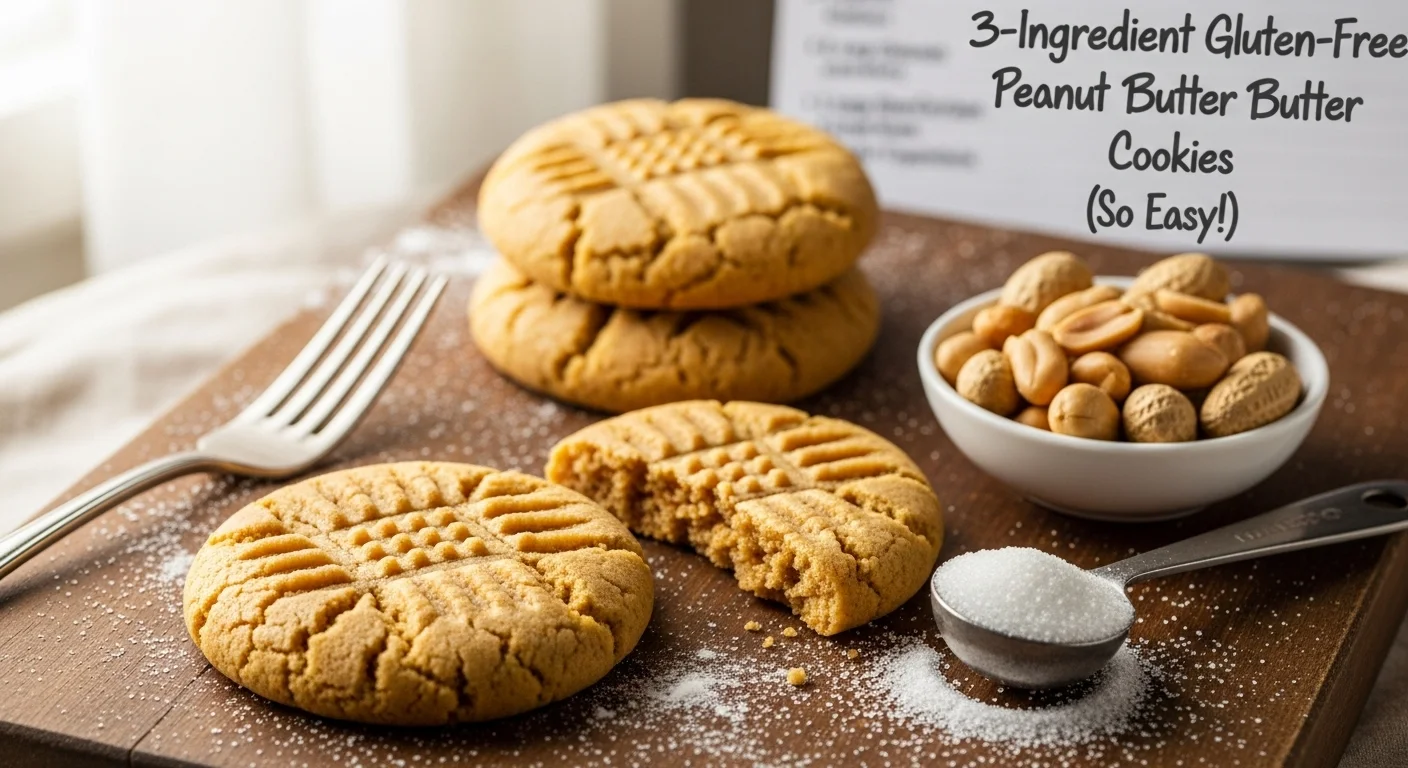
Let me tell you about these cookies. When I first stumbled upon the idea of making cookies with just three ingredients, I was skeptical. How could something so simple taste good? But when I took that first bite, I was hooked! These 3-ingredient gluten-free peanut butter cookies are not just easy to whip up; they’re also rich, chewy, and absolutely satisfying. The beauty of this recipe lies in its simplicity. With just peanut butter, a sweetener, and an egg, you can create a delightful treat that everyone will love.
What Makes These Cookies Gluten-Free?
One of the best parts about these peanut butter cookies is that they are naturally gluten-free. Unlike traditional cookies that require flour, this recipe relies solely on peanut butter for its base. I remember realizing that gluten can be avoided without compromising flavor or texture. If you’re like me and have friends or family members who are gluten-sensitive or celiac, these cookies allow us to indulge together without worry. It’s a fantastic way to enjoy a classic treat without the gluten!
Why Choose 3 Ingredients?
I believe the beauty of a 3-ingredient recipe lies in its accessibility. Many of us lead busy lives, and sometimes the last thing we want to do is hunt for a long list of ingredients. I’ve found that when I keep things simple, it becomes easier to bake more often. Plus, using just three ingredients means you can focus on quality over quantity. Each element shines through. The peanut butter provides a rich flavor, the sweetener adds just the right amount of sweetness, and the egg acts as a binder. It’s a winning combination!
Essential Ingredients for the Recipe
Now, let’s dive into the essential ingredients that bring these cookies to life. Each one plays a vital role, and I’ve learned a few tips along the way that can help you choose the best options.
Peanut Butter: Choosing the Right Type
Peanut butter is the star of the show here. I recommend using natural peanut butter without added sugars or hydrogenated oils. When I make these cookies, I go for a creamy variety because it spreads easily and results in a smooth texture. However, if you prefer a bit of chunkiness, you can use crunchy peanut butter for added texture. Just keep in mind that the flavor will be slightly different. It’s important to stir the peanut butter well before measuring; the oils can separate, and we want to maintain that creamy goodness throughout the cookie!
Sweeteners: Options for Natural and Granulated
When it comes to sweeteners, I’ve found that you can use various types. I typically go for granulated sugar or brown sugar for that classic cookie taste. However, if you’re looking for a more natural alternative, honey or maple syrup can work wonders. Just remember that using liquid sweeteners might change the dough’s consistency, so you might need to adjust the amounts slightly. I’ve experimented with both, and while they all taste fantastic, I find that granulated sugar gives the best texture for these cookies. Read Interesting article: 5 Fabulous Flourless Desserts for a Gluten-Free Treat
Eggs: Understanding the Role in Baking
The egg in this recipe serves as a binding agent, which is crucial for holding everything together. When I first started baking, I was curious about the role of eggs in recipes. They not only help bind the ingredients but also add moisture, giving the cookies a chewy texture. I’ve tried making these without eggs, and while they can work with substitutes like flaxseed or applesauce, the texture isn’t quite the same. For me, using a fresh egg makes all the difference!
Step-by-Step Instructions
Now that we’ve covered the essential ingredients, let’s dive into the fun part: making these cookies! I’ve found that having a clear set of instructions makes the process smoother and more enjoyable. So, grab your mixing bowl, and let’s get started!
Preparing the Dough
First things first, let’s prepare the dough. Begin by measuring out your peanut butter—if you’re using creamy peanut butter, it should be easy to scoop out. I usually take about one cup of peanut butter and place it in a large mixing bowl. Then, I add in my sweetener of choice. If I’m using granulated sugar, I add half a cup, but remember that if you choose honey or maple syrup, I typically use about a third of a cup instead since they are sweeter and more liquid. Once you have your sweetener in the bowl, crack in the egg. When I mix these three ingredients together, I find that using a sturdy spatula or a wooden spoon works best. I start by blending the peanut butter and sweetener until they’re well-combined, then I gradually incorporate the egg. The dough will start to come together beautifully, and I can already smell that rich peanut butter aroma wafting through my kitchen!
Shaping the Cookies
Next up is shaping the cookies. This is where the fun really begins! I usually preheat my oven to 350°F (175°C) at this point, so it’s ready when I’m done mixing. To shape the cookies, I like to use a small cookie scoop or my hands to form about one-inch balls of dough. I remember the first time I made these cookies; I was so excited to see the dough transform into something delicious! After rolling them into balls, I place them on a baking sheet lined with parchment paper. It’s important to leave some space between each ball because they will spread slightly while baking. Once they’re all on the sheet, I gently press each ball down with a fork, making a crisscross pattern. It’s a simple step that adds a nice touch and helps them bake evenly.
Baking Time and Temperature
Now, it’s time to bake these delightful treats! I pop the baking sheet into the preheated oven and set a timer for about 10 to 12 minutes. The cookies are done when the edges are lightly golden, and the centers look just set. I remember the first time I took them out; the smell was so intoxicating that I could hardly wait for them to cool! I usually let them rest on the baking sheet for a few minutes before transferring them to a wire rack to cool completely. This resting period helps them firm up a bit, making them easier to handle. You’ll want to let them cool completely, but I won’t judge you if you sneak a warm cookie or two—they’re simply irresistible hot out of the oven!
Variations to Try
Now that you know how to make the basic cookies, let me share some variations that I’ve tried and absolutely loved. It’s always fun to mix things up, and these ideas can elevate your cookie game to a whole new level!
Chocolate Chip Additions
One of my favorite variations is adding chocolate chips. Who doesn’t love a classic peanut butter and chocolate combination? I usually toss in about half a cup of semi-sweet or dark chocolate chips into the dough before mixing everything together. The melty chocolate adds richness and depth that makes these cookies even more indulgent. The first time I added chocolate chips, I was blown away by how they transformed the flavor while still keeping that signature peanut butter taste. It’s pure magic!
Nut and Seed Swaps
If you want to add a little crunch or extra nutrition, consider swapping out part of the peanut butter for other nut butters like almond or cashew, or even adding in chopped nuts or seeds. I’ve personally enjoyed using almond butter, which gives a slightly different flavor profile but is equally delicious. Sunflower seeds can also be a great addition, especially if you’re making these for school lunches where nut allergies might be a concern. I love experimenting with different combinations, and each time I do, I’m amazed at the delightful results!
Flavor Enhancements (Vanilla, Cinnamon, etc.)
Finally, don’t forget about flavor enhancements! I often add a splash of vanilla extract or a sprinkle of cinnamon to the dough for an extra flavor boost. Just a teaspoon of vanilla can elevate the taste, making it even more decadent. In the fall, I love adding cinnamon for a warm, cozy flavor that pairs perfectly with the peanut butter. When I tried this, I felt like I was getting a taste of autumn in every bite!
Storage and Shelf Life
After making a batch of these delightful cookies, you might be wondering how best to store them. I’ve learned a few tricks over the years that keep them fresh and tasty!
How to Store Leftover Cookies
Once the cookies are completely cool, I store them in an airtight container at room temperature. They typically last up to a week, though I’ve found they rarely stick around that long in my house! To keep them tasting fresh, I like to place a piece of bread in the container with them. This little trick helps maintain moisture and keeps the cookies soft. It’s amazing how something so simple can make a big difference!
Freezing for Longer Storage
If you want to make a larger batch or save some for later, freezing is an excellent option. I often freeze them after they’ve cooled completely. I place the cookies in a single layer on a baking sheet and freeze them for about an hour. After that, I transfer them to a freezer-safe bag or container, separating layers with parchment paper to prevent sticking. They can last in the freezer for up to three months! When I want a cookie, I just pull out a couple, let them thaw for a few minutes, and they’re good to go. It’s the perfect solution for those late-night cravings!
Common Baking Tips and Troubleshooting
Baking is such an art, and I’ve learned that even the simplest recipes can sometimes throw a curveball. Here are some tips and troubleshooting advice I’ve gathered from my own experiences that can help ensure your baking venture goes smoothly!
What to Do If the Dough Is Too Sticky
We’ve all been there—our dough turns out stickier than we expected. If you find yourself in this situation, don’t panic! A little extra peanut butter can help, but I usually recommend adding a small amount of sugar or even a sprinkle of almond flour to absorb some of that stickiness. I remember the first time I tried making these cookies and ended up with dough that stuck to my hands like glue. It was frustrating! But after a quick adjustment, I realized that a little extra ingredient can make a world of difference. Just be careful not to overdo it; you want to maintain that perfect cookie texture!
Ensuring Even Baking
Getting those cookies baked evenly is key. I’ve found that the positioning of your baking sheet in the oven can really impact the results. If you’re baking multiple sheets at once, try rotating them halfway through the baking time. This ensures that every cookie gets that lovely golden hue. I also like to use a light-colored baking sheet; dark ones tend to absorb more heat and can lead to burnt bottoms. A little trial and error has shown me that sometimes it’s the small details that lead to cookie perfection!
Adjusting Sweetness Levels
If you’re like me and love to tweak recipes, adjusting the sweetness in these cookies is super easy! Depending on your taste preference or the sweetener you use, you might find the need to dial it up or down. I often taste the dough before baking (yes, it’s that good!), and if I feel it needs a bit more sweetness, I’ll add a teaspoon of honey or a touch more sugar. Just keep in mind that adding more sugar can change the texture slightly, so it’s all about finding that perfect balance that suits your palate!
Nutritional Information and Benefits
Understanding the nutritional content of what we eat has become increasingly important to many of us. I’ve taken a closer look at these cookies and their benefits, and I’m excited to share what I’ve learned!
Caloric Content and Macronutrient Breakdown
These 3-ingredient peanut butter cookies are not only simple but also relatively straightforward in terms of nutritional content. Depending on the size you make them, each cookie typically contains around 90-100 calories. The macronutrient breakdown is quite appealing as well, with a good balance of healthy fats from the peanut butter, some carbohydrates from the sweetener, and protein from the egg. I love knowing that I can enjoy a tasty treat while still being mindful about what I’m putting into my body!
Health Benefits of Peanut Butter
Peanut butter is more than just delicious; it’s packed with nutrients! It’s a great source of protein, heart-healthy fats, and essential vitamins and minerals like vitamin E, magnesium, and potassium. I remember reading about how the healthy fats in peanut butter can help keep you feeling fuller for longer, which is a definite plus. Plus, it has a low glycemic index, making it a fantastic option for those watching their blood sugar levels. For me, it’s comforting to know that I’m indulging in something that not only satisfies my sweet tooth but also offers some health benefits!
Gluten-Free Diet Considerations
For anyone following a gluten-free diet, these cookies are an absolute win! They allow for a delightful treat without the worry of gluten exposure. I’ve seen friends with gluten sensitivities enjoy these cookies without any adverse reactions, and it warms my heart to see everyone gather around the dessert table! It’s crucial to ensure that all your ingredients are indeed gluten-free, especially the sweetener if you opt for a pre-packaged option. I truly believe that everyone deserves a little sweetness in their life, and these cookies make it possible for all of us! Read Interesting article: 12 Lovely Baking Recipes for Holiday House Guests
Frequently Asked Questions (FAQs)
As I’ve shared my love for these cookies, I’ve noticed some common questions coming up. Let’s delve into those!
Can I Substitute Ingredients?
Absolutely! One of the great things about these cookies is their versatility. If you’re out of peanut butter, you can use other nut butters like almond or cashew. Just keep in mind that the flavor will change slightly. I’ve also experimented with different sweeteners, and while granulated sugar gives the best texture, maple syrup or agave nectar can be great alternatives. It’s all about what you have on hand and what flavor you’re in the mood for!
Are These Cookies Kid-Friendly?
Definitely! My kids love these cookies, and I enjoy making them together. They’re easy and fun to shape, and they get super excited when it’s time to bake. Plus, they’re gluten-free, which means I don’t have to worry about allergies when their friends come over. I can’t tell you how many times I’ve seen little hands reaching for these cookies after school—they disappear within minutes!
How Can I Make Them Vegan?
If you want to make these cookies vegan, it’s totally doable! You can replace the egg with a flax egg (one tablespoon of ground flaxseed mixed with three tablespoons of water, let sit until it thickens). I’ve tried this substitution, and while the texture changes slightly, they still turn out delicious! It’s a great way to accommodate different dietary preferences while still enjoying the same classic flavor.
Frequently Asked Questions
“`htmlWhat are the main ingredients in 3-ingredient gluten-free peanut butter cookies?
The main ingredients are peanut butter, a sweetener (such as granulated sugar, brown sugar, honey, or maple syrup), and an egg.
Are these peanut butter cookies gluten-free?
Yes, these cookies are naturally gluten-free as they do not contain any flour, relying solely on peanut butter for their base.
What type of peanut butter is recommended for the recipe?
It is recommended to use natural peanut butter without added sugars or hydrogenated oils. Creamy peanut butter is preferred for a smooth texture, but crunchy peanut butter can also be used for added texture.
How do you store leftover cookies?
Leftover cookies should be stored in an airtight container at room temperature. To maintain their softness, it is helpful to place a piece of bread in the container with them.
Can the cookies be frozen for later use?
Yes, the cookies can be frozen after they have cooled completely. They should be placed in a single layer on a baking sheet and frozen for about an hour before transferring to a freezer-safe bag or container.
What can be done if the cookie dough is too sticky?
If the dough is too sticky, a little extra peanut butter can help. Alternatively, adding a small amount of sugar or almond flour can absorb some of the stickiness.
How long do these cookies typically last?
The cookies typically last up to a week when stored properly in an airtight container at room temperature.
What are some variations to try with the cookies?
Some variations include adding chocolate chips, swapping out peanut butter for other nut butters, or enhancing the flavor with vanilla extract or cinnamon.
Are these cookies kid-friendly?
Yes, these cookies are kid-friendly! They are easy to make and shape, making them a fun baking activity for children.
How can you make the cookies vegan?
The cookies can be made vegan by replacing the egg with a flax egg, which is made by mixing one tablespoon of ground flaxseed with three tablespoons of water and letting it sit until it thickens.
“`