
Rye sourdough bread is a delightful twist on traditional bread-making, bringing unique flavors and health benefits to the table. This guide will help you explore the wonders of creating your own rye sourdough at home. Read Interesting article: Easy No-Fail Sourdough Bread For Absolute Beginners
What is Rye Sourdough Bread?
Definition and Characteristics
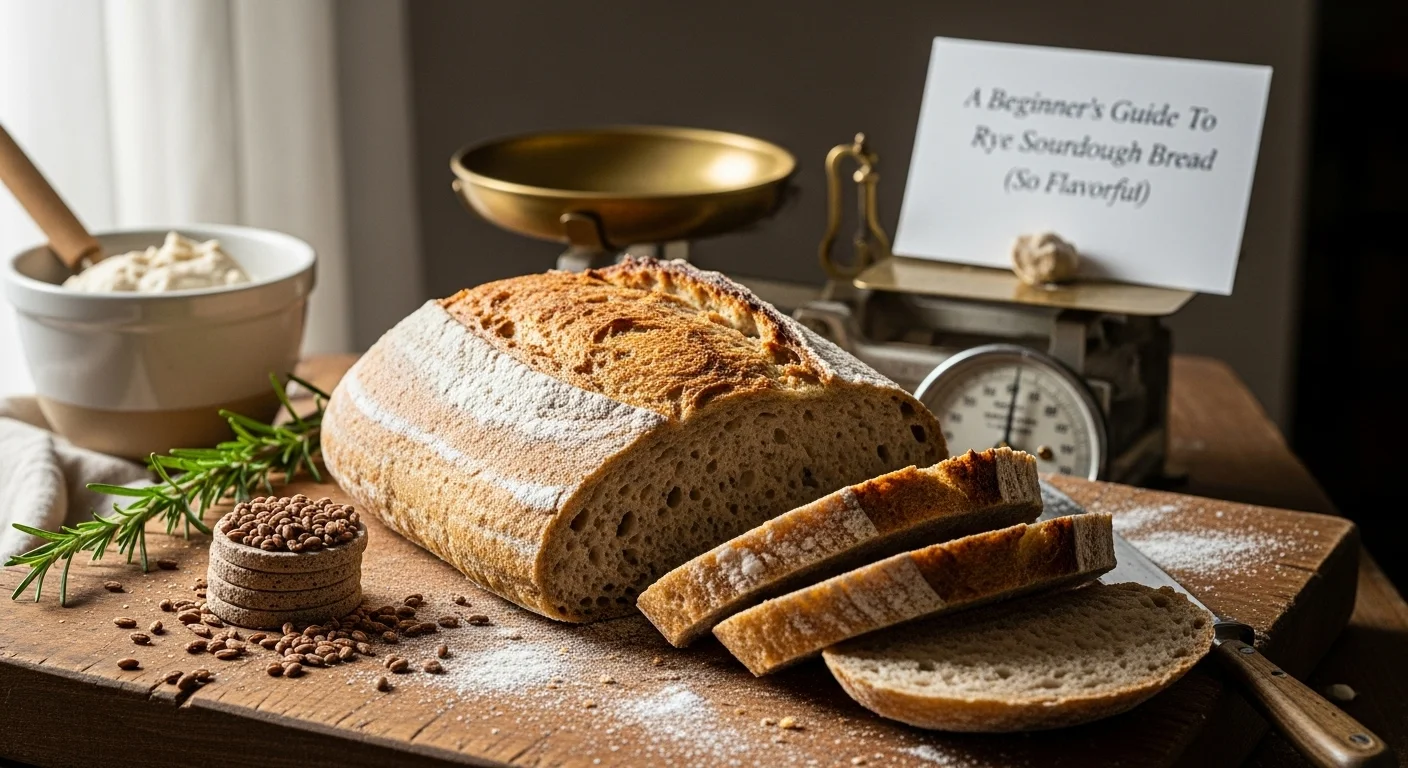
Rye sourdough bread is made using rye flour and a sourdough starter, which gives it a distinct tangy flavor. I remember the first time I made rye sourdough; I was surprised at how different it felt compared to the wheat bread I was used to. The dough is usually denser and has a darker color from the rye flour, which can range from light to dark, depending on the type used. The bread itself tends to have a more robust structure, thanks to the gluten content in rye being lower than in wheat. This results in a unique crumb that’s chewy yet satisfying.
One of the fascinating characteristics of rye sourdough is its ability to retain moisture. I’ve noticed that it stays fresh longer compared to white bread, which means I can enjoy a slice days after baking it. Plus, the crust tends to be thicker and crunchier, adding to the overall experience. If you’ve ever had a freshly baked loaf, you know the aroma alone can make your mouth water!
Flavor Profile and Texture
The flavor of rye sourdough is truly something special. It has a nutty, earthy quality that’s hard to beat. I’ve found that this bread pairs beautifully with various toppings, from creamy butter to sweet jams. The tangy notes from the fermentation process bring depth that you simply won’t find in standard bread.
When it comes to texture, the crumb of rye sourdough is denser and more compact than that of wheat bread. This dense structure means that each bite feels hearty and satisfying. I remember the first time I sliced into a freshly baked loaf; the crust crackled beautifully, and the interior was soft yet firm. It’s the kind of bread that fills you up and keeps you satisfied long after your meal.
Health Benefits of Rye Sourdough
Nutritional Advantages
One of the reasons I love rye sourdough so much is the health benefits that come with it. Rye is packed with nutrients, including fiber, vitamins, and minerals. I’ve read that rye bread can help with weight management because the fiber keeps you full for longer. This has been true in my experience; I often find that a single slice with some toppings is enough to stave off hunger.
Rye sourdough is also known for its lower glycemic index compared to other breads. For those of us watching our blood sugar levels, this is a significant advantage. I appreciate knowing that I can enjoy a slice of bread without the steep blood sugar spikes that often come from white bread. Plus, it provides essential nutrients like magnesium, phosphorus, and B vitamins, which are crucial for overall health.
Digestive Health Benefits
One of the standout benefits of rye sourdough is its positive impact on digestive health. The fermentation process that occurs when making sourdough helps break down gluten and phytic acid, making the nutrients in rye more accessible. I’ve noticed that my digestion feels smoother when I incorporate rye sourdough into my diet.
Moreover, the high fiber content in rye can aid in maintaining a healthy gut. It promotes regularity and helps prevent constipation, which is something I always appreciate after indulging in richer meals. If you’re looking for a way to improve your gut health, adding rye sourdough to your routine might be a delicious way to do it.
Ingredients for Rye Sourdough Bread
Rye Flour vs. Wheat Flour
When it comes to making rye sourdough, the type of flour you use is essential. I’ve tried various blends, and I can confidently say that rye flour makes a noticeable difference. Rye flour has a unique composition; it contains more soluble fiber and fewer gluten proteins compared to wheat flour. This means it’s not only healthier but also contributes to that signature flavor and texture.
While I’ve occasionally mixed rye flour with wheat flour for a lighter loaf, I find that 100% rye gives the best flavor. It’s a wonderful way to experience the true essence of rye bread. I recommend experimenting with different proportions to find what suits your taste best.
Importance of Sourdough Starter
The sourdough starter is the heart of any sourdough bread, and rye is no exception. I remember the first time I nurtured a starter; it felt like I was caring for a pet! This mixture of flour and water ferments over time, allowing wild yeast and bacteria to thrive. The starter not only helps the dough rise but also imparts that desired tangy flavor. For more information on maintaining your starter, check out The Ultimate Sourdough Starter Feeding Guide (With Schedule).
For my rye sourdough, I typically use a rye starter, which enhances the overall taste. If you’re new to sourdough, starting a rye starter is a fun project. I found that it took about a week of daily feeding before it was ready to use, but the satisfaction of baking my first loaf with it was worth every moment.
Additional Ingredients (Water, Salt, etc.)
Beyond flour and starter, the remaining ingredients are pretty simple. Water is crucial, as it hydrates the dough and activates the starter. I usually use filtered water since I’ve found that it helps the fermentation process. Salt is another key ingredient; it not only enhances flavor but also strengthens the dough structure. I always make sure to use good quality sea salt for the best results.
Some bakers also like to experiment with additional ingredients, such as seeds or herbs, which can add extra flavor and texture. I’ve enjoyed adding caraway seeds for a traditional touch, which complements the rye perfectly. Each time I bake, it feels like a new adventure with endless possibilities!
Tools and Equipment Needed
Baking Tools (Mixing Bowls, Bench Scraper, etc.)
When it comes to baking rye sourdough bread, having the right tools can make all the difference. I’ve learned through my own baking adventures that a good mixing bowl is essential. I prefer using a large glass or stainless-steel bowl because they’re easy to clean and let me see the dough as it rises. A sturdy bench scraper is another tool I can’t live without; it helps me handle the sticky rye dough without much fuss. Trust me, trying to get dough off your hands can be a real challenge, and that scraper makes it a breeze!
Another handy tool is a digital kitchen scale. I know measuring ingredients by weight can feel a bit daunting at first, but it’s so much more accurate than using cups. Rye flour behaves differently than wheat flour, so precise measurements can really impact the outcome. I found that my loaves became more consistent once I started weighing my ingredients. Plus, a scale is great for portioning dough when you’re shaping your loaves.
Lastly, I recommend investing in a good dough thermometer. This little gadget might seem like an unnecessary expense, but it helps me monitor the dough temperature during fermentation. Rye bread often needs a slightly cooler environment than wheat bread, and knowing the temperature can help me adjust my methods accordingly. It’s all about getting to know your dough!
Oven and Baking Stone or Dutch Oven
The oven is where the magic happens, and I’ve found that how you bake your rye sourdough can greatly affect its crust and overall texture. Using a baking stone is something I absolutely advocate for. It retains heat and helps achieve that crispy crust we all crave. I heat mine up for at least 30 minutes before baking, which really enhances the oven spring—the initial rise of the bread when it first goes into the hot oven.
If you don’t have a baking stone, a Dutch oven is another fantastic option. It creates a steamy environment that mimics professional bread ovens. I remember the first time I baked a loaf in my Dutch oven; it was like watching a transformation. The steam trapped inside helps the bread rise more during baking, and the result is a beautifully crusty exterior with a soft, moist interior. Whether you choose a stone or a Dutch oven, just make sure to preheat it well to achieve the best results.
Step-by-Step Guide to Making Rye Sourdough Bread
Preparing the Sourdough Starter
Getting the sourdough starter ready is one of the most exciting parts of the process for me. I usually start by feeding my rye starter with equal parts of rye flour and water. It’s like giving it a boost! After letting it sit for a few hours, I check for bubbles, which means it’s active and ready to use. Sometimes I even do a “float test” by dropping a spoonful of starter into a glass of water; if it floats, it’s good to go. I remember the thrill of seeing my first starter bubble up, and each new batch still brings me joy.
Mixing the Dough
Once the starter is ready, it’s time to mix the dough. I combine the starter with water in my mixing bowl and give it a good stir. Then, I gradually add in the rye flour and salt. I’ve found that mixing with my hands works best because it allows me to feel the dough’s texture. As I knead, I can tell if it needs more water or flour. Rye dough is typically stickier than wheat dough, so I embrace that stickiness instead of being intimidated by it!
First Rise (Bulk Fermentation)
After mixing, I cover the bowl with a damp cloth and set it in a warm spot. This is the bulk fermentation stage, and I love watching the dough rise. I usually let it sit for about 4 to 6 hours, depending on the temperature of my kitchen. I often give the dough a gentle stretch and fold every hour to help develop strength. It’s fascinating to see how the dough changes during this time—it becomes smoother and more elastic.
Shaping the Dough
Once the bulk fermentation is complete, it’s time to shape the dough. I lightly flour my work surface and carefully turn the dough out. I find that being gentle here is key; I want to keep as much air in the dough as possible. After shaping it into a round or a loaf, I let it rest for a few minutes before the final shaping. It’s such a rewarding moment to see the dough take form, and I can already imagine the delicious bread to come!
Second Rise (Proofing)
Now, I place the shaped dough into a proofing basket lined with a floured cloth. The second rise, or proofing, usually lasts about 1 to 2 hours. This is when the dough expands further, and I keep an eye on it to ensure it’s not over-proofing. I’ve learned to gently poke the dough; if it springs back slowly, it’s perfect for baking. The anticipation builds as I wait, knowing that each moment brings me closer to that first slice.
Baking the Bread
When it’s finally time to bake, I preheat my oven to a high temperature, usually around 450°F. If I’m using a Dutch oven, I place it inside to heat up as well. I carefully turn the proofed dough onto a parchment paper and score the top with a sharp blade. This beautiful cut allows the bread to expand properly in the oven. I then transfer the dough into the hot Dutch oven, cover it, and let it bake for about 30 minutes. The aroma that fills my kitchen during this time is pure bliss! After removing the lid, I bake it for another 15-20 minutes until it’s a lovely golden brown. The moment I take it out, I can hardly wait to let it cool before slicing into that crusty exterior.
Common Challenges and Solutions
Dealing with Dense Bread
One of the most common issues I’ve faced while baking rye sourdough bread is ending up with a loaf that’s denser than I’d like. I remember the first time I pulled out a beautifully shaped loaf only to find it was more like a brick than a fluffy bread! After some research and experimentation, I discovered a few key factors that can help avoid this. First, ensuring that my sourdough starter is active and bubbly before mixing it into the dough is crucial. If it’s not sufficiently fermented, the bread won’t rise properly.
Another tip I’ve found helpful is adjusting the hydration of the dough. Rye flour absorbs more water than wheat flour, so for me, adding a bit more water can help create a lighter loaf. I’ve also learned to be mindful of my mixing and kneading technique; overworking the dough can lead to excessive density. Instead, I focus on gentle kneads and stretches. If you find yourself with a dense loaf, don’t be discouraged—it’s a great opportunity to tweak your method and try again!
Addressing Under or Over Fermentation
Fermentation can be a bit of a balancing act, and I’ve had my fair share of under and over-fermented doughs. When I first started baking rye sourdough, I often struggled to tell when the dough was perfectly ready. Under-fermented dough tends to rise less, resulting in a heavy, compact loaf, while over-fermented dough can become overly slack and difficult to shape.
To avoid these pitfalls, I learned to trust my instincts and observe the dough closely. A great rule of thumb is to look for signs like volume increase and the texture of the dough. I also pay attention to the temperature of my kitchen, as warmer conditions will speed up fermentation, while cooler temps will slow it down. Keeping a consistent environment can help maintain better control over the fermentation process. I also found it helpful to set a timer and check the dough regularly during the bulk fermentation stage—I can usually tell it’s ready when it has doubled in size and feels airy to the touch.
Crust and Crumb Issues
Achieving the perfect crust and crumb has been one of my favorite challenges when baking rye sourdough. I’ve experienced everything from crusts that are too hard to those that come out soft and pale. After a bit of trial and error, I learned that steam plays a vital role in achieving that ideal crust. Whether I’m using a Dutch oven or a baking stone, creating steam in the oven during the first part of baking is essential. I often add a pan of hot water to the bottom of my oven or use the lid of my Dutch oven to trap steam for the first half of the bake.
As for the crumb, the secret lies in knowing how to handle the dough when shaping it. Too much pressure while shaping can deflate the air bubbles that have formed during fermentation, leading to a denser crumb. I try to handle the dough gently to keep those bubbles intact. If I’m looking for a more open crumb structure, I also experiment with longer fermentation times and slight increases in hydration. It’s all about patience and practice, and I’ve enjoyed the journey of fine-tuning my rye sourdough baking skills!
Tips for Storing Rye Sourdough Bread
Best Practices for Freshness
Once I’ve baked a delicious loaf of rye sourdough, I want to keep it fresh for as long as possible. I’ve learned that the way I store it can significantly impact its shelf life. One of the best practices I follow is to let the bread cool completely on a wire rack before wrapping it. I find that if I wrap it too soon, the moisture can build up and lead to a soggy crust, which is a definite no-go for me!
After cooling, I usually wrap my bread in a clean kitchen towel or place it in a paper bag. This allows the bread to breathe while still keeping it protected. I’ve noticed that storing it this way keeps the crust nice and crispy for several days. If I need to keep it longer, I’ll slice the loaf and store it in an airtight container or a plastic bag. Just remember, the crust will soften over time, but the flavor remains wonderfully intact.
Freezing and Thawing Techniques
For longer storage, freezing my rye sourdough has been a game changer. I’ve found that freezing slices is particularly effective. After cooling the bread, I slice it into portions and wrap each slice tightly in plastic wrap. Then, I place all the wrapped slices in a freezer bag, squeezing out as much air as possible before sealing it. This way, I can easily grab a slice whenever I’m craving that delicious rye flavor!
When I’m ready to enjoy a slice, I take it out of the freezer and let it thaw at room temperature. If I want to revive that crusty exterior, I pop it in the oven for a few minutes at 350°F. The steam from the oven helps bring back that amazing crust, making it taste freshly baked again. It’s a simple trick that never fails to impress, and it feels great to have homemade bread on hand whenever I want it!
Frequently Asked Questions
What is rye sourdough bread?
Rye sourdough bread is made using rye flour and a sourdough starter, giving it a distinct tangy flavor. It is denser, darker, and has a more robust structure compared to wheat bread.
What are the health benefits of rye sourdough?
Rye sourdough bread is rich in fiber, vitamins, and minerals, which can aid in weight management and provide a lower glycemic index compared to other breads. It also promotes digestive health by breaking down gluten and phytic acid, making nutrients more accessible.
How does rye flour differ from wheat flour?
Rye flour contains more soluble fiber and fewer gluten proteins compared to wheat flour, making it healthier and contributing to its unique flavor and texture. It is also stickier and requires more water during the baking process.
What is the importance of a sourdough starter?
The sourdough starter is essential for rye sourdough bread as it ferments over time, allowing wild yeast and bacteria to thrive, which helps the dough rise and imparts the desired tangy flavor.
What tools and equipment are needed for baking rye sourdough?
Essential tools include a mixing bowl, bench scraper, digital kitchen scale, dough thermometer, and either a baking stone or a Dutch oven for baking. These tools help with measuring ingredients accurately and achieving the desired crust and texture.
What is the process for preparing the sourdough starter?
To prepare the sourdough starter, equal parts of rye flour and water are mixed and allowed to ferment. Bubbles indicate that the starter is active and ready to use, and a “float test” can confirm its readiness.
How do you address dense bread when baking rye sourdough?
To avoid dense bread, ensure the sourdough starter is active, adjust the hydration of the dough by adding more water, and handle the dough gently during mixing and kneading to preserve air bubbles.
What are common challenges when fermenting rye sourdough dough?
Common challenges include under or over-fermentation, which can result in a heavy loaf or overly slack dough. Observing the dough’s volume increase and texture, as well as maintaining a consistent temperature, can help manage fermentation effectively.
How should rye sourdough bread be stored for freshness?
To keep rye sourdough fresh, let it cool completely on a wire rack before wrapping it in a kitchen towel or placing it in a paper bag. For longer storage, slice the bread and freeze it in airtight containers or freezer bags.
What techniques can be used for freezing and thawing rye sourdough bread?
For freezing, slice the bread and wrap each slice tightly in plastic wrap before placing them in a freezer bag. To thaw, let the slice come to room temperature, and if desired, warm it in the oven to revive the crust.