
Boston Cream Pie is a dessert that never fails to impress, especially when it’s gluten-free! With layers of rich pastry cream and chocolate ganache, it’s a treat that combines elegance and indulgence. Read Interesting article: This Quick Pesto Rice Is the Only Trend I Trust Now
What is Boston Cream Pie?
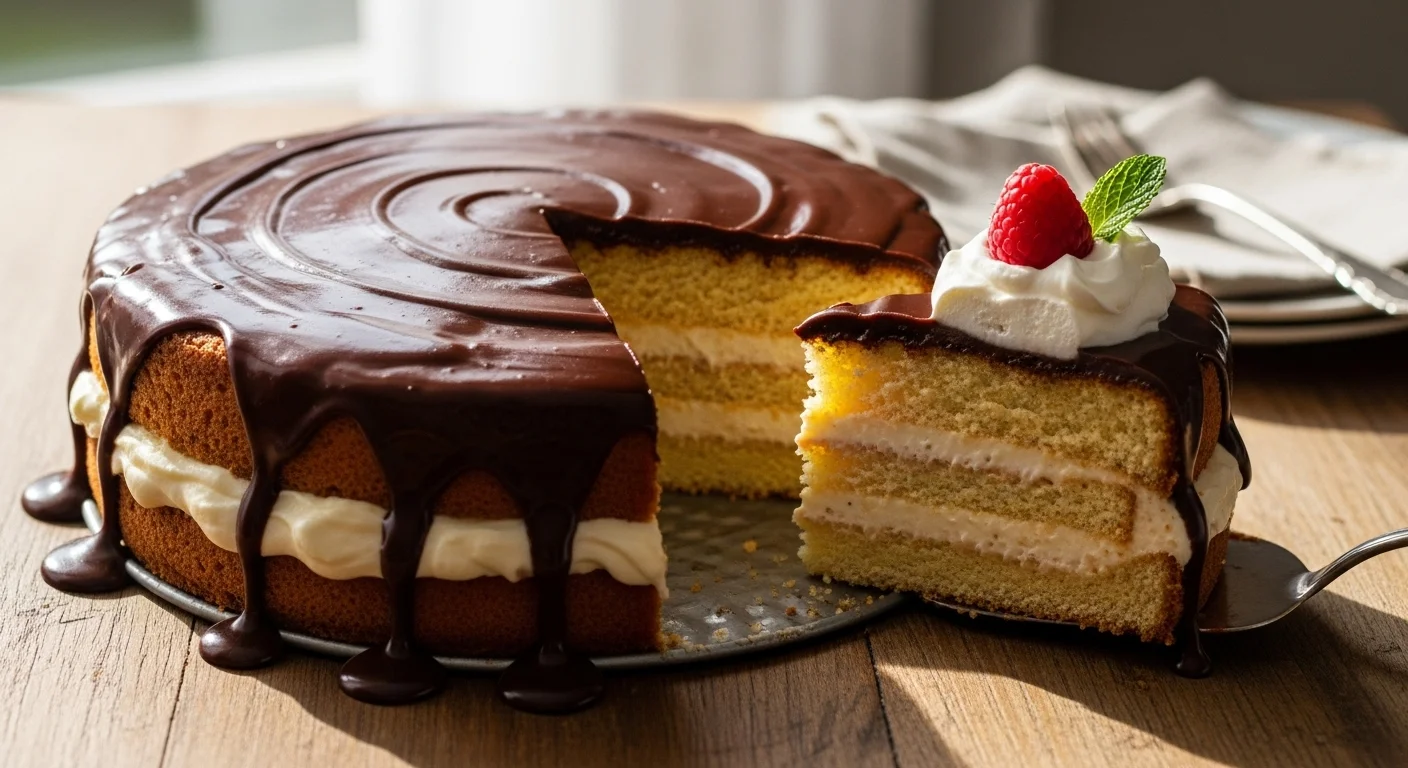
Boston Cream Pie is often mistaken for a pie due to its name, but it’s actually a delicious cake. It features a tender sponge cake filled with a creamy vanilla pastry cream and topped with a glossy chocolate ganache. This dessert is beloved for its delightful combination of flavors and textures. When I first tasted it, I was struck by how the smooth cream contrasted with the soft cake and the rich chocolate. It’s a classic treat that holds a special place in the hearts of many, including myself.
History and Origin of Boston Cream Pie
The origins of Boston Cream Pie date back to the 19th century. It was created by Chef M. A. F. Carpentier at the Parker House Hotel in Boston around 1856. The dessert became a local favorite and eventually gained national recognition. I love how food has stories, and Boston Cream Pie’s history adds to its charm. It was designated as the official dessert of Massachusetts in 1996, solidifying its status as a classic American treat.
Difference Between Cake and Pie
Even with “pie” in its name, Boston Cream Pie is indeed a cake. The confusion comes from the way it’s assembled and served, resembling a pie. Traditionally, pies feature a crust that holds fillings, while cakes are typically made with a batter baked in round pans. I’ve found that the best way to describe Boston Cream Pie is as a layered cake that mimics the experience of enjoying a pie. This unique combination of cake and cream gives it a special place in my dessert lineup.
Key Ingredients for Classic Gluten-Free Boston Cream Pie
Making a gluten-free version of Boston Cream Pie is both exciting and rewarding. The key to achieving that classic flavor lies in selecting the right ingredients. I remember my first attempt; I was worried about how the gluten-free base would turn out, but I was pleasantly surprised!
Gluten-Free Cake Base
The cake base is the foundation of our Boston Cream Pie. For a gluten-free option, I recommend using a blend of gluten-free flours. My favorite combination includes almond flour, coconut flour, and a gluten-free all-purpose flour. This mix helps create a moist and tender cake that doesn’t crumble easily. When I bake with gluten-free flours, I often add a bit of xanthan gum to help with texture. The result is a cake that’s soft and delicious, perfect for holding the layers of cream and ganache. Read Interesting article: Italian Dream: Easy & Authentic Tiramisu (5 Steps to Perfection!)
Vanilla Pastry Cream Filling
No Boston Cream Pie is complete without its signature vanilla pastry cream! Making the filling from scratch is an experience I cherish. The creamy texture and rich vanilla flavor are unbeatable. I usually start by heating milk with vanilla beans or extract, then whisking it with egg yolks, sugar, and cornstarch until it thickens. It’s a simple process, but the aroma that fills the kitchen is incredible! Once it cools, the pastry cream becomes the perfect filling for our gluten-free cake.
Chocolate Ganache Topping
The final touch to our Boston Cream Pie is the chocolate ganache. It’s a straightforward mixture of chocolate and heavy cream, but the balance is key. I’ve experimented with different types of chocolate, and I’ve found that a semi-sweet or dark chocolate gives the best flavor. When I pour the warm ganache over the cake, I can’t help but feel a sense of excitement. The shiny, rich topping transforms the dessert into something truly special.
In my experience, the combination of these ingredients is what makes Boston Cream Pie an impressive dessert. Each layer complements the others, creating a delightful experience from the first bite to the last. Whether you’re making it for a special occasion or just to treat yourself, I believe this gluten-free version will impress anyone lucky enough to taste it! Read Interesting article: Effortless Labor Day Eats for a Perfect Holiday
Step-by-Step Recipe for Classic Gluten-Free Boston Cream Pie
Now that we’ve covered the key ingredients, let’s dive into the step-by-step process of making this delightful dessert. I remember when I first attempted to make my Boston Cream Pie; it felt daunting, but breaking it down into manageable steps made it a fun experience. Here’s how I do it!
Preparation of the Gluten-Free Cake
To start, preheat your oven to 350°F (175°C). I find that getting the oven ready ahead of time helps the cake bake evenly. Grease and flour (with gluten-free flour) two 9-inch round cake pans. This is crucial because no one wants their cake to stick! In a large mixing bowl, combine your gluten-free flour blend, baking powder, and salt. I like to whisk these dry ingredients together first to ensure they’re evenly mixed.
In another bowl, cream together your softened butter and sugar until it’s light and fluffy. I usually do this for about 3-5 minutes, and the smell is heavenly! Then, add in the eggs, one at a time, making sure to mix well after each addition. Don’t forget to scrape down the sides of the bowl; it’s a step that makes a difference. Next, mix in the vanilla extract.
Now, alternately add the dry ingredients and milk into the butter mixture, starting and ending with the dry ingredients. I like to mix just until combined to avoid overmixing, which can make the cake dense. Once the batter is ready, pour it evenly into the prepared pans and bake for about 25-30 minutes. I always check for doneness with a toothpick; if it comes out clean, the cakes are done. Let them cool in the pans for a few minutes before transferring them to a wire rack to cool completely.
Making the Vanilla Pastry Cream
While the cake cools, I turn my attention to the vanilla pastry cream. In a medium saucepan, I heat the milk and stir in the vanilla. I’ve learned that using vanilla beans adds a depth of flavor that’s unmatched, but pure vanilla extract works well too. Just bring it to a gentle simmer, but be careful not to boil it! In a separate bowl, whisk together the egg yolks, sugar, and cornstarch until smooth.
Once the milk is steaming, I slowly pour it into the egg mixture while whisking continuously. This step is vital to avoid scrambling the eggs. After that, I return the mixture to the saucepan over medium heat, whisking constantly until it thickens. It usually takes about 5-7 minutes. Once it reaches the right consistency, I remove it from the heat and stir in the butter until it melts smoothly into the cream. I then transfer the pastry cream to a bowl, cover it with plastic wrap (making sure it touches the surface to prevent a skin from forming), and let it cool in the fridge.
Creating the Chocolate Ganache
Next up is the chocolate ganache, which I find to be the easiest part of the whole process! In a small saucepan, I heat the heavy cream just until it starts to simmer. Then, I pour it over a bowl of chopped chocolate. I typically use semi-sweet or dark chocolate, depending on my mood, and let it sit for a couple of minutes. This waiting period allows the chocolate to melt perfectly.
After a few minutes, I gently stir the mixture until it’s glossy and smooth. I’ve learned that the secret to a great ganache is patience—rushing it can lead to a grainy texture. Once it’s ready, I let it cool slightly before using it to top the cake.
Assembling the Pie
Now comes the fun part: assembling the Boston Cream Pie! I like to place the first layer of cake on a serving plate. Then, I spread a generous layer of the chilled vanilla pastry cream over the top. I usually take my time here, making sure it’s evenly distributed. Next, I carefully place the second layer of cake on top. The anticipation is thrilling at this point! Finally, I pour the warm chocolate ganache over the top, allowing it to drip down the sides for that beautiful presentation.
For an additional touch, I like to sprinkle some shaved chocolate or chocolate curls on top. It not only enhances the look but adds an extra bit of chocolatey goodness. Now, I let it chill in the refrigerator for a bit to set everything nicely. The waiting can be the hardest part, but trust me, it’s worth it when you serve it up!
Tips for Perfecting Your Boston Cream Pie
Creating the perfect Boston Cream Pie can feel like an art form, especially when you add the gluten-free twist. Over the years, I’ve learned a few tips that have helped me achieve that ideal combination of flavors and textures. Here are some of my best recommendations that I think will elevate your baking experience.
Choosing the Right Gluten-Free Flour Blend
The choice of gluten-free flour can make or break your cake. I’ve experimented with various blends, and I feel that a mix of almond flour, coconut flour, and a high-quality gluten-free all-purpose flour yields the best texture and taste. It’s essential to pick a blend that includes xanthan gum, as it helps bind the ingredients together, giving your cake a nice rise and preventing it from becoming too crumbly. If you’re unsure, many brands offer ready-to-use gluten-free flour blends that already include these important components. Just remember, each flour behaves differently, so you might have to adjust your recipe slightly depending on what you choose!
Common Mistakes to Avoid
During my baking adventures, I’ve made my fair share of mistakes, and I’ve seen others make them too. Here are some pitfalls to avoid for a flawless Boston Cream Pie:
- Overmixing the batter: When I first started baking, I thought mixing longer would yield a better cake. Instead, I learned that mixing just until combined keeps the cake light and fluffy. Overmixing can lead to a dense texture, which is not what we want.
- Skipping the cooling process: I know it’s tempting to rush through the cooling stage, especially when you’re excited to assemble your pie. However, letting the cake cool completely is crucial. If you try to assemble while it’s still warm, the pastry cream can melt, and the ganache may not set properly.
- Not measuring ingredients accurately: Baking is a science! I’ve learned the hard way that using too much or too little of an ingredient can drastically change the outcome. I recommend using a kitchen scale for accuracy, especially when working with gluten-free flours.
- Not letting the ganache cool: Pouring hot ganache over the cake can lead to a gooey mess instead of the beautiful, shiny finish we’re aiming for. Letting it cool slightly ensures it will set perfectly on top of your pie.
Serving Suggestions and Pairings
Now that you’ve created this stunning dessert, it’s time to think about how to serve it. I always enjoy thinking about the overall experience when I share food with others. Here are a few suggestions that have made my Boston Cream Pie even more enjoyable.
Best Beverages to Serve with Boston Cream Pie
Pairing the right drink with your Boston Cream Pie can enhance the flavors and create a more delightful experience. Here are a few of my favorite options:
- Coffee or Espresso: For me, there’s nothing quite like a warm cup of coffee or a shot of espresso alongside a slice of Boston Cream Pie. The rich, bold flavors of coffee complement the dessert beautifully.
- Milk: Classic, right? A tall glass of cold milk brings me back to my childhood, and it pairs perfectly with the sweetness of the pie.
- Sweet Dessert Wines: If you’re in the mood for something a bit fancier, I recommend serving a sweet dessert wine, like a late harvest Riesling or a Moscato. The fruity notes enhance the flavors of the chocolate and cream.
Decorative Serving Ideas
Presentation is key when serving any dessert, and I love to get creative with how I serve my Boston Cream Pie. Here are some ideas that have added a special touch:
- Garnishing with Fresh Berries: I often add a few fresh strawberries or raspberries on the side. Their vibrant colors and tartness contrast beautifully with the richness of the pie.
- Chocolate Curls or Shavings: A sprinkle of chocolate curls or shavings on top not only makes it look more appealing but also adds an extra layer of chocolate flavor!
- Mint Leaves: A couple of fresh mint leaves can brighten up the plate and provide a refreshing aroma when you dig in.
These simple touches can make your dessert not just a treat for the taste buds but a feast for the eyes as well. I always find that when I put in a little extra effort in presentation, it makes the moment feel even more special.
Storage and Shelf Life
Once you’ve crafted your delicious gluten-free Boston Cream Pie, you might wonder how to keep that delectable dessert fresh. Knowing the right way to store it ensures that you can enjoy it over a few days, which is always a bonus! I remember the first time I made this pie; I was so excited to share it with friends, but I also wanted to savor some for myself later!
How to Store Leftover Boston Cream Pie
To store leftover Boston Cream Pie, I recommend placing it in the refrigerator, especially since it contains perishable ingredients like cream and eggs. I usually slice the pie and place it in an airtight container. If I don’t have a container big enough, I cover the pie with plastic wrap, ensuring it’s sealed tightly. This helps keep it fresh and prevents it from absorbing other odors in the fridge. In my experience, it can last for about 3-4 days in the refrigerator, but believe me, it rarely lasts that long!
Freezing Tips for Long-Term Storage
If you want to keep your Boston Cream Pie for a longer period, freezing is a great option! I’ve learned that the best way to freeze it is to let the pie chill completely in the refrigerator first. Once it’s chilled, I cut it into slices for easy serving later. I wrap each slice individually in plastic wrap and then place them in a freezer-safe bag or container. This prevents freezer burn and preserves that lovely creaminess. When I’m ready to indulge again, I simply let the slices thaw in the refrigerator overnight. It’s like having a little surprise waiting for me!
Variations and Dietary Adaptations
One of the things I love about Boston Cream Pie is its versatility. Over the years, I’ve played around with different flavors and dietary needs, and I think there’s something for everyone. If you’re looking to switch things up, here are some adaptations I’ve tried!
Vegan Boston Cream Pie Options
For my friends who follow a vegan diet, I’ve experimented with vegan Boston Cream Pie recipes that are just as delicious. Instead of eggs and dairy, I use coconut milk or almond milk for the pastry cream and replace eggs with a flaxseed mixture or aquafaba. The result is a delightful, creamy filling that everyone can enjoy. I remember the first time I served this version; my vegan friends were thrilled and couldn’t believe how good it tasted!
Other Flavor Variations
If you’re feeling adventurous, you can also play with different flavors. I’ve made a mocha version by adding espresso powder to the pastry cream and using dark chocolate for the ganache. Another favorite of mine is to infuse the pastry cream with citrus zest, like lemon or orange, for a bright, refreshing twist. These variations keep things exciting and allow us to enjoy Boston Cream Pie in new and delicious ways!
Frequently Asked Questions (FAQs)
Can I make this recipe ahead of time?
Absolutely! One of the best things about Boston Cream Pie is that it can be made a day in advance. I often prepare the cake and pastry cream the night before, allowing the flavors to meld beautifully. Just be sure to keep it in the refrigerator until you’re ready to serve.
Is Boston Cream Pie gluten-free without modifications?
Traditional Boston Cream Pie is not gluten-free, as it uses regular flour. However, when making your own, simply swap in a gluten-free flour blend, and you’re good to go! I’ve found that with the right gluten-free flour, you won’t even miss the gluten!
What are some common allergens in Boston Cream Pie?
Boston Cream Pie typically contains eggs, dairy, and gluten, which are common allergens. If you’re baking for someone with allergies, consider using egg substitutes, dairy-free milk, and gluten-free flour to create a safe and delicious alternative.
Final Thoughts
Making a gluten-free Boston Cream Pie is not just about creating a dessert; it’s about crafting memories, sharing joy, and experiencing the delight that comes with each layer of cake, cream, and chocolate. I’ve truly enjoyed the journey of perfecting this recipe, and I believe that anyone can create their own masterpiece with a bit of patience and love. Whether you’re baking for a special occasion or simply treating yourself, I hope you find as much joy in this dessert as I have. Happy baking!
Frequently Asked Questions
“`htmlWhat is Boston Cream Pie?
Boston Cream Pie is a dessert that is often mistaken for a pie due to its name, but it’s actually a delicious cake. It features a tender sponge cake filled with a creamy vanilla pastry cream and topped with a glossy chocolate ganache.
Who created Boston Cream Pie?
Boston Cream Pie was created by Chef M. A. F. Carpentier at the Parker House Hotel in Boston around 1856. It became a local favorite and gained national recognition, eventually being designated as the official dessert of Massachusetts in 1996.
What are the key ingredients for a gluten-free Boston Cream Pie?
The key ingredients for a gluten-free Boston Cream Pie include a blend of gluten-free flours (such as almond flour, coconut flour, and gluten-free all-purpose flour), vanilla pastry cream, and chocolate ganache.
How do you make the vanilla pastry cream filling?
To make the vanilla pastry cream filling, heat milk with vanilla, whisk together egg yolks, sugar, and cornstarch, then combine and cook until thickened. Stir in butter until smooth and let cool before using.
What type of chocolate is best for the ganache?
For the chocolate ganache, semi-sweet or dark chocolate is recommended as it provides the best flavor. The ganache is made by heating heavy cream and pouring it over chopped chocolate to let it melt before mixing until smooth.
How should Boston Cream Pie be stored?
Leftover Boston Cream Pie should be placed in the refrigerator, ideally in an airtight container or covered tightly with plastic wrap. It can last for about 3-4 days in the fridge.
Can Boston Cream Pie be frozen?
Yes, Boston Cream Pie can be frozen! It is best to chill it completely first, cut into slices, wrap each slice individually in plastic wrap, and then place them in a freezer-safe bag or container.
What are some common allergens in Boston Cream Pie?
Common allergens in Boston Cream Pie include eggs, dairy, and gluten. For those with allergies, substitutes like egg replacements, dairy-free milk, and gluten-free flour can be used to create a safe alternative.
What are some serving suggestions for Boston Cream Pie?
Serving suggestions for Boston Cream Pie include pairing it with coffee or espresso, milk, or sweet dessert wines. Additionally, garnishing with fresh berries, chocolate curls, or mint leaves can enhance the presentation.
Can Boston Cream Pie be made ahead of time?
Yes, Boston Cream Pie can be made a day in advance. It is best to prepare the cake and pastry cream the night before and keep it refrigerated until ready to serve.
“`