
Cranberry Walnut Sourdough Bread is not just a loaf; it’s a delightful addition to any holiday table. Imagine the warmth of fresh bread mingling with the tang of cranberries and the crunch of walnuts. Let’s dive into this culinary experience!
Overview of Cranberry Walnut Sourdough Bread
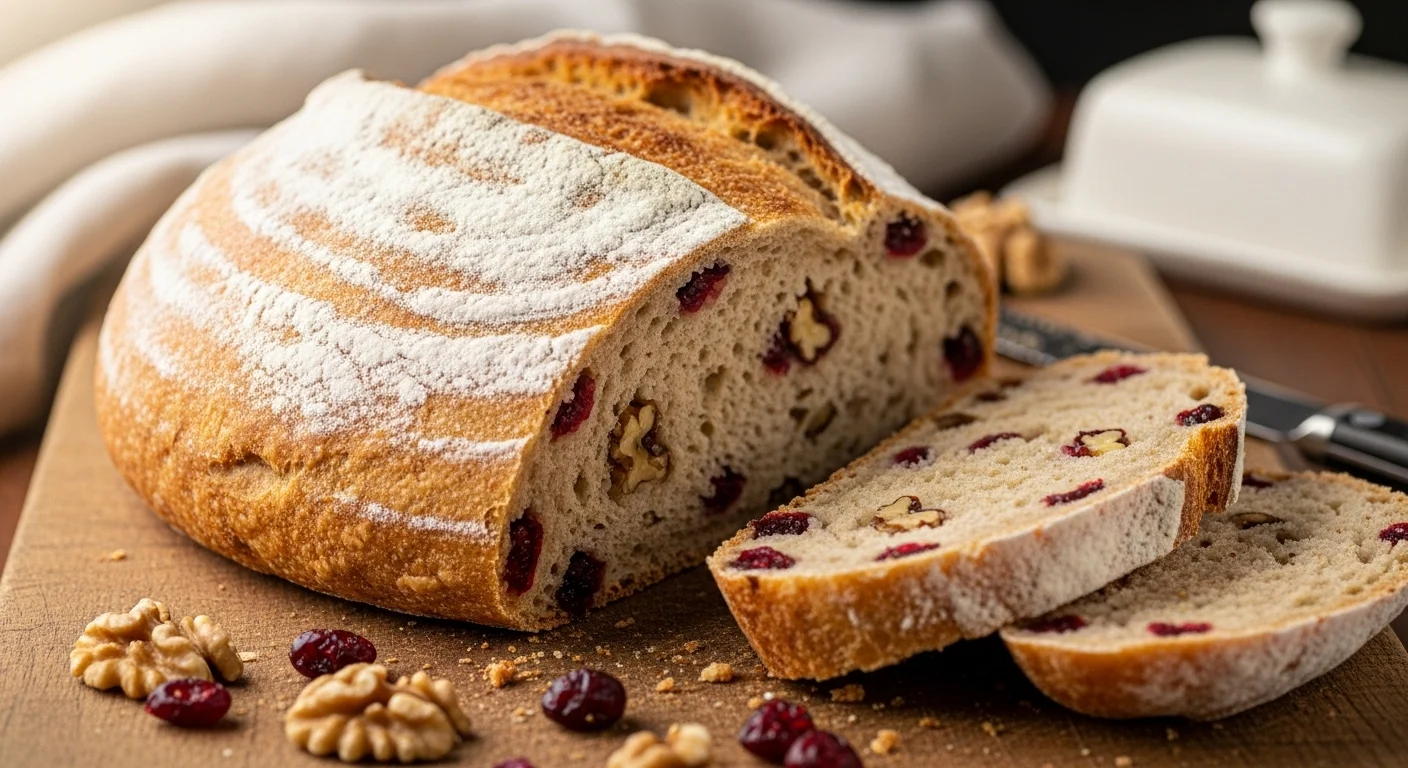
I’ve always been captivated by sourdough bread. It’s unique, complex, and has a character all its own. But what makes this Cranberry Walnut Sourdough Bread truly special is how it combines the tradition of sourdough with festive flavors. This bread isn’t just food; it’s an experience, especially during the holiday season. The combination of tangy cranberries and nutty walnuts creates a loaf that’s both beautiful and delicious. It’s perfect for toasting, spreading with butter, or even as part of a holiday charcuterie board.
What is Sourdough Bread?
Sourdough bread is made through a natural fermentation process, which involves a sourdough starter. This starter is a mix of flour and water that captures wild yeast and bacteria from the environment. I remember the first time I made my own starter; it felt like I was nurturing a living thing! The result is a loaf with a chewy texture and a slightly tangy flavor, a beautiful contrast to the sweetness of the cranberries and the richness of the walnuts. Unlike commercial yeasted bread, sourdough takes longer to rise, allowing the flavors to develop deeply.
Health Benefits of Cranberries and Walnuts
Beyond the delicious taste, cranberries and walnuts bring a host of health benefits to this bread. Cranberries are packed with antioxidants and vitamin C, and they can be great for heart health. I’ve read that they might even help with urinary tract infections! Walnuts, on the other hand, are rich in omega-3 fatty acids, making them a fantastic brain food. When I added these ingredients to my sourdough, I felt good knowing I was not just indulging but also nourishing my body. Their combination not only enhances the taste but also adds a nutritious twist to this holiday loaf.
Why Choose This Recipe for the Holidays?
When the holidays roll around, I always look for ways to make my gatherings special. This Cranberry Walnut Sourdough Bread is a standout choice. It’s visually stunning, with the bright red cranberries peeking through the golden crust. Every time I bake it, the aroma fills my kitchen, drawing my family in like moths to a flame. It’s a bread that sparks conversation and brings people together. I’ve served it at family dinners, and it’s always a hit, becoming a cherished part of our festive traditions. Plus, who doesn’t love the idea of making something from scratch? It’s a great way to impress your guests while also sharing a piece of my heart through cooking. Read Interesting article: The Best Ground Beef Casserole (Easy & Cheesy)
Key Ingredients
The beauty of this bread lies in its ingredients, each playing a crucial role in the final product. Let’s explore these key components that make this recipe shine.
Cranberries: Fresh vs. Dried
When it comes to cranberries, I’ve experimented with both fresh and dried varieties. Fresh cranberries lend a tart burst, while dried cranberries offer sweetness and chewy texture. For this recipe, I usually opt for dried cranberries since they blend seamlessly into the dough and don’t add excess moisture. However, if you can get your hands on some fresh ones during the holiday season, they can offer a delightful surprise. Just be sure to chop them if they are too large, as you want a good distribution throughout the bread.
Walnuts: Toasted vs. Untoasted
Walnuts can elevate your bread, and I highly recommend toasting them before adding them to the dough. Toasting brings out their rich, nutty flavor and adds an irresistible crunch. I remember the first time I forgot to toast them; the bread was still good, but the flavor was just not as vibrant. So, take that little extra step. Just a few minutes in a dry pan can make a world of difference!
Sourdough Starter: Homemade vs. Store-Bought
Now, the star of the show – the sourdough starter! I’ve found that using a homemade starter gives the best flavor and texture. It’s a little labor-intensive to create one from scratch, but I promise it’s worth it. If you’re short on time or new to sourdough, a good store-bought starter can work just fine. Just remember to feed it a few hours before you plan to use it for the best results. I often keep a backup store-bought starter on hand, just in case my homemade one needs a little extra TLC.
Flour Types: All-Purpose vs. Bread Flour
The type of flour you choose can drastically affect the outcome of your bread. I like to use bread flour for a higher protein content, which helps develop gluten and gives the bread that lovely chewy texture. All-purpose flour can work in a pinch, but I find that bread flour yields a better rise and structure, especially for sourdough. It’s all about the little things!
Additional Flavor Enhancements: Spices and Sweeteners
To enhance the flavors in my Cranberry Walnut Sourdough, I sometimes add hints of cinnamon or nutmeg. These spices bring out the cozy, warm notes that we all crave during the holidays. A touch of honey or maple syrup can also be a nice addition, balancing the tartness of the cranberries. I like to experiment with these flavors, and I encourage you to do the same. This bread is your canvas!
Step-by-Step Recipe Guide
Preparing the Sourdough Starter
Getting your sourdough starter ready is an essential first step. If you’re using a homemade starter like I often do, make sure it’s active and bubbly. I usually feed mine the night before I plan to bake, so it’s at its peak. If you’re using a store-bought starter, you’ll want to feed it a few hours ahead as well. To feed my starter, I mix equal parts flour and water, and then I let it sit at room temperature until it’s doubled in size. Watching it grow is one of the most satisfying parts of the process—it’s like seeing magic happen right in my kitchen!
Mixing the Dough
Once your starter is ready, it’s time to mix the dough. I start by measuring out my flour, water, and a bit of salt. I usually go with about 500 grams of bread flour, 350 grams of water, and 100 grams of my active sourdough starter. I like to mix everything in a large bowl using my hands, which really helps to incorporate all the ingredients. The dough will be sticky at first, but that’s perfectly normal. I remember feeling a little overwhelmed by how messy it was the first time, but I learned that this is part of the charm of sourdough baking. Don’t be afraid to get your hands dirty!
Incorporating Cranberries and Walnuts
After mixing my dough and letting it rest for about 30 minutes, I gently fold in the cranberries and toasted walnuts. I’ve found that sprinkling them over the dough and then folding the dough over itself helps distribute them evenly. It’s like folding in chocolate chips into cookie dough, but with a festive twist! The colors of the cranberries against the dough are just beautiful, and I can’t help but feel excited about how it will turn out. I usually add about one cup of cranberries and one cup of walnuts, but feel free to adjust these amounts based on your taste.
Fermentation Process: Bulk Fermentation and Shaping
Now comes the waiting game. I cover the bowl with a damp cloth and let the dough ferment for about 4 to 6 hours at room temperature. During this time, I like to give it a few folds every hour to help develop gluten. It’s fascinating to see how much the dough changes in that time—it becomes airy and puffy! After the bulk fermentation, I gently turn the dough out onto a floured surface and shape it into a round loaf. Shaping can be tricky, but I’ve found that using a bench scraper helps with handling the sticky dough.
Scoring and Baking the Loaf
Once my dough is shaped, I place it in a well-floured proofing basket for its final rise. I usually let it rest for another 2 to 3 hours. It’s during this time that I prepare my oven; I preheat it to a scorching 450°F, along with my Dutch oven. When I’m ready to bake, I gently flip the dough onto a piece of parchment paper and score the top with a sharp razor. This scoring is not just for aesthetics; it helps the bread expand while baking, creating that beautiful rise. I carefully transfer the loaf into the preheated Dutch oven, cover it, and bake it for 30 minutes. The aroma that fills my kitchen during this time is simply heavenly!
Cooling and Storing the Bread
After the initial 30 minutes, I remove the lid and bake for an additional 15 to 20 minutes until the crust is golden brown and crispy. Once it’s done baking, I transfer it to a wire rack to cool for at least an hour. I know it’s hard to resist the temptation to slice into it right away, but letting it cool helps develop the flavor and texture. When it comes to storing my bread, I find that a cloth bag keeps it fresh for longer. I’ve tried plastic bags, and they just make the crust soggy—no thanks! Enjoying a slice of this bread the next day, toasted with a bit of butter, is one of my favorite treats! Read Interesting article: Why Are My GF Waffles Bad? Make These Perfect Ones
Tips for Perfecting Your Sourdough
Common Mistakes to Avoid
As I’ve ventured into the world of sourdough baking, I’ve learned that it’s easy to make mistakes, especially when you’re just starting out. One common pitfall is not allowing the dough enough time to ferment. I remember one time I was so eager to bake that I rushed the process, and the result was a dense, flat loaf. Patience is key! It’s crucial to give your dough the time it needs to rise and develop flavor. Another mistake I’ve made is not measuring my ingredients accurately. I’ve found that using a kitchen scale consistently leads to better results. Flour can be tricky; a cup of flour can weigh differently depending on how you scoop it. Trust me, investing in a good scale is worth it! Lastly, I’ve learned the importance of maintaining the right temperature. Sourdough thrives in a warm environment, so if your kitchen is too cold, it can slow down fermentation. I often place my dough in a warm corner of my kitchen or even near the oven while it’s preheating. These little adjustments have made a world of difference in my baking results!
Adjusting Hydration for Different Flour Types
Hydration is another crucial aspect of sourdough that I’ve come to understand better over time. Different types of flour absorb water differently. When I switched from all-purpose flour to bread flour, I noticed that I needed to adjust the water content slightly. I typically start with a hydration level of around 70%, but if I’m using a higher-protein flour, I sometimes reduce the water a bit. It’s all about finding the right balance! I recommend adding water gradually and checking the dough’s consistency as you go. If it feels too dry, add a little more water; if it’s too sticky, you can sprinkle in a touch of flour. Over time, you’ll develop a feel for the dough that works for you.
How to Achieve the Perfect Crust
Ah, the crust! For me, it’s one of the most satisfying parts of baking sourdough bread. I’ve learned that achieving that perfect crispy crust involves a few key techniques. First, steaming the oven while the bread bakes is essential. When I started, I would simply place the loaf in the oven, but I soon discovered that adding steam helps create that beautiful crust. I usually place a pan with water at the bottom of the oven during preheating. Alternatively, I sometimes spritz the oven walls with water using a spray bottle just after I put the bread in. Another tip is to bake the bread covered in a Dutch oven for the first half of the baking time. This traps steam and promotes a lovely rise and crust development. Finally, don’t be shy about letting your loaf bake until it’s a deep golden brown. The darker crust adds a wonderful flavor and texture!
Serving Suggestions
Pairing with Spreads and Cheeses
When it comes to enjoying my Cranberry Walnut Sourdough Bread, the possibilities are endless! I love pairing slices with a variety of spreads. A generous layer of creamy butter is a classic choice, but I’ve also found that a dollop of goat cheese or cream cheese complements the tanginess of the cranberries beautifully. If I’m feeling adventurous, I sometimes whip up a honey and thyme spread, which brings out the sweetness of the bread. It’s a delightful combination that has impressed many guests at my gatherings!
Serving as a Holiday Appetizer
This bread shines as a holiday appetizer. I’ve often served it as part of a charcuterie board, where it pairs wonderfully with cured meats and cheeses. The bright colors of the cranberries make it visually appealing, and the nutty crunch of the walnuts adds a unique texture. I usually slice the bread into thick wedges and arrange them alongside sliced meats, a variety of cheeses, and even some seasonal fruits. Guests love the combination, and it sparks lively conversation around the table. It’s also a great conversation starter—everyone wants to know where the bread came from!
Using in Holiday Recipes: Stuffing and Bread Puddings
One of my favorite ways to use leftover Cranberry Walnut Sourdough Bread is in holiday recipes. I’ve experimented with making stuffing for turkey, where the bread adds a lovely depth of flavor. The cranberries provide pops of sweetness, and the walnuts add crunch—perfect for complementing savory dishes. I also love using the bread in a bread pudding for dessert. Soaking the slices in a mixture of eggs, milk, and spices transforms them into a warm, comforting dish that’s hard to resist. Topped with a drizzle of caramel sauce or a scoop of vanilla ice cream, it’s a delightful way to end any holiday meal!
Frequently Asked Questions
How Long Does Sourdough Bread Last?
One question I often hear is about the shelf life of sourdough bread. From my experience, this bread can last quite a while if stored properly. Typically, a loaf will stay fresh for about 3 to 5 days at room temperature. I try to keep it in a cloth bag or wrapped in a clean kitchen towel, which helps maintain the crust’s texture. If you notice it starting to go stale, don’t worry! Toasting slices brings back that delightful crunch. If you want to keep your bread for longer, freezing it is a great option.
Can I Freeze Cranberry Walnut Sourdough Bread?
Absolutely! Freezing is one of my favorite tricks for preserving bread. When I freeze my Cranberry Walnut Sourdough, I slice it first so I can grab just what I need later. I wrap each slice in plastic wrap and then place them in a freezer bag. This way, they stay protected from freezer burn. When I’m ready to enjoy some, I simply take out a slice or two, let them thaw at room temperature, or pop them directly into the toaster. It’s almost like having fresh bread whenever I want!
What Are the Best Ways to Reheat Sourdough Bread?
Reheating sourdough bread can be a bit of an art! I’ve found that the oven is the best method to revive that crispy crust. Preheat your oven to 350°F, wrap the loaf in aluminum foil to prevent it from drying out, and heat for about 10-15 minutes. If you’re just reheating a slice, the toaster does the trick perfectly, giving you that fresh-out-of-the-oven taste. Sometimes, I even spritz a little water on the crust before reheating in the oven to get an even better crust. It’s a little step that makes a big difference!
Can I Substitute Ingredients?
Absolutely! One of the joys of baking is experimenting with ingredients. If you’re out of walnuts, you could try pecans or even hazelnuts for a different flavor profile. I’ve also swapped cranberries for dried cherries or blueberries when I wanted to mix things up. If you’re looking for a sweeter loaf, adding chocolate chips can create a delicious contrast with the sourdough. The key is to keep the ratios similar to maintain the dough’s texture. Baking is all about finding what works for you!
Storage and Preservation Tips
Best Practices for Storing Sourdough Bread
Storing sourdough bread correctly is essential for keeping it fresh. I like to avoid plastic bags, as they can trap moisture and make the crust soft. Instead, I use a bread box or a cloth bag to allow the bread to breathe while maintaining just the right amount of moisture. In cooler months, I sometimes keep it on the counter; during warmer months, I make sure to check it daily to prevent mold. If you notice any mold, it’s best to discard the entire loaf, as it can spread quickly.
How to Keep Cranberries and Walnuts Fresh
Keeping the ingredients in my Cranberry Walnut Sourdough fresh is just as important. I store dried cranberries in an airtight container in a cool, dark place to maintain their chewy texture. For walnuts, I keep them in the refrigerator or freezer to prevent them from going rancid. I discovered this trick after a batch of walnuts turned out bitter because they were stored in the pantry for too long. By keeping them cool, I can enjoy their nutty flavor whenever I bake!
Variations and Customizations
Adding Other Nuts and Fruits
If you’re feeling adventurous, consider adding other nuts or fruits to your Cranberry Walnut Sourdough. I’ve experimented with almonds, pecans, or even hazelnuts, and each brings a unique flavor and texture to the loaf. You could also incorporate fruits like diced apples for a sweet twist or even citrus zest for a refreshing zing. The possibilities are endless, and it’s fun to see how each variation turns out!
Making Gluten-Free Cranberry Walnut Sourdough
For those who follow a gluten-free diet, I’ve learned that it is possible to make a gluten-free version of this bread. Using a gluten-free flour blend can yield great results, especially when paired with a gluten-free sourdough starter. It’s important to follow a recipe designed for gluten-free sourdough, as the ratios and techniques differ. I’ve found that a blend of almond flour and brown rice flour works well, but you may need to adjust the water content based on the flour’s absorption properties.
Creative Flavor Combinations for Other Seasons
Don’t be shy about experimenting with seasonal flavors! In autumn, I like to add pumpkin puree and spices like cinnamon and nutmeg for a cozy twist. In spring, I might incorporate fresh herbs like rosemary or thyme, making the bread perfect for brunch gatherings. You can even create a festive version for winter holidays by tossing in orange zest and dried fruits like apricots or figs. Each season brings new inspiration and flavors to explore!
Final Thoughts
Creating Cranberry Walnut Sourdough Bread has become one of my cherished holiday traditions. It’s more than just baking; it’s about sharing moments with family and friends, creating memories, and enjoying the rich flavors that come with each slice. I love how this bread connects us to the seasons and brings warmth to our gatherings. Whether you’re baking it for a special occasion or simply to enjoy at home, I hope you feel the joy and satisfaction that comes from making something delicious from scratch. So roll up your sleeves, get those ingredients ready, and let’s make some magic in the kitchen!
Frequently Asked Questions
What makes Cranberry Walnut Sourdough Bread special?
Cranberry Walnut Sourdough Bread combines the tradition of sourdough with festive flavors, creating a delightful loaf with tangy cranberries and crunchy walnuts, making it perfect for holiday gatherings.
How is sourdough bread made?
Sourdough bread is made through a natural fermentation process using a sourdough starter, which is a mix of flour and water that captures wild yeast and bacteria from the environment, resulting in a chewy texture and slightly tangy flavor.
What health benefits do cranberries and walnuts provide?
Cranberries are packed with antioxidants and vitamin C, which can support heart health and may help with urinary tract infections. Walnuts are rich in omega-3 fatty acids, making them beneficial for brain health.
What are the key ingredients in Cranberry Walnut Sourdough Bread?
The key ingredients include cranberries (fresh or dried), walnuts (preferably toasted), a sourdough starter (homemade or store-bought), and flour (bread flour is recommended for better texture).
How do I prepare the sourdough starter?
To prepare a sourdough starter, ensure it’s active and bubbly. Feed it equal parts flour and water the night before baking, or a few hours before using a store-bought starter for optimal results.
What common mistakes should I avoid when baking sourdough?
Common mistakes include not allowing enough time for fermentation, inaccurate ingredient measurements, and not maintaining the right temperature, all of which can affect the bread’s texture and flavor.
How should I store my sourdough bread?
To store sourdough bread, use a cloth bag or bread box to keep it fresh, avoiding plastic bags that can make the crust soft. It typically lasts about 3 to 5 days at room temperature.
Can I freeze Cranberry Walnut Sourdough Bread?
Yes, you can freeze it! Slice the bread first, wrap each slice in plastic wrap, and then place them in a freezer bag to prevent freezer burn. Thaw or toast slices as needed.
What are some serving suggestions for this bread?
This bread pairs well with creamy butter, goat cheese, or spreads like honey and thyme. It also makes a great appetizer when included in a charcuterie board or used in recipes like stuffing or bread pudding.
Can I customize the ingredients in this recipe?
Yes! You can substitute walnuts with other nuts like pecans, or cranberries with dried cherries. Additionally, you can add spices or chocolate chips to alter the flavor profile of the bread.