
Making tender, juicy ribs in an air fryer might sound too good to be true, but trust me, it’s easier than you think! Let’s dive into this surprising method that will have everyone asking for seconds.
Understanding Air Fryers
What is an Air Fryer?
Air fryers have quickly become a kitchen staple in many homes, including mine. I remember the first time I saw one; it looked like a mini oven with a basket and a digital display. Essentially, an air fryer is a countertop convection oven that circulates hot air around food to create that delicious crispy texture we all love, without the need for excessive oil. I was intrigued by the idea of frying food in a healthier way and decided to give it a try.
How Air Fryers Work
The science behind air fryers is pretty fascinating. They use a powerful fan to circulate hot air around the food, cooking it evenly while giving it that crispy exterior. It mimics the frying process but uses significantly less oil, which was a game-changer for me. I found that I can enjoy my favorite comfort foods without the guilt. The result? Perfectly cooked ribs that retain their juiciness and flavor.
Benefits of Using an Air Fryer for Cooking Ribs
When I first tried cooking ribs in my air fryer, I was amazed at how quick and easy it was. Here are some of the benefits I noticed:
- Less Mess: Air frying eliminates the need for messy marinades and grilling setups. Just season, place in the fryer, and let it do its magic!
- Faster Cooking Time: Compared to traditional methods, air fryers can significantly reduce cooking time. Ribs that usually take hours can be ready in under an hour.
- Healthier Option: With less oil used, I felt better about indulging in ribs. It’s a win-win for flavor and health!
- Crispy Exterior: I love that perfect caramelization on the outside. It gives the ribs a delightful crunch while keeping the meat tender inside.
By this point, I was convinced that air fryers were not just a passing trend; they were a practical tool that could elevate my cooking game, especially when it came to ribs. Crispy Air Fryer Pork Belly (A Decadent Treat) is another fantastic dish you can try with the air fryer!
Choosing the Right Ribs
Types of Ribs: Baby Back vs. Spare Ribs
When I started exploring different types of ribs, I discovered the two main contenders: baby back ribs and spare ribs. Baby back ribs are smaller, more tender, and typically leaner, making them a popular choice for many. They’re cut from the back of the pig and tend to cook faster, which is great news for air frying. On the other hand, spare ribs are larger, meatier, and come from the belly area. They have more fat, which makes them incredibly flavorful when cooked right. I’ve experimented with both, and while I love the tenderness of baby back ribs, the richness of spare ribs has its merits too.
How to Select Fresh Ribs
Selecting fresh ribs is crucial for achieving that melt-in-your-mouth experience. I always look for ribs with a nice pink color and even marbling. The bones should be clean without excessive fat or gristle. If you can, check for a fresh smell. If they have any off-putting odor, I suggest you pass on those. A good butcher can be a great resource; they often have the best quality cuts.
Understanding Rib Cuts and Their Differences
It took me a while to understand the different cuts of ribs and how they can affect the cooking process. Besides baby back and spare ribs, there are also St. Louis-style ribs, which are spare ribs with the sternum bone removed for a more uniform shape. I found that knowing the cut helps in determining cooking times and techniques. For instance, baby back ribs typically take less time in the air fryer, while spare ribs may need a bit longer to become tender.
As I embraced these insights into the world of ribs, I felt empowered to create some truly delicious meals right in my kitchen. Choosing the right ribs has become a delightful part of my cooking journey, and I can’t wait to share how to turn them into mouth-watering air fryer ribs! Stay tuned for more on preparation and cooking techniques. You won’t want to miss it!
Essential Tools and Ingredients
Must-Have Kitchen Tools for Air Fryer Ribs
Before I dive into cooking those mouth-watering ribs, I realized I needed to gather some essential tools that make the process smoother. Here are some must-haves I recommend having on hand:
- Air Fryer: Of course, the star of the show is the air fryer itself! I’ve found that having one with adjustable temperature settings is a big plus.
- Meat Thermometer: This tool has become my best friend in ensuring the ribs are perfectly cooked without cutting them open. It helps me avoid any guesswork.
- Sharp Knife: A good knife is essential for trimming and cutting the ribs. I like to make sure it’s sharp for clean cuts.
- Cutting Board: I always use a sturdy cutting board to prepare my ribs. It makes the whole process much more organized.
- Baking Tray or Foil: Sometimes I use a baking tray or foil with my air fryer to catch any drippings. It makes clean-up easier and keeps my air fryer in good shape.
Having these tools handy has made cooking ribs not just easier, but also more enjoyable for me. I feel ready to tackle any rib recipe that comes my way!
Key Ingredients for Flavorful Ribs
Now that the tools are sorted out, let’s talk about the ingredients. The right ingredients can make a world of difference in how your ribs turn out. Here are my favorites that I always keep in my pantry when preparing ribs:
- Ribs: Naturally, starting with quality ribs is key. Whatever cut you choose, make sure they are fresh!
- Salt and Pepper: Sometimes the simplest seasoning works best. A good sprinkle of salt and pepper enhances the natural flavors of the meat.
- Olive Oil: I often use a light coat of olive oil to help the seasonings stick to the ribs.
- Garlic Powder and Onion Powder: These two add depth and richness to my ribs. They’re staples in my spice cabinet.
- Brown Sugar: For a touch of sweetness, I love incorporating brown sugar. It caramelizes beautifully and adds a lovely crust.
Using these ingredients has definitely elevated my rib game! They’re simple yet effective in creating rich, flavorful ribs that I can’t get enough of.
Recommended Seasonings and Marinades
For me, seasoning and marinating are where the magic happens. I’ve discovered that even a simple rub can transform the ribs into something extraordinary. Here are some of my go-to seasonings and marinades:
- BBQ Dry Rub: I love mixing smoked paprika, cumin, garlic powder, and a touch of cayenne pepper for a bit of heat. It gives a nice smoky flavor.
- Honey Garlic Marinade: A mix of honey, soy sauce, minced garlic, and a splash of vinegar creates a sweet and tangy marinade that pairs perfectly with the richness of the ribs.
- Chipotle Sauce: For those who like a kick, I recommend a chipotle marinade with adobo sauce. It adds a smoky heat that takes the flavors to another level.
Experimenting with different seasonings has been one of my favorite parts of cooking ribs. I encourage you to mix and match based on your palate. It’s all about finding what works best for you!
Preparation Steps for Easy Air Fryer Ribs
Preparing the Ribs: Trimming and Cleaning
Once I gather all the ingredients and tools, it’s time to prepare the ribs. I’ve learned that proper prep is crucial to ensure they cook evenly and taste great. Here’s what I do:
- Trim Excess Fat: I start by trimming off any large chunks of fat from the ribs. While a little fat can add flavor, too much can make them greasy.
- Remove the Membrane: This step is important! I carefully slide a knife under the membrane on the back of the ribs and pull it off. It helps the seasonings penetrate better.
- Rinse and Pat Dry: I rinse the ribs under cold water to remove any residue, then pat them dry with a paper towel. This helps achieve that beautiful crust when cooking.
Taking the time to prep the ribs properly has made a noticeable difference in my cooking. It’s worth the effort to get the best possible results!
Applying Marinades and Rubs
With the ribs prepped, it’s time to get creative with marinades and dry rubs. I usually go with one of my favorite marinades or create a simple rub. Here’s my process:
- Applying Marinades: If I’m using a marinade, I place the ribs in a large resealable bag or a shallow dish. I pour the marinade over them, ensuring they’re thoroughly coated, and then seal the bag or cover the dish. I usually let them marinate for at least a couple of hours, or even overnight in the fridge for maximum flavor.
- Using Dry Rubs: When applying a dry rub, I generously sprinkle it over the ribs, massaging it into the meat. I make sure to cover all sides for an even flavor.
This part is always fun for me. It’s like giving those ribs a delicious spa treatment! The more time they spend soaking in those flavors, the better they’ll taste.
How Long to Marinate Ribs
From my experience, the marination time can really influence the taste of the ribs. Depending on the marinade, I usually aim for:
- 30 Minutes to 2 Hours: For milder marinades, a shorter marination time is sufficient. If I’m in a rush, I often opt for this.
- Overnight: For deeper flavors, I prefer marinating overnight. The flavors really have time to penetrate the meat, leading to truly flavorful ribs.
In my opinion, a little patience goes a long way when it comes to marinating ribs. It’s so worth it when you take that first bite and taste all those delicious flavors come together!
Cooking Ribs in the Air Fryer
Step-by-Step Cooking Instructions
Once I’ve prepped my ribs and let them soak up all those delicious flavors, it’s time to cook! I’ve found that following these simple steps helps ensure my ribs come out perfectly every time:
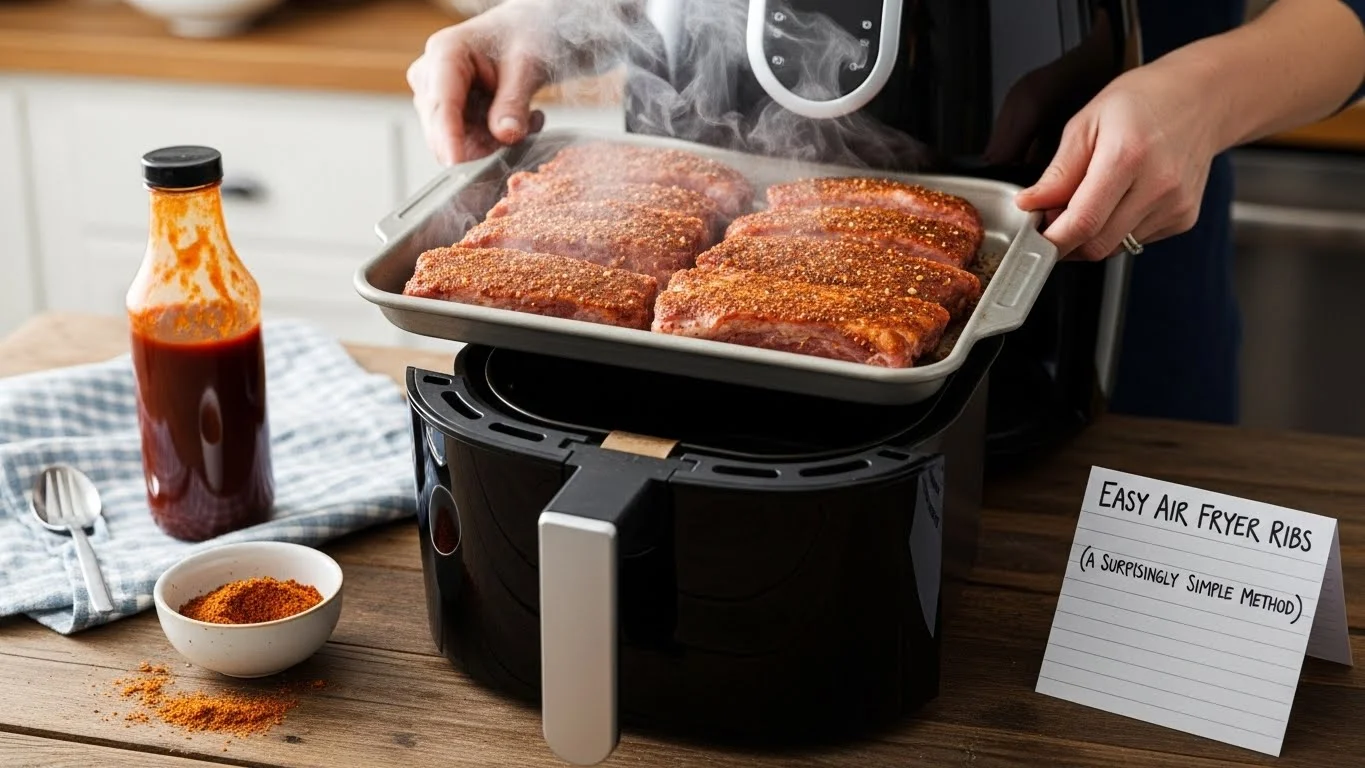
- Preheat the Air Fryer: I always start by preheating my air fryer for about 5 minutes. This helps to create that crispy exterior right from the get-go. I usually set it to 375°F (190°C) for ribs.
- Arrange the Ribs: After marinating, I take the ribs out of the bag or dish and let any excess marinade drip off. Then, I place the ribs in the air fryer basket in a single layer. If I’m cooking a lot, I try to fit them snugly but without overcrowding. This way, the hot air can circulate properly.
- Cooking in Batches: If I have more ribs than can fit in the basket, I cook them in batches. This ensures that each piece gets that perfect crispy finish and doesn’t steam from being crammed together.
- Flip Halfway: About halfway through the cooking time, I carefully flip the ribs using tongs. This helps to achieve an even crisp on both sides and allows for better cooking.
These steps have turned cooking ribs into a fun and stress-free experience for me. I love that I can enjoy the process as much as the final product!
Optimal Cooking Temperature and Time
Finding the right cooking time and temperature has been key to my rib success. Here’s what I’ve learned through trial and error:
- Baby Back Ribs: I usually cook these for about 25 to 30 minutes at 375°F (190°C). They cook faster due to their smaller size and tenderness.
- Spare Ribs: These tend to take a bit longer. I’ve found that around 35 to 40 minutes works well at the same temperature. I like to check them a bit earlier to ensure they don’t dry out.
These timings have allowed me to get the ribs just right, balancing tenderness and flavor without overcooking them. I highly recommend keeping an eye on them, especially if it’s your first time!
How to Check for Doneness
One of the most nerve-wracking parts for me was figuring out when the ribs were done. Here’s how I check for perfect doneness:
- Internal Temperature: I always use a meat thermometer to check the internal temperature of the ribs. I aim for at least 190°F (88°C) for tender ribs that fall off the bone. Once they hit that mark, I know they’re ready!
- Visual Cues: I also look for a nice caramelized exterior and that the meat has pulled back from the bones slightly. This indicates that they’re well-cooked and flavorful.
- Testing with a Fork: If I’m unsure, I use a fork to prod the meat. If it feels tender and pulls away easily, it’s usually a good sign!
Over time, I’ve gained confidence in checking for doneness, and I encourage you to trust your instincts as well. Cooking is all about learning what works for you!
Enhancing Flavor: Sauces and Glazes
Homemade BBQ Sauce Recipes
Once I’ve mastered the air fryer technique, I love to take the flavor up a notch with some homemade BBQ sauces. There’s something incredibly rewarding about crafting my own sauce from scratch. One of my favorites is a classic tangy BBQ sauce. Here’s how I make it:
- Ingredients: 1 cup ketchup, 1/4 cup apple cider vinegar, 1/4 cup brown sugar, 1 tablespoon Worcestershire sauce, 1 teaspoon smoked paprika, and salt to taste.
- Instructions: I simply combine all the ingredients in a saucepan over medium heat. I let it simmer for about 15 minutes, stirring occasionally until it thickens and the flavors meld together. This sauce is perfect for brushing on the ribs during the last few minutes of cooking!
Another favorite is a honey mustard sauce, which I make by mixing equal parts honey and Dijon mustard, along with a splash of apple cider vinegar. It adds a sweet and tangy twist that pairs wonderfully with the richness of the ribs.
Using Store-Bought Sauces Effectively
Sometimes, I don’t have the time to whip up a homemade sauce. That’s when I turn to store-bought options. To make them stand out, I like to jazz them up a bit. For instance, I’ll take a bottle of plain BBQ sauce and mix in some extra spices or a dash of hot sauce for a kick. I remember using a store-bought spicy BBQ sauce and adding a bit of honey to balance the heat. It turned out amazing!
Another tip is to warm up the sauce before serving. I usually heat it gently on the stovetop, which brings out the flavors even more and gives it a homemade feel. This little step has made a noticeable difference in how the sauce tastes with the ribs.
Tips for Glazing Ribs During Cooking
Glazing ribs while they cook in the air fryer adds an extra layer of flavor and brings out that beautiful caramelization. I typically apply the glaze during the last 5-10 minutes of cooking. This ensures that the sauce doesn’t burn but still gets that delicious sticky finish.
- Timing is Key: I always keep an eye on the cooking time. Once the ribs are nearly finished, I gently brush the sauce over them, allowing it to bubble and create a glaze.
- Multiple Coats: If I’m feeling adventurous, I’ll apply multiple coats of sauce, waiting a few minutes in between. This layering creates a deeper flavor and a beautiful finish that’s hard to resist!
These glazing techniques have really transformed my rib game, making them not just delicious but visually appealing as well.
Serving Suggestions and Pairings
Side Dishes That Complement Ribs
After all the effort that goes into cooking the ribs, I love to serve them with sides that enhance the meal. Some of my favorite side dishes include:
- Coleslaw: The crunch and creaminess of coleslaw perfectly balance the smoky flavor of the ribs. I often make a quick version with shredded cabbage, carrots, and a simple mayo-based dressing.
- Grilled Corn on the Cob: I enjoy grilling corn during the summer months. The sweet corn pairs wonderfully with the savory ribs, especially when brushed with a bit of butter and sprinkled with salt. You can find a great recipe for this in my article on Perfect Air Fryer Corn On The Cob (Sweet & Juicy).
- Baked Beans: This classic combo is a must-have in my household. The sweetness of baked beans complements the smoky flavor of the ribs, making every bite a delight.
Best Beverages to Serve with Ribs
When it comes to drinks, I’ve found that the right beverage elevates the meal. For me, cold beers are a go-to; a nice lager or pale ale complements the ribs beautifully. Alternatively, I enjoy serving a sweet iced tea or lemonade, especially during summer gatherings. The refreshing taste balances the rich flavors of the meat.
Presentation Tips for Serving Ribs
Presentation matters, too! I like to serve my ribs on a wooden cutting board or a large platter, garnished with fresh parsley or herbs for a pop of color. Sometimes, I’ll add some lemon wedges for a splash of brightness. It makes the meal feel special and inviting, and it’s always fun to impress my guests with a beautiful presentation!
Frequently Asked Questions (FAQs)
Can I Cook Frozen Ribs in the Air Fryer?
I’ve tried this, and yes, you can cook frozen ribs in the air fryer! Just keep in mind that they will take longer to cook. I usually add about 10-15 minutes to the cooking time and check for doneness using a meat thermometer.
How Do I Store Leftover Air Fryer Ribs?
Storing leftover ribs is pretty straightforward. I let them cool completely, then wrap them tightly in aluminum foil or plastic wrap and store them in the fridge. They usually stay fresh for 3-4 days. When I reheat them, I like to put them back in the air fryer for a few minutes to regain that crispy texture.
What are Common Mistakes to Avoid?
From my experience, one common mistake is overcrowding the air fryer basket. I’ve learned that giving the ribs space allows for better air circulation and even cooking. Another mistake is not checking for doneness properly. Using a meat thermometer has been a game-changer for me, helping to avoid undercooking or overcooking.
Final Thoughts
Cooking ribs in an air fryer has become one of my favorite culinary adventures. The ease, speed, and flavor just can’t be beaten. With the right tools, techniques, and a little creativity with sauces and sides, I’ve turned my kitchen into a rib paradise! I hope these insights and tips inspire you to try air-fried ribs yourself. Trust me, once you taste that juicy, flavorful goodness, you’ll be hooked! And for a refreshing side dish, consider trying my Zesty Taco Pasta Salad!