
Nothing beats the aroma of freshly baked breadsticks wafting through the kitchen, especially when they’re gluten-free, chewy, and bursting with garlicky goodness. Let’s dive into how we can create these delicious treats right at home!
Understanding Gluten-Free Baking
When I first started baking gluten-free, I quickly realized that it was a whole new world. The absence of gluten—a protein found in wheat, barley, and rye—changes everything. For someone like me, who had always enjoyed traditional bread, it felt a bit daunting at first. But I was determined to make chewy, satisfying breadsticks that wouldn’t make me miss gluten at all. Here’s what I learned about gluten-free baking along the way. Read Interesting article: Soft & Fluffy Gluten-Free Dinner Rolls (Perfect For Holidays)
What is Gluten?
Gluten is a protein that gives bread its structure and elasticity. In traditional baking, gluten works its magic by stretching and trapping air bubbles, which helps the bread rise and gives it a chewy texture. When I discovered I had a gluten sensitivity, I had to rethink my approach to baking. It was challenging because gluten-free alternatives behave differently, but I found that with the right knowledge and ingredients, I could still create delightful breadsticks.
Common Gluten-Free Flours
One of the most exciting aspects of gluten-free baking is the variety of flours available. I experimented with several types before finding my favorites. Here are some common gluten-free flours that I’ve worked with:
- Almond Flour: It adds a rich, nutty flavor, but can sometimes make baked goods denser.
- Coconut Flour: Absorbs a lot of moisture, so it’s best used in small quantities.
- Brown Rice Flour: A versatile flour that works well in many recipes, it gives a nice texture.
- Oat Flour: Made from ground oats, it adds a subtle sweetness (just ensure they’re certified gluten-free).
- Gluten-Free All-Purpose Flour Blends: These are often a mix of several flours and are formulated to mimic the properties of wheat flour. They’ve been a game-changer for me.
These flours can be combined for the best results, and I often like to use a blend to achieve the right chewiness in my breadsticks.
Why Choose Gluten-Free Options?
The decision to go gluten-free can stem from various reasons. For me, it was all about feeling better and enjoying food without discomfort. I’ve realized that gluten-free options can be just as delicious, satisfying, and even healthier than their traditional counterparts. Plus, trying out new recipes has opened up a whole array of flavors and textures that I never explored before. Whether you have dietary restrictions or just want to try something new, gluten-free baking can be a rewarding experience. Read Interesting article: 15 Festive New Year’s Eve Appetizers to Wow Guests
Key Ingredients for Chewy Gluten-Free Breadsticks
Now that we’ve covered the basics of gluten-free baking, let’s dive into the key ingredients that make these breadsticks chewy and flavorful. I’ve learned that each ingredient plays a crucial role, contributing to the overall texture and taste.
Gluten-Free Flour Blends
When I first made gluten-free breadsticks, I used a store-bought gluten-free all-purpose flour blend. It saved me time and provided a great texture. However, I’ve also experimented with mixing my own blends at home. My go-to mix includes brown rice flour, tapioca starch, and potato starch. This combination not only brings chewiness but also a nice crust when baked.
Yeast: Importance and Types
Yeast is essential for making our breadsticks rise. I learned that there are different types of yeast, but I usually go for active dry yeast. To activate it, I mix it with warm water and a pinch of sugar, and let it sit until it becomes frothy. This step is crucial; it’s like a little magic moment where the dough starts to come alive!
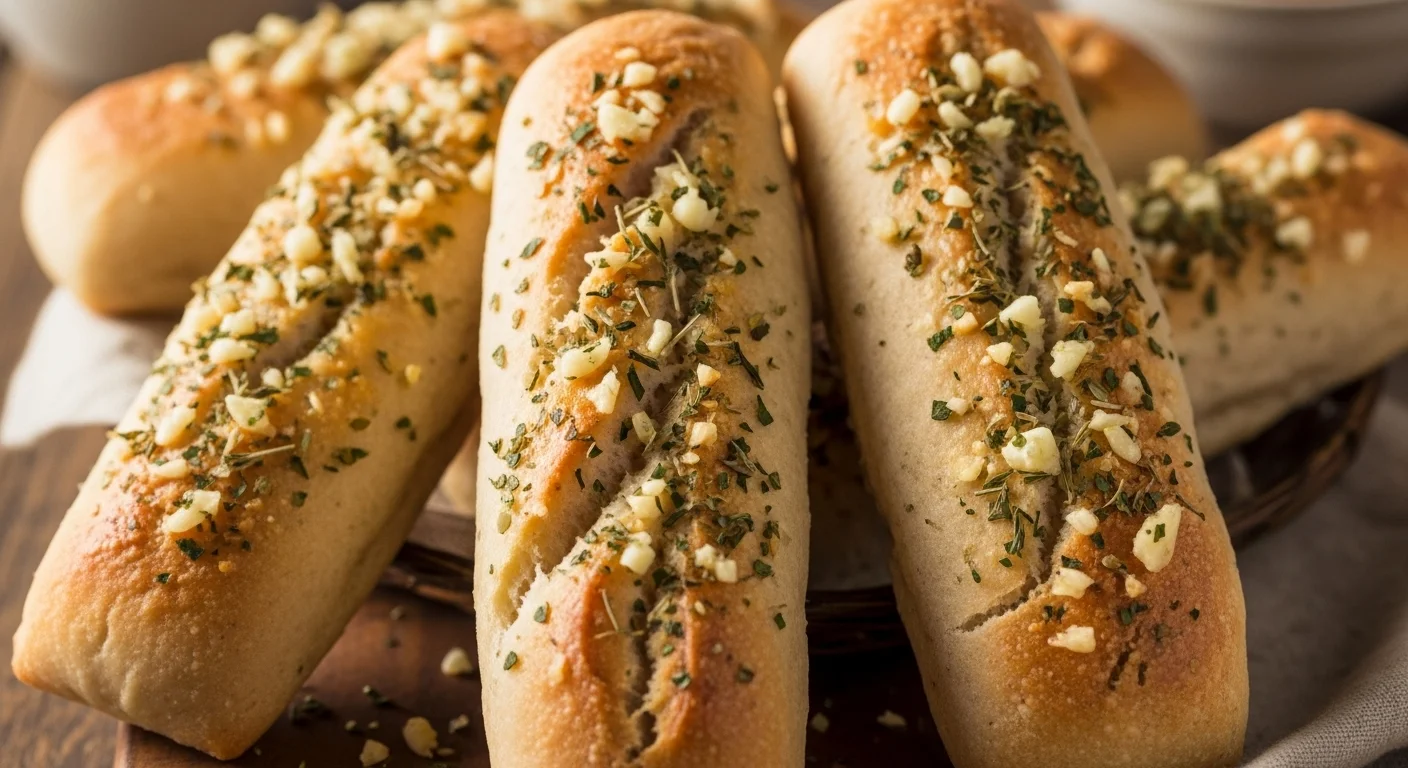
Garlic: Fresh vs. Powdered
Garlic is what makes these breadsticks truly special. Personally, I prefer using fresh garlic, as it adds a robust flavor that’s hard to beat. I finely mince it and mix it right into the dough. However, I’ve also used garlic powder when I’m in a pinch, and it still gives a nice garlicky kick. You can’t go wrong with either option!
Olive Oil: Types and Benefits
Olive oil is another ingredient I never skimp on. It adds moisture and flavor to the breadsticks. I usually opt for extra virgin olive oil for its rich taste. Not only does it enhance the flavor, but it also helps create that delightful crust on the outside of the breadsticks. If you want to experiment, you can try flavored olive oils, like garlic or herb-infused, to add even more depth to your breadsticks.
Salt: Enhancing Flavor
Salt is a crucial ingredient in any bread recipe; it enhances the overall flavor. I typically add a bit of sea salt to the dough, and sometimes sprinkle a little more on top before baking for an extra burst of flavor. It’s simple, but makes a big difference!
Step-by-Step Guide to Making Gluten-Free Breadsticks
Now that we’ve gathered all the essential ingredients, it’s time to put them together and create our delicious gluten-free breadsticks. I’ve found that following a clear step-by-step process helps ensure everything turns out perfectly. Here’s how I make them, and I hope you find this guide just as helpful!
Preparing the Dough
To start, I mix my dry ingredients in a large bowl. This includes my gluten-free flour blend, salt, and any other dry spices I want to add. I recommend whisking them together to make sure everything is evenly combined. Then, in a separate bowl, I prepare the wet ingredients. I combine warm water, olive oil, and activated yeast from the previous step. It’s important to make sure that the water isn’t too hot; otherwise, it could kill the yeast! I usually let this mixture sit for a few minutes to make sure the yeast is doing its thing before combining it with the dry ingredients.
How to Activate Yeast
Activating yeast is one of the most exciting parts of baking for me. I’ve learned that the key is to use warm water—about 110°F is perfect. I add a pinch of sugar to help feed the yeast, which I’ve found enhances its activation. After about five to ten minutes, the mixture should become frothy and bubbly. That’s when I know it’s ready to go into the dough. It’s like a little science experiment that brings my breadsticks to life!
Kneading Techniques for Gluten-Free Dough
Kneading gluten-free dough is quite different from traditional dough because we don’t have gluten to help create that stretchy texture. I usually mix the wet and dry ingredients until they’re just combined, and then I use my hands to knead the dough gently. It’s more about mixing until smooth rather than working the dough like you would with regular bread. I’ve found that letting it rest for about 30 minutes helps the flours absorb moisture, resulting in a better texture. During this resting period, I cover the bowl with a damp towel to keep it from drying out.
Shaping the Breadsticks
Once the dough has rested, it’s time to shape the breadsticks. I lightly flour my work surface with some extra gluten-free flour to prevent sticking. I take a portion of the dough and roll it into a long, thin shape, about 1/2 inch thick. I used to struggle with this part, but I’ve found that using my hands to gently roll and stretch the dough works best. I like to make them about six inches long, but you can make them however long you prefer! After shaping, I place them on a baking sheet lined with parchment paper.
Baking Guidelines
Before baking, I preheat my oven to 375°F. This temperature allows the breadsticks to bake evenly and develop a nice crust. I let the shaped breadsticks rest for an additional 10-15 minutes on the baking sheet, which gives them a little more rise. To add flavor, I often brush them with a mixture of olive oil and minced garlic before popping them in the oven. Baking usually takes about 15-20 minutes, but I recommend keeping an eye on them. When they turn golden brown, that’s my cue that they’re ready to come out. The aroma that fills my kitchen during baking is simply irresistible!
Flavor Variations for Breadsticks
Once you’ve mastered the basic recipe, the fun truly begins! I love to experiment with different flavors to keep things exciting. Here are some variations that I’ve tried and enjoyed, and I think you will too!
Cheesy Garlic Breadsticks
For a cheesy twist, I fold in shredded mozzarella or parmesan cheese into the dough before shaping the breadsticks. This addition makes them extra savory. I also sprinkle some cheese on top before baking for a gooey, melty finish. The combination of garlic and cheese is a classic that never disappoints!
Herb-Infused Breadsticks
If you’re a fan of herbal flavors, I recommend adding dried herbs like oregano, basil, or rosemary right into the dough. I find that about a tablespoon of mixed herbs gives a wonderful aroma and taste. Brushing the dough with herb-infused olive oil before baking intensifies the flavor even more.
Spicy Breadsticks with Red Pepper Flakes
For those who enjoy a kick, I like to add red pepper flakes to the dough or sprinkle them on top before baking. This adds a warm spiciness that pairs wonderfully with dips or soups. It’s my go-to variation when I want to impress guests or simply spice up a cozy night in.
These variations provide endless possibilities to explore, and I love how each one brings a unique twist to the basic breadstick recipe. I can’t wait for you to try them out and find your favorites! Read Interesting article: 10 Sweet and Savory Maple Syrup Recipes
Serving Suggestions and Pairings
Now that we’ve created these delicious gluten-free breadsticks, I can’t wait to share some of my favorite ways to serve them. Whether you’re hosting a dinner party or just enjoying a cozy night at home, these ideas will elevate your breadstick experience!
Best Dips for Breadsticks
I’ve found that having a tasty dip is essential when serving breadsticks. Here are a few of my go-to dips that perfectly complement the garlicky goodness of our breadsticks:
- Marinara Sauce: This classic tomato-based sauce adds a tangy flavor that pairs wonderfully with the breadsticks. I love to warm it up and serve it in a small bowl for dipping.
- Alfredo Sauce: For a creamy, rich option, homemade or store-bought Alfredo sauce is a fantastic choice. It adds a luxurious touch to every bite.
- Pesto: I adore pesto for its fresh and vibrant flavors. Whether it’s basil or sun-dried tomato pesto, it adds a unique twist that’s hard to resist.
- Hummus: For a healthier option, hummus is a perfect fit. I often make roasted garlic hummus to keep the garlic theme going!
These dips not only enhance the flavor but also make the breadsticks more interactive and fun to enjoy.
Pairing with Soups and Salads
One of the best things about breadsticks is how versatile they are. I’ve enjoyed serving them alongside various soups and salads. Here are a few pairings that I think you’ll love:
- Tomato Basil Soup: The warm, comforting flavors of tomato basil soup create a perfect match with the crispy outside and chewy inside of the breadsticks.
- Chicken Noodle Soup: For a heartier meal, I always opt for chicken noodle soup. Dipping a breadstick into the broth is simply delightful!
- Caesar Salad: I frequently serve breadsticks with a crisp Caesar salad. The crunch of the lettuce and the creamy dressing balance out the breadsticks beautifully.
- Greek Salad: The fresh veggies and tangy feta in a Greek salad make for a refreshing complement to the savory breadsticks.
These pairings not only make for a balanced meal but also create an inviting atmosphere for mealtime.
Using as a Side for Italian Dishes
Italian cuisine and breadsticks go hand in hand, so I often serve my gluten-free breadsticks as a side for various Italian dishes. Here are some of my favorites:
- Pasta Primavera: The light, fresh vegetables in pasta primavera pair so well with the breadsticks. It’s like having a mini garlic bread alongside your favorite pasta!
- Lasagna: I can’t resist serving breadsticks with a hearty lasagna. The breadsticks are perfect for soaking up any extra sauce left on the plate.
- Risotto: A creamy risotto dish becomes even more comforting when paired with warm breadsticks, making every bite a treat.
These dishes not only enhance the flavors but also create a more complete dining experience. I truly believe that good food is about sharing and enjoying together.
Storing and Reheating Gluten-Free Breadsticks
Sometimes, I make a big batch of breadsticks knowing that we won’t finish them all in one sitting. Thankfully, they store well and can be reheated without losing their delightful texture and flavor. Here’s how I do it:
How to Store Leftover Breadsticks
After enjoying the breadsticks, I make sure to let any leftovers cool completely before storing them. I usually place them in an airtight container, which helps keep them fresh. If I want to keep them for a longer period, I wrap them in plastic wrap and then place them in a freezer bag. It’s a great way to save them for later indulgence!
Reheating Tips for Optimal Texture
When it’s time to enjoy the leftover breadsticks, I like to reheat them in the oven to retain that lovely texture. I preheat the oven to 350°F and place the breadsticks on a baking sheet for about 5-10 minutes. This method warms them through while crisping up the outside, bringing back that freshly baked goodness. I’ve also used the microwave in a pinch, but I find that it can make the breadsticks a bit chewy rather than crispy. So, if you have the time, the oven is my recommended method!
These storage and reheating tips ensure that I can enjoy the delightful taste of my gluten-free breadsticks long after they’ve been baked. I hope you find these suggestions helpful for your own breadstick adventures!
Common FAQs about Gluten-Free Breadsticks
Can I use a different type of flour?
Absolutely! One of the most fantastic things about gluten-free baking is the flexibility you have with flours. I’ve experimented with many different types, and each brings its unique flavor and texture to the breadsticks. If you don’t have a particular flour on hand, you can often substitute one with another, but I recommend starting with a gluten-free all-purpose blend. It’s designed to mimic the properties of wheat flour, making it easier for beginners. I’ve found that mixing different flours can also yield delightful results, so don’t hesitate to get creative!
How long do these breadsticks stay fresh?
Freshly baked gluten-free breadsticks are best enjoyed right out of the oven, but I know life gets busy! If stored properly, they can last for a couple of days at room temperature in an airtight container. I usually find they taste best within the first day or two. After that, they may start to lose some of their chewy texture. If you want to keep them longer, freezing is a great option!
Can I freeze gluten-free breadsticks?
Yes, you can! Freezing is actually one of my favorite ways to save any leftovers. I wrap each breadstick in plastic wrap and then place them in a freezer bag. When I’m ready to enjoy them again, I simply reheat them in the oven as mentioned before. They’ll taste almost as good as fresh! I love knowing that I can have a quick and delicious snack or side dish ready whenever I want.
What can I substitute for yeast?
If you don’t have yeast or prefer not to use it, there are alternatives! Baking powder can sometimes work, but it won’t give you the same rise or flavor. I’ve tried making breadsticks with baking powder, but they come out denser. If you’re up for an experiment, you could also try a sourdough starter for a unique flavor, but that involves a bit more preparation. In my experience, yeast is the way to go if you want that airy texture in your breadsticks.
Tips for Perfecting Your Breadsticks
Getting the Right Consistency
Achieving the perfect dough consistency is key to making great gluten-free breadsticks. I’ve learned that the dough should be sticky but not overly wet. If it feels too dry, add a little more warm water, and if it’s too sticky, a bit more flour can help. It took me some trial and error, but now I can usually tell just by feel when the dough is right.
Adjusting for Altitude
If you live at a higher altitude, you might need to make some adjustments to your recipe. I remember when I moved to a higher elevation; my breadsticks were coming out flatter than I expected. Reducing the amount of liquid slightly or increasing the flour may help. I found that keeping a close eye on my dough and baking times helped me nail down the perfect results at different altitudes.
Testing for Doneness
Knowing when your breadsticks are done baking is crucial. I usually look for a golden-brown color and a slight firmness when I tap them. The aroma that fills the kitchen is also a reliable sign! I’ve made the mistake of underbaking before, and while they were still edible, I learned the hard way that they taste best when fully cooked. A little patience goes a long way in baking!
Final Thoughts
Making gluten-free breadsticks has been such a rewarding experience for me. From understanding the unique ingredients to mastering the baking process, every step has taught me something new. I hope you feel inspired to try making your own gluten-free breadsticks and experiment with flavors and pairings. It’s more than just a recipe; it’s about creating something delicious that you can share with family and friends. Whether you stick to the basics or venture into exciting flavor variations, I truly believe you’ll enjoy the process as much as the end result. Happy baking!
Frequently Asked Questions
What is gluten and why is it important in baking?
Gluten is a protein found in wheat, barley, and rye that gives bread its structure and elasticity. It helps bread rise and provides a chewy texture. In gluten-free baking, the absence of gluten requires different approaches and ingredients.
What are some common gluten-free flours used in baking?
Common gluten-free flours include almond flour, coconut flour, brown rice flour, oat flour (certified gluten-free), and gluten-free all-purpose flour blends. These flours can be combined for the best results in gluten-free baking.
What key ingredients contribute to chewy gluten-free breadsticks?
Key ingredients include gluten-free flour blends, yeast (typically active dry yeast), fresh or powdered garlic, olive oil (preferably extra virgin), and salt. Each plays a crucial role in the texture and flavor of the breadsticks.
How do you activate yeast for baking?
To activate yeast, mix it with warm water (about 110°F) and a pinch of sugar. Let it sit until it becomes frothy, which usually takes about five to ten minutes, indicating that the yeast is ready to use in the dough.
What are some flavor variations for gluten-free breadsticks?
Flavor variations include cheesy garlic breadsticks (with mozzarella or parmesan), herb-infused breadsticks (with dried herbs), and spicy breadsticks (with red pepper flakes). These variations add unique twists to the basic recipe.
What dips pair well with gluten-free breadsticks?
Great dips for gluten-free breadsticks include marinara sauce, Alfredo sauce, pesto, and hummus. These dips enhance the flavor and make the breadsticks more enjoyable to eat.
What are some recommended pairings for serving gluten-free breadsticks?
Gluten-free breadsticks pair well with soups like tomato basil or chicken noodle soup, salads such as Caesar or Greek salad, and Italian dishes like pasta primavera, lasagna, or risotto.
How should leftover gluten-free breadsticks be stored?
Leftover gluten-free breadsticks should be cooled completely and stored in an airtight container. For longer storage, they can be wrapped in plastic wrap and placed in a freezer bag.
What is the best way to reheat gluten-free breadsticks?
The best way to reheat gluten-free breadsticks is in the oven at 350°F for about 5-10 minutes. This method retains their texture and flavor, unlike microwaving, which can make them chewy.
Can I use a different type of flour for gluten-free breadsticks?
Yes, you can use different types of gluten-free flours. Each flour brings its unique flavor and texture to the breadsticks. Starting with a gluten-free all-purpose blend is recommended for beginners.