
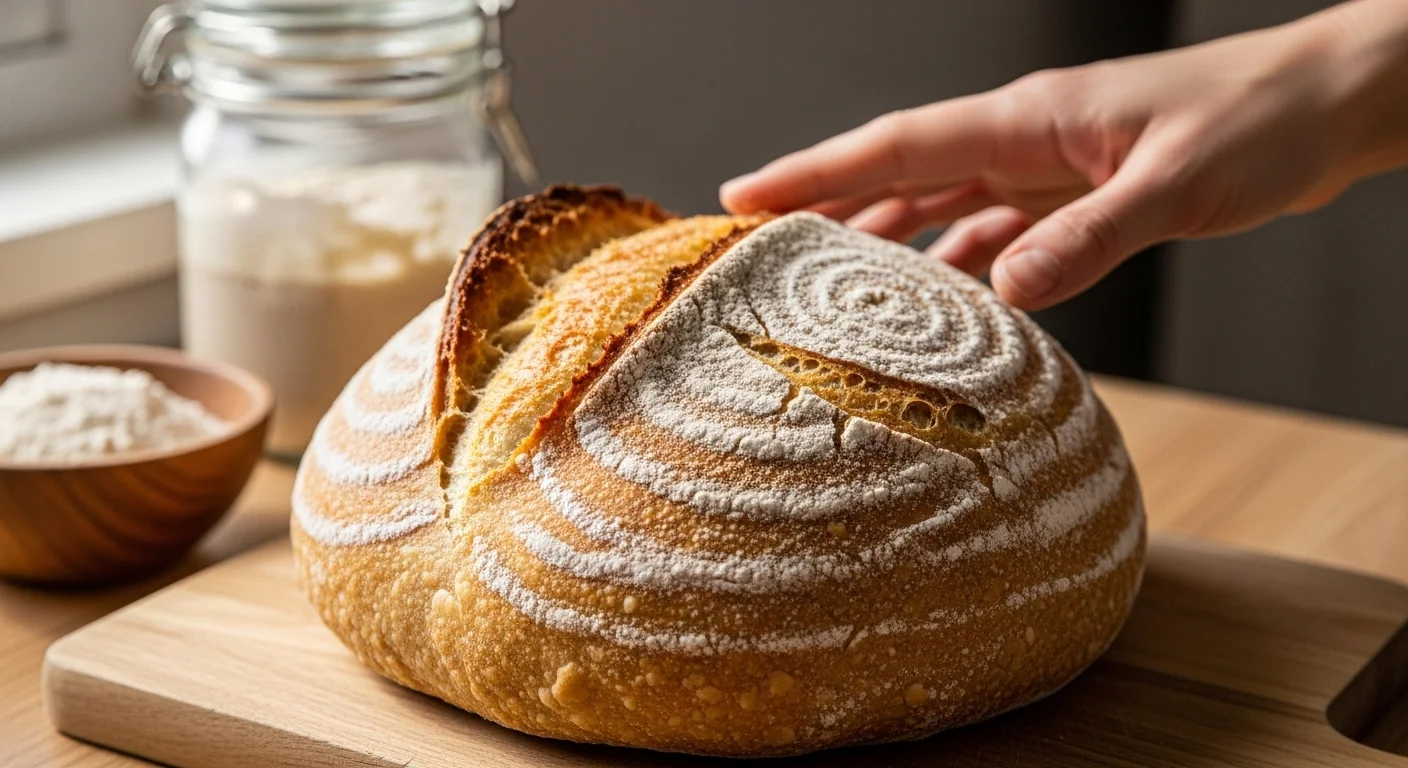
Imagine the smell of freshly baked bread wafting through your home, the golden crust crackling as you slice into it. Making sourdough bread doesn’t have to be an intimidating task. Let me show you how simple and rewarding it can be!
Understanding Sourdough Bread
What is Sourdough Bread?
Sourdough bread is a type of bread made through the fermentation of dough using naturally occurring lactobacilli and yeast. Unlike commercial breads that rely on quick-acting yeast, sourdough uses a starter—a blend of flour and water that captures wild yeast from the environment. This gives sourdough its unique tangy flavor and chewy texture. I remember the first time I tasted a slice of homemade sourdough; it was unlike anything I had ever bought from the store. The complex flavors and texture made me realize just how special this bread could be.
The Science Behind Sourdough Fermentation
The magic of sourdough lies in its fermentation process. When you mix flour and water to create a starter, you’re setting off a chain of biological reactions. The wild yeast present in the environment begins to feed on the sugars in the flour, producing carbon dioxide and alcohol in the process. This is what gives sourdough its rise and distinctive flavor. I found it fascinating to learn that the longer the dough ferments, the more pronounced the sourness becomes. It’s all about patience and letting nature work its charm!
Health Benefits of Sourdough Bread
Sourdough isn’t just delicious; it’s also packed with health benefits. The fermentation process breaks down gluten, making it easier for some people to digest. Additionally, the presence of lactic acid bacteria enhances the availability of nutrients in the bread, such as B vitamins and minerals like magnesium and zinc. I’ve noticed that when I eat sourdough, I feel fuller longer, which is a nice bonus. I often find myself enjoying it with just a smear of butter or as a base for my favorite toppings. If you’re interested in exploring more alternatives, check out Easy Gluten-Free Sourdough: A Beginner’s No-Fail Guide.
Sourdough Bread Ingredients
Essential Ingredients for Sourdough Bread
To make sourdough bread, you’ll need just a handful of ingredients: flour, water, salt, and your sourdough starter. I love the simplicity of this list. It’s comforting to know that I’m using basic, whole ingredients without any preservatives or additives. I feel like I’m connecting with a long tradition of bakers who have come before me, using the same elements to create something wonderful.
Choosing the Right Flour for Sourdough
The type of flour you use can significantly impact your sourdough. I’ve experimented with various flours, and I’ve found that a combination of all-purpose flour and whole wheat flour works best for me. Whole wheat flour adds flavor and nutrition but can make the bread denser. For a lighter loaf, I often stick to all-purpose flour for the majority. Remember, each flour behaves differently, so don’t be afraid to play around until you find your favorite mix.
Importance of Water Quality
Water may seem like a simple ingredient, but its quality is crucial. I learned this the hard way when I used tap water with a strong chlorine taste. It negatively affected my sourdough’s flavor. If you can, use filtered or bottled water for the best results. The water should be at room temperature, which helps the fermentation process along nicely.
The Role of Salt in Sourdough
Salt is often underestimated, but it’s essential in sourdough. It enhances flavor and controls yeast activity, which is vital for a balanced rise. I used to skip salt thinking it was unnecessary, but I quickly realized it helps to improve the overall taste and texture of the bread. A general rule of thumb is to use about 2% of the flour weight in salt, and I find that to be just right.
Understanding Sourdough Starter
Your sourdough starter is the heart of your bread-making process. It’s a living culture that requires care and attention. I remember the excitement I felt when my starter bubbled for the first time, showing me that it was alive and ready to be used. A healthy starter is crucial for good sourdough, so it’s worth taking the time to nurture it. I always make sure to feed mine regularly and keep it in a warm spot where it can thrive.
Getting Started with Sourdough
How to Make a Sourdough Starter from Scratch
Creating your own sourdough starter is one of the most rewarding parts of the sourdough journey. I remember the first time I decided to make my starter from scratch; it felt like I was embarking on a little science experiment in my kitchen. To start, you only need flour and water. I used equal parts of both (about 100 grams each) in a clean jar. On day one, mix them together until smooth, cover it loosely with a cloth or lid, and let it sit at room temperature. I found it helpful to mark the jar with the date and time, so I could track its progress. It’s amazing to watch it transform over the next few days as wild yeast begins to activate, creating bubbles and a delightful sour aroma!
Maintaining Your Sourdough Starter
Once your starter is bubbling and ready for baking, keeping it alive and healthy becomes your next priority. I’ve learned that a consistent feeding schedule is key. I like to feed mine every 12 hours if I’m keeping it at room temperature. This means discarding half of the starter and adding fresh flour and water. It’s a bit of a ritual for me now, and I actually enjoy it. If you plan on baking less frequently, you can store it in the fridge and feed it once a week. Just remember to bring it back to room temperature and feed it a day before you want to use it!
Feeding Your Starter: Tips and Techniques
Feeding your sourdough starter is where you can really experiment and find what works best for you. I prefer to use a mix of all-purpose and whole wheat flour when I feed mine, as this seems to give it a nice boost of activity. When adding the flour and water, I also like to use a scale for accuracy. I find that measuring by weight ensures consistency, which is crucial for a healthy starter. It’s important to keep the proportions of flour and water equal by weight; this maintains the right hydration level in your starter. After a good feeding, I usually see bubbles forming within a few hours, and that’s the sign that it’s ready to bake!
Easy No-Fail Sourdough Bread Recipe
Step-by-Step Instructions for Beginners
Now that you have your starter up and running, let’s dive into making sourdough bread! I’ve found that following a straightforward recipe keeps things less overwhelming. Start by mixing 500 grams of flour, 350 grams of water, and 100 grams of your active starter in a large bowl. I usually stir it with a wooden spoon until there are no dry bits left. Then, I let it rest for about 30 minutes. This is called autolyse, and it helps with gluten development, making kneading easier later on.
Tips for Measuring Ingredients Accurately
Precision in measuring your ingredients can make a world of difference in baking, especially with sourdough. I highly recommend using a kitchen scale; it’s one of my favorite tools in the kitchen. When I switched from measuring cups to grams, my bread improved significantly. Even slight variations in flour or water can lead to different outcomes. For a successful loaf, I aim for a hydration level of around 70%. This means that for every 100 grams of flour, I’ll use 70 grams of water. Keeping a consistent ratio is essential!
Mixing and Kneading Techniques
After the autolyse, it’s time to combine everything! I add 10 grams of salt to the dough and mix it in with my hands. I find this part to be quite meditative. Once everything is incorporated, I start kneading. I usually do a technique called stretch and fold. I pull one side of the dough up and over itself, give it a quarter turn, and repeat this process for about 5 to 10 minutes. It helps build gluten without the kneading being too labor-intensive. I love the tactile nature of this process—it’s like giving the dough a gentle massage!
First Rise: Bulk Fermentation Explained
After kneading, I place the dough in a lightly greased bowl and cover it with a damp cloth. This is where the magic happens during bulk fermentation. I typically let my dough rise for about 4 to 6 hours at room temperature, depending on the temperature of my kitchen. I like to check it every hour, doing a stretch and fold every 30 minutes during the first couple of hours. Watching the dough grow and change is so satisfying! It’s a reminder of how alive and dynamic sourdough can be.
Shaping Your Sourdough Loaf
Once the dough has doubled in size, it’s shaping time! I gently turn it out onto a floured surface and shape it into a round loaf. I learned the importance of being gentle during this stage to preserve all the air bubbles formed during fermentation. I tuck the edges into the center, flip it over, and then use my hands to create tension on the surface by pulling it against the work surface. It’s a fun, tactile experience that I really enjoy.
Second Rise: Proofing Your Dough
After shaping, I place the loaf into a proofing basket (or a bowl lined with a floured cloth) and cover it again. This second rise usually takes about 1 to 2 hours at room temperature, or you can pop it in the fridge for an overnight cold proof. I have done both, and I find that the cold proof gives the bread a deeper flavor and better texture. Watching it puff up is a joy, and I feel a sense of accomplishment knowing that I’m one step closer to fresh bread!
Baking Your Sourdough Bread
When it’s time to bake, I preheat my oven to 450°F (232°C) with a Dutch oven inside. Once heated, I carefully transfer my dough onto parchment paper, score the top with a sharp knife (this helps control where it expands), and then place it into the hot Dutch oven. The steam created in the sealed pot helps the bread rise, giving it that beautiful crust I love. I bake it covered for about 30 minutes, then remove the lid for an additional 15-20 minutes to achieve a golden, crispy crust.
How to Know When Your Bread is Done
The moment of truth is always exciting! I know my sourdough is done when it has a deep golden-brown crust and sounds hollow when I tap the bottom. I’ve learned that using an instant-read thermometer is also a great way to check; I aim for an internal temperature of around 200°F (93°C) to ensure it’s fully baked. Once it’s out of the oven, I let it cool on a wire rack before slicing—a hard task, but it helps the texture set nicely!
Common Mistakes to Avoid
Overproofing vs. Underproofing
One of the most common pitfalls when making sourdough is getting the proofing time wrong. I’ve had my fair share of disasters, especially with overproofing. When my dough sat for too long, it became slack and lost its structure, resulting in a flat loaf that was disappointing to slice into. On the flip side, underproofing can lead to a dense, heavy bread that just doesn’t rise as it should. I found that the best way to tell if my dough is proofed properly is to do the “poke test.” I gently press my finger into the dough; if it springs back slowly and leaves a slight indentation, it’s ready to go. This simple trick has saved me from many baking blunders!
Using the Wrong Flour Type
Choosing the right flour is crucial, and I learned this the hard way when I decided to experiment with a low-quality flour. The texture and flavor of my loaf suffered, and I was left with a disappointing result. Different flours absorb water differently, and using a flour that doesn’t play well with sourdough can lead to frustration. I recommend sticking to high-quality bread flour or a blend that suits your taste. Whole wheat and rye flours can add depth, but they also require slightly different hydration levels. I’ve found that if I take the time to understand my flours, my sourdough game improves significantly.
Temperature Control Issues
Temperature plays a huge role in sourdough baking, and it took me a while to grasp how much it can affect my bread. I remember a particularly hot summer when my dough rose to the point of being almost unmanageable because my kitchen was too warm. Conversely, during the winter, I noticed that my dough was sluggish, taking forever to rise. After experiencing these extremes, I learned to adjust the environment. I now place my dough in a warm spot in my kitchen and cover it with a damp cloth to maintain humidity. Sometimes, I even use my oven with just the light on to provide a gentle warmth. This little trick has helped me achieve consistent results, regardless of the season!
Neglecting the Starter’s Health
Your sourdough starter is the backbone of your bread, and neglecting its care can have dire consequences. I’ve found that ignoring my starter’s feeding schedule led to sluggish fermentation and failed bread. A healthy starter is active and bubbly, and if it starts to smell off or doesn’t rise well, it’s time to reassess my care routine. I recommend keeping a close eye on it, especially before a baking session. I always make sure to feed it the night before I plan to bake, ensuring it’s at its peak activity when I incorporate it into my dough. This habit has transformed my baking adventures and made all the difference in the quality of my bread.
Storing and Enjoying Sourdough Bread
Best Practices for Storing Sourdough Bread
Once I’ve baked my glorious loaf of sourdough, the next challenge is figuring out how to store it. I’ve tried various methods, and I’ve learned that the best way to keep my bread fresh is to store it in a bread bag or a cotton cloth. This allows the bread to breathe while preventing it from getting stale too quickly. I keep my bread on the counter, away from direct sunlight, for up to three days. If I have leftovers that I won’t eat in that time, I slice the bread and freeze it in a freezer bag. This way, I can enjoy a slice of freshly toasted sourdough anytime I want!
How to Refresh Day-Old Sourdough
There’s nothing quite like the taste of freshly baked bread, but if I find myself with day-old sourdough, I’ve developed a little routine to bring it back to life. I simply preheat my oven to 350°F (175°C) and pop the loaf in for about 10-15 minutes. This helps revive the crust, making it crispy again while warming the inside. I’ve found that this little trick not only breathes new life into the bread but also makes my kitchen smell amazing all over again. It’s a delightful way to enjoy the bread as if it was just baked!
Creative Ways to Use Leftover Sourdough
Sometimes I have leftover sourdough, and rather than letting it go to waste, I love to get creative in the kitchen. One of my favorite ways to use it is to make sourdough croutons. I simply cut the bread into cubes, toss them with olive oil, garlic powder, and herbs, and bake them until golden. They’re perfect for adding a crunchy texture to salads or soups. I also enjoy making French toast with my sourdough. The tangy flavor enhances the dish, making it a delightful breakfast treat. I’ve even experimented with bread pudding, which turned out to be a delicious dessert! The possibilities are endless, and I find joy in using every last crumb of my homemade bread. For a quick meal idea, check out Quick Chicken Fajitas Recipe (Perfect For Busy Nights).
Resources for Sourdough Enthusiasts
Recommended Books on Sourdough Baking
If you’re looking to deepen your sourdough knowledge, I can’t recommend enough the wealth of books available. My personal favorite is “Tartine Bread” by Chad Robertson. It’s packed with detailed instructions and beautiful photographs that inspire me every time I flip through its pages. Another great resource is “The Sourdough School” by Vanessa Kimbell, which offers insightful tips and creative recipes. I often find myself returning to these books whenever I’m in need of inspiration or troubleshooting advice.
Online Communities and Forums
As I dove deeper into the world of sourdough, I discovered a vibrant online community filled with fellow enthusiasts. Platforms like Reddit and Facebook have groups dedicated to sourdough baking, where members share their successes, failures, and tips. I’ve learned so much from these groups, from troubleshooting issues to discovering unique recipes. Joining a community not only provides camaraderie but also keeps me motivated to bake regularly.
Video Tutorials and Cooking Channels
Sometimes, watching someone else create sourdough can be just the inspiration I need. YouTube is full of talented bakers showcasing their techniques and recipes. Channels like “Food Wishes” and “Baker Bettie” offer fantastic tutorials that are both educational and entertaining. I love pausing the videos to take notes and then trying out their techniques in my own kitchen. It’s a fun way to learn and experiment with new ideas!
Frequently Asked Questions
What is sourdough bread?
Sourdough bread is a type of bread made through the fermentation of dough using naturally occurring lactobacilli and yeast. It uses a starter—a blend of flour and water that captures wild yeast from the environment—giving it a unique tangy flavor and chewy texture.
What ingredients do I need to make sourdough bread?
To make sourdough bread, you need flour, water, salt, and your sourdough starter. These are simple, whole ingredients without preservatives or additives.
How do I create a sourdough starter from scratch?
To create a sourdough starter, mix equal parts of flour and water (about 100 grams each) in a clean jar. Cover it loosely and let it sit at room temperature. Over the next few days, wild yeast will activate, creating bubbles and a sour aroma.
What is the importance of water quality in sourdough?
The quality of water is crucial for sourdough bread. Using filtered or bottled water is recommended, as tap water with a strong chlorine taste can negatively affect the bread’s flavor.
How can I tell if my sourdough is proofed properly?
To check if your dough is proofed properly, do the “poke test.” Gently press your finger into the dough; if it springs back slowly and leaves a slight indentation, it’s ready to bake.
What are some common mistakes to avoid when making sourdough?
Common mistakes include overproofing or underproofing the dough, using the wrong type of flour, temperature control issues, and neglecting the health of the sourdough starter. Each of these can lead to unsatisfactory bread results.
How do I store sourdough bread to keep it fresh?
The best way to store sourdough bread is in a bread bag or a cotton cloth, away from direct sunlight, for up to three days. If you have leftovers, slice the bread and freeze it in a freezer bag.
What should I do with day-old sourdough bread?
To refresh day-old sourdough, preheat your oven to 350°F (175°C) and bake the loaf for about 10-15 minutes. This revives the crust and warms the inside, making it enjoyable again.
What are some creative ways to use leftover sourdough?
Leftover sourdough can be used to make croutons, French toast, or bread pudding. These options help prevent waste while allowing you to enjoy the bread in different delicious ways.
Can you recommend any resources for learning more about sourdough baking?
Some recommended resources include “Tartine Bread” by Chad Robertson and “The Sourdough School” by Vanessa Kimbell. Online communities on platforms like Reddit and Facebook, as well as video tutorials on YouTube, can also be helpful for learning and sharing tips.
Read Interesting article: One-Pot Lasagna Soup (All The Flavor, None Of The Work)