
Sheet pan fajitas are a delicious, easy way to enjoy a classic Mexican dish without the fuss. With minimal cleanup and maximum flavor, they’re perfect for busy weeknights or casual gatherings. If you’re looking for more quick meal ideas, check out 30-Minute Meals: A Full Week of Quick & Easy Family Dinners.
What Are Sheet Pan Fajitas?
Definition and Concept
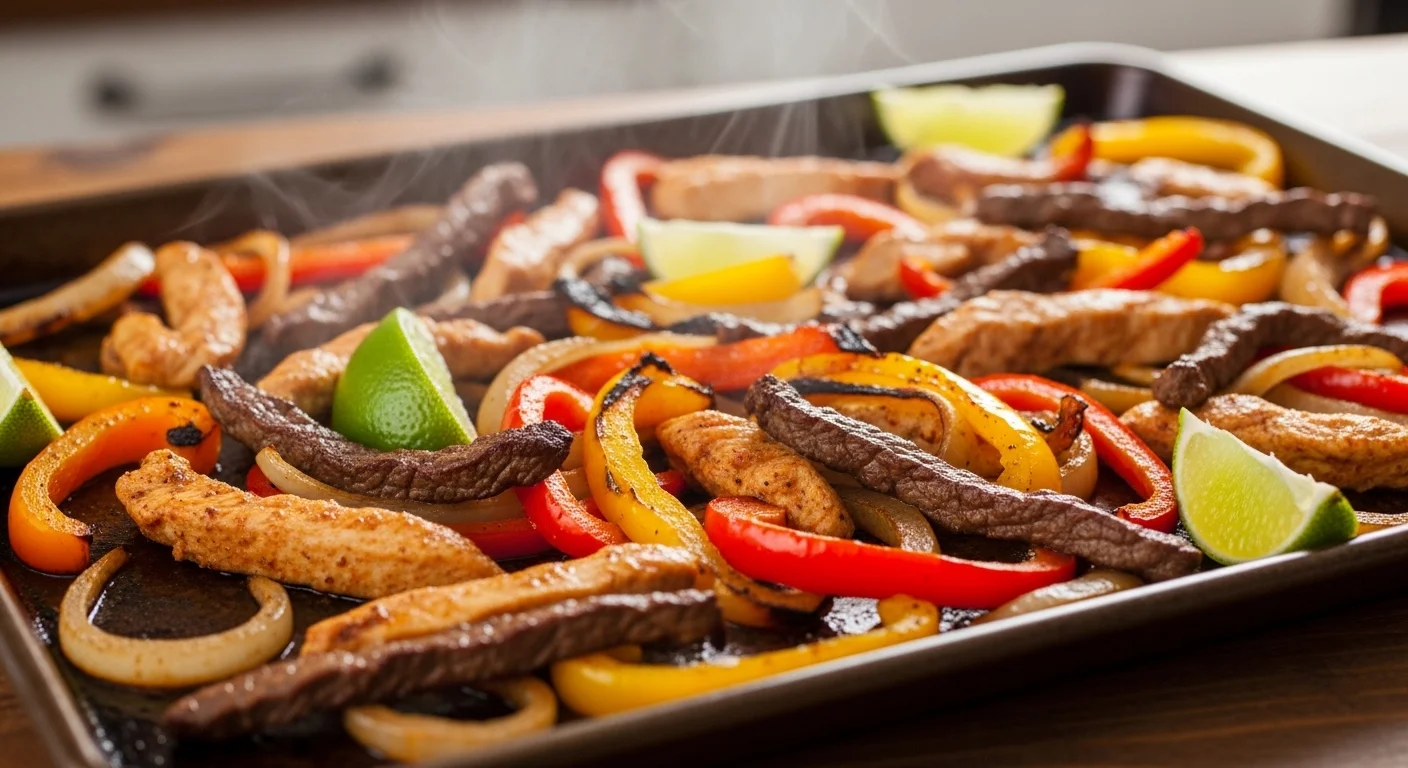
Sheet pan fajitas are a simplified version of traditional fajitas that allows you to cook everything on a single baking sheet. I remember the first time I tried making them; the idea of throwing everything together and letting the oven do the work felt like a game-changer. Instead of grilling meats and sautéing veggies separately, you can toss sliced chicken or beef, bell peppers, and onions on a pan, season them, and bake until tender. The result is a vibrant, flavorful dish that captures the essence of fajitas without the hassle.
Benefits of Using a Sheet Pan
One of the biggest perks of sheet pan fajitas is the convenience they offer. I love how I can prep everything ahead of time and then let the oven do its magic. Here are a few reasons I think using a sheet pan is the way to go:
- Less Cleanup: Since everything cooks on one pan, there’s less to wash afterward. This has been a huge time-saver in my kitchen.
- Even Cooking: The direct heat from the oven allows for even cooking, ensuring the veggies remain crisp while the meat stays juicy.
- Versatility: You can easily customize the ingredients based on what you have on hand or your personal preferences. I’ve experimented with different proteins, vegetables, and spices, and each time, it felt like a new dish!
- Perfect for Meal Prep: Sheet pan fajitas are great for meal prepping. You can make a big batch and enjoy them throughout the week, which I find incredibly helpful during busy times. For more meal prep ideas, check out The Ultimate Budget Meal Plan That Will Save You Hundreds This Month.
Ingredients for Easy Sheet Pan Fajitas
Essential Ingredients
When it comes to making sheet pan fajitas, the ingredients are straightforward and easy to find. Here’s what I typically use:
- Protein: You can go for chicken breast, thighs, or beef (like flank steak or sirloin). I often choose chicken because it cooks faster and is a family favorite.
- Bell Peppers: A mix of colors adds a nice visual appeal. I typically use red, yellow, and green, which not only taste great but also make the dish pop.
- Onion: Sliced red onions add sweetness and flavor. I’ve found that they caramelize beautifully in the oven.
- Olive Oil: A drizzle helps everything roast nicely without sticking.
- Fajita Seasoning: A blend of chili powder, cumin, garlic powder, and paprika is my go-to. You can make your own or buy a pre-made mix.
Optional Ingredients and Variations
One of the great things about fajitas is how flexible they are. I like to experiment with different ingredients based on what I have available. Here are some optional items to consider:
- Other Vegetables: Zucchini, mushrooms, or even corn can add extra flavor and texture.
- Spices: A pinch of cayenne pepper or smoked paprika can give your fajitas an extra kick.
- Marinades: If you want to take it a step further, marinating your protein overnight can intensify the flavor.
Choosing Between Chicken and Beef
For me, the choice between chicken and beef often comes down to mood and occasion. Chicken is lighter and cooks faster, making it perfect for a quick weeknight meal. On the other hand, I find that beef tends to have a richer flavor and can be very satisfying. When I have time to let the beef marinate, I go for it. Both options are delicious, so it really depends on what you’re in the mood for!
Preparing Your Sheet Pan Fajitas
Step-by-Step Preparation Guide
Getting started with sheet pan fajitas is easy. Here’s how I typically prepare them:
- Preheat the Oven: I always start by preheating my oven to 400°F (200°C) to ensure even cooking.
- Slice the Ingredients: I slice the chicken or beef into thin strips and chop the bell peppers and onions into bite-sized pieces. This ensures everything cooks evenly.
- Season Everything: In a large bowl, I toss the meat and veggies with olive oil and fajita seasoning until well coated. This step is crucial for flavor!
- Arrange on the Pan: I spread the mixture evenly on a sheet pan, ensuring the veggies and meat are in a single layer for the best roasting.
- Bake: I pop the pan in the oven and bake for about 20-25 minutes, stirring halfway through. This helps everything cook evenly.
Tips for Marinating Chicken or Beef
If you want to take your fajitas to the next level, marinating your protein can make a big difference. I usually marinate chicken for at least 30 minutes, but if I have more time, I let it sit in the fridge for a few hours or even overnight. For beef, a couple of hours usually does the trick. I mix olive oil, lime juice, and my favorite spices for a simple marinade that really enhances the flavors.
Chopping Vegetables: What to Use
When chopping vegetables for fajitas, I prefer using a sharp knife and a cutting board for safety and efficiency. For me, it’s all about getting those nice, uniform pieces so that everything cooks evenly. I also like to cut my veggies right before cooking to keep them fresh and crisp. If you have a busy schedule, prepping them ahead of time works too—just store them in the fridge in an airtight container.
Cooking Methods for Sheet Pan Fajitas
Baking Instructions
Baking is my favorite method for cooking sheet pan fajitas because it’s so straightforward and yields delicious results. After I’ve followed the preparation steps, I ensure my oven is preheated to 400°F (200°C) for optimal cooking. Once my mixture is spread out on the sheet pan, I bake it for about 20-25 minutes, stirring halfway through to ensure everything cooks evenly and nothing sticks to the pan. I usually keep an eye on it towards the end; the veggies should be tender and slightly caramelized, while the meat should be cooked through. The aroma that fills the kitchen during this time is absolutely mouthwatering! If you want an extra char, you can broil them for the last 2-3 minutes, but be cautious to avoid burning.
Alternative Cooking Methods (e.g., Air Fryer, Grill)
While baking is my go-to, I’ve also enjoyed experimenting with different cooking methods to switch things up. The air fryer is a fantastic option for sheet pan fajitas, especially if I’m cooking for just myself or one other person. The air fryer gives the veggies a nice crispy texture while keeping the meat juicy. I typically set my air fryer to 375°F (190°C) and cook for about 15-20 minutes, shaking the basket halfway through. It’s quick, and the cleanup is even easier since the basket usually only needs a quick wash.
If I’m feeling adventurous or want to enjoy summer vibes, grilling is another great alternative. Just toss your marinated mixture into a grill basket or use skewers for a fun presentation. I love the smoky flavor that grilling adds to the fajitas. The cooking time on the grill varies depending on the heat, but I usually aim for about 10-15 minutes, flipping occasionally for even cooking.
Serving Suggestions
Best Toppings for Fajitas
When it comes to toppings, I think this is where you can really get creative! I love to set up a little fajita bar at the table, allowing everyone to customize their plates. Some of my favorite toppings include:
- Fresh Cilantro: It adds a burst of freshness that complements the flavors perfectly.
- Sour Cream: A dollop of sour cream is a classic choice, adding creaminess to each bite.
- Guacamole: I can’t resist adding guac! The richness balances the spices beautifully.
- Pico de Gallo: Fresh salsa with diced tomatoes, onions, and jalapeños adds a lovely zesty kick.
- Shredded Cheese: A sprinkle of cheese, whether it’s cheddar or a Mexican blend, can make the dish even more indulgent.
Side Dishes to Pair with Fajitas
To round out the meal, I often serve my sheet pan fajitas with some simple side dishes. Some of my go-to options include:
- Mexican Rice: This flavorful rice dish pairs well with the spices in the fajitas and makes the meal feel complete.
- Refried Beans: Creamy refried beans add protein and a comforting element to the plate.
- Elote (Mexican Street Corn): Grilled corn on the cob topped with cheese and spices is always a hit!
- Simple Salad: A fresh green salad with lime vinaigrette offers a refreshing contrast to the warm fajitas.
How to Serve: Tortillas vs. Bowls
When it’s time to serve, I usually find myself at a crossroads: do I go with tortillas or build bowls? It really depends on the mood and the crowd. For a more traditional approach, warm corn or flour tortillas make the perfect vessel for the fajita filling. I love to warm them in a skillet or wrap them in foil and heat them in the oven for a few minutes. On the other hand, if I’m looking for a lighter option or trying to keep things low-carb, serving the fajita mixture over rice or lettuce in a bowl is a satisfying alternative. Either way, it’s fun to get creative with how we serve the fajitas!
Frequently Asked Questions (FAQs)
Can I Make Sheet Pan Fajitas Ahead of Time?
I often find myself in a rush during the week, so meal prepping is a game-changer for me. Yes, you can definitely make sheet pan fajitas ahead of time! I usually prepare all the ingredients—slicing my protein and veggies—and toss them with the seasoning and olive oil. Then, I store them in an airtight container in the fridge. They can last up to 24 hours before cooking. When it’s time to eat, all I have to do is preheat the oven and pop everything on the sheet pan. It saves a ton of time and effort!
How to Store and Reheat Leftovers
After enjoying a delicious meal, I often have some leftovers, and I love that sheet pan fajitas keep well! I let them cool completely and then transfer the fajitas to an airtight container. They can typically last in the fridge for about 3-4 days. When I’m ready to reheat, I simply spread them on a baking sheet and warm them in a preheated oven at 350°F (175°C) for about 10-15 minutes. This helps to maintain that crispy texture. If I’m in a hurry, I’ve also reheated them in the microwave, but I prefer the oven for better results.
Can I Use Other Proteins or Vegetables?
Absolutely! One of the best things about sheet pan fajitas is their versatility. I’ve tried various proteins like shrimp and pork, and each one brings a unique flavor to the dish. If you’re looking for a vegetarian option, black beans or tofu work wonderfully too. As for vegetables, the sky’s the limit! I’ve added asparagus, broccoli, or even sweet potatoes when I want to switch up the flavor profile. The key is to ensure whatever ingredients you choose are cut to similar sizes so they cook evenly.
What Spices Work Best for Fajitas?
Fajita seasoning can really make or break the dish. I believe a good blend should include chili powder, cumin, garlic powder, and paprika, which I mentioned earlier. However, I like to experiment! Sometimes, I’ll add a touch of oregano or even some lime zest for a zesty kick. If I’m feeling adventurous, I might throw in a bit of smoked paprika for that extra depth of flavor. The wonderful part is that you can adjust the spices based on your taste; if you like it spicy, a pinch of cayenne pepper can do wonders!
Tips for Perfecting Your Fajitas
Choosing the Right Pan
The type of pan you use can really impact your fajitas. I prefer using a heavy-duty rimmed baking sheet or a cast-iron skillet. This ensures that the heat distributes evenly, giving me that perfect caramelization on the veggies and meat. If you have a pan with a non-stick surface, that’s even better—everything slides right off once it’s done cooking! Just make sure not to overcrowd the pan, as that can lead to steaming rather than roasting.
How to Achieve the Best Flavor
Flavor is key when it comes to fajitas! I find that marinating the protein really enhances the taste. Even a quick marinade of lime juice, olive oil, and spices can elevate the dish. Additionally, I always make sure to season my veggies well. Sometimes, I’ll add a little extra seasoning before serving to really punch up the flavor. Fresh herbs like cilantro add a lovely finish right before diving in!
Common Mistakes to Avoid
From my experience, there are a few common pitfalls when making sheet pan fajitas. One major mistake is cutting the meat too thick; it can lead to uneven cooking. I always aim for thin strips. Another mistake is not giving enough space on the pan—overcrowding can result in soggy veggies. Lastly, forgetting to toss everything halfway through cooking is another one I’ve been guilty of, which means I don’t get that beautiful caramelization. Keeping these tips in mind has helped me nail my fajitas every time!
Final Thoughts
As I wrap up my thoughts on sheet pan fajitas, I can’t help but feel excited about this dish’s versatility and ease. It’s become a staple in my kitchen, and I genuinely believe it can be a game-changer for busy families or anyone looking to whip up a satisfying meal without spending hours in the kitchen. The ability to customize the ingredients is fantastic; I often find myself trying out new combinations based on seasonal vegetables or whatever I have left in the fridge. It makes cooking feel fresh and fun every time!
The joy of gathering around a table with family or friends, assembling our fajitas just the way we like them, is a tradition I cherish. It’s not just about the food; it’s about the experience and the memories we create together. I remember one night, we decided to have a fajita night with friends. We set up a little bar with all the toppings, and everyone got creative with their combinations. The laughter and camaraderie made the meal all the more enjoyable.
Whether you’re cooking for yourself, your family, or hosting a gathering, sheet pan fajitas can easily adapt to any occasion. Plus, the leftovers are just as tasty, making it a dish that keeps on giving. I truly believe that these fajitas can help bring people together, whether it’s a casual weeknight dinner or a festive gathering. So why not give them a try? I’d love to hear how they turn out for you!
In the end, cooking should be fun, approachable, and full of flavor. Sheet pan fajitas are all of that and more, making them a perfect addition to anyone’s recipe collection. Enjoy the process, and happy cooking!