
If you’re craving pizza but want to make it a bit special, I’ve got just the thing for you: easy sourdough discard pizza dough! This delightful recipe not only helps you reduce waste but also turns a regular pizza night into something extraordinary. If you’re interested in more ways to utilize your sourdough, check out How To Make A Sourdough Starter From Scratch (7 Days).
Understanding Sourdough Discard
What is Sourdough Discard?
Sourdough discard is the portion of sourdough starter that you remove before feeding it with fresh flour and water. This practice helps maintain a healthy starter and prevents it from growing uncontrollably. It can feel a bit wasteful to just toss this mixture, especially when it holds so much potential for flavor and texture in various recipes. In my experience, using sourdough discard opens up a world of culinary possibilities, and pizza is one of my favorites. The best part? It requires minimal effort and yields delicious results!
Benefits of Using Sourdough Discard in Cooking
There are several reasons to embrace sourdough discard in your cooking. First, it’s a fantastic way to reduce food waste. Instead of throwing away that discarded starter, you can incorporate it into your meals. Second, using sourdough discard adds a unique tangy flavor to your dishes, which can elevate the taste profile of your pizza dough. The natural fermentation process enhances the dough’s complexity, making it more interesting and enjoyable.
Additionally, sourdough discard contains beneficial bacteria and yeasts that contribute to a healthier gut. By using it in recipes, you’re not only enhancing the flavor but also adding nutrients to your meal. I remember the first time I made pizza dough with my sourdough discard – it was a game changer! The crust was crisp and had a delightful chew, and everyone at the table could taste the difference. If you’re looking for another way to use your sourdough discard, try making Easy Sourdough Discard Crepes (A 10-Minute Recipe).
How to Store Sourdough Discard
Proper storage of sourdough discard is essential for maintaining its quality. I typically keep mine in an airtight container in the refrigerator, where it can last up to two weeks. Just remember to give it a good stir before using, as the ingredients may separate a bit. If you find yourself with more discard than you can use, you can also freeze it in small portions. I like to use ice cube trays for this purpose – it makes it easy to grab just the right amount for future recipes.
When freezing, I recommend labeling the container with the date and the amount of discard inside. This way, you can keep track of how long it’s been stored. When you’re ready to use it, simply thaw it in the refrigerator overnight or at room temperature for a couple of hours. This way, you’re always prepared for a spontaneous pizza night!
Ingredients for Easy Sourdough Discard Pizza Dough
Essential Ingredients Overview
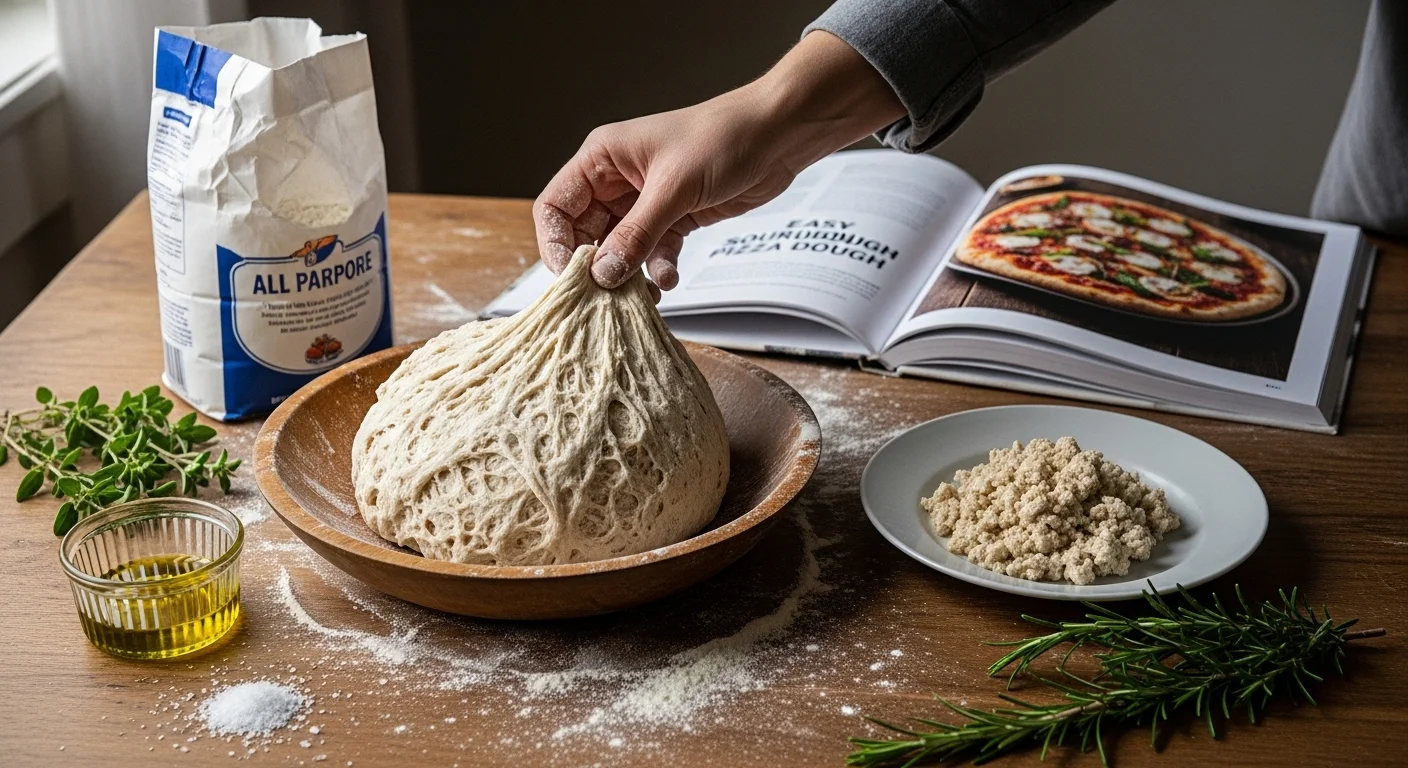
Making sourdough discard pizza dough is incredibly simple, and the ingredients are likely ones you already have in your pantry. Here’s what you’ll need:
- 1 cup sourdough discard
- 2 cups all-purpose flour (more for dusting)
- 1 teaspoon salt
- 1 teaspoon sugar (optional, but adds a nice touch)
- 1 tablespoon olive oil
- Warm water (as needed)
When I first started making this dough, I was surprised at how straightforward it was. With just a few staple ingredients, I could whip up a delicious crust in no time!
Choosing the Right Flour
The type of flour you choose can impact the texture and flavor of your pizza dough. While all-purpose flour works perfectly, I’ve also experimented with bread flour for a chewier crust. If you like a bit of whole grain flavor, you can mix in some whole wheat flour. Just remember that the hydration levels may change, so you might need to adjust the water content slightly. I’ve found that playing around with different flours leads to some delightful surprises, and it’s all about personal preference!
Additional Flavor Enhancers (Herbs, Garlic, etc.)
To take your sourdough pizza dough to the next level, consider adding some flavor enhancers. Fresh or dried herbs like oregano, basil, or thyme can add a lovely aroma and taste. I often toss in a bit of garlic powder or minced garlic for an extra kick. You could even experiment with different spices, such as crushed red pepper flakes or Italian seasoning. I love customizing my dough to reflect the flavor profile I’m aiming for with my pizza toppings!
Step-by-Step Guide to Making Sourdough Discard Pizza Dough
Preparing Your Ingredients
Before diving into making the dough, I always find it helpful to gather all my ingredients and tools. It makes the process smoother and less chaotic. So, let’s make sure we have everything on hand: a mixing bowl, measuring cups, a wooden spoon or spatula, and a clean surface for kneading the dough. I also like to keep a little extra flour nearby for dusting. Once everything is laid out, I feel more organized and excited to start the pizza-making adventure!
Mixing the Dough
Now that my ingredients are prepped, I begin by combining the sourdough discard with the olive oil and warm water in a mixing bowl. I usually add the water gradually, which helps me control the dough’s hydration level. After mixing these wet ingredients, I sprinkle the salt and sugar, followed by the flour. I personally like to start with one cup of flour, mixing it in gradually until everything comes together. The dough will be sticky at first, but that’s perfectly normal. I remember feeling a bit apprehensive the first time I tried this, but I quickly learned that a little stickiness is okay!
Kneading Techniques for Optimal Texture
Once the dough starts to form, it’s time to knead! I like to turn it out onto a lightly floured surface. Kneading is one of those satisfying steps in the process. It’s almost like therapy for me. I usually knead for about 8 to 10 minutes, working the dough until it becomes smooth and elastic. A good tip I picked up is to use the heel of my hand to push the dough away from me and then fold it back over itself. This technique helps develop the gluten structure, which is crucial for that chewy pizza crust we all love. If I find the dough is sticking too much, I lightly dust my hands or the surface with flour.
Resting and Fermentation Process
After kneading, I shape the dough into a ball and place it in a lightly oiled bowl, covering it with a damp cloth or plastic wrap. This step is essential! I usually let it rest for at least an hour at room temperature. This resting period allows the dough to ferment and rise a bit, developing flavor and texture. Sometimes, I even let it ferment longer – up to three hours – if I have the time. I’ve noticed that the longer fermentation really enhances the sourness and complexity of the flavor. Plus, it gives me a chance to prepare my toppings or simply relax while the dough does its magic!
Shaping and Baking Your Pizza
How to Shape the Pizza Dough
Once my dough has rested and puffed up a bit, it’s time to shape it into a pizza! I start by gently pressing it down to release some of the air. I usually divide the dough into two portions for two medium-sized pizzas. I take one portion and place it on a floured surface. Using my fingers, I gently stretch and press the dough outwards, creating a nice round shape. I like to keep the edges slightly thicker to form a crust, giving it that perfect puffy edge when baked. If I find it resistant, I let it rest for a few more minutes before trying again. Patience is key here!
Best Baking Methods (Oven vs. Pizza Stone)
Now, let’s talk about baking! I’ve experimented with various methods, and honestly, both the oven and a pizza stone have their perks. If I’m using a pizza stone, I preheat the oven to around 500°F (or as high as it goes) for at least 30 minutes before baking. The stone retains heat beautifully, giving the crust a lovely crispness. On the other hand, if I’m using a regular baking sheet, I preheat it as well and sprinkle some cornmeal or flour on the surface to prevent sticking. Both methods yield great results, but the pizza stone definitely creates that pizzeria-style crust that I crave!
Temperature and Baking Time Recommendations
When it’s time to bake, I keep a close eye on my pizza. If I’m using a pizza stone, I usually bake it for about 8 to 12 minutes. The key is to look for that golden-brown color and bubbly cheese on top. If I’m using a baking sheet, it might take a bit longer, around 12 to 15 minutes. I’ve learned that every oven is different, so I always check a couple of minutes early. Pulling that pizza out and seeing it beautifully baked never fails to make my day! The aroma wafting through the kitchen is the cherry on top, making the anticipation even sweeter.
Pizza Topping Ideas
Classic Toppings (Pepperoni, Margherita, etc.)
When it comes to pizza toppings, the possibilities are endless! I love starting with the classics. A simple Margherita with fresh mozzarella, basil, and a drizzle of olive oil is always a hit. For those who enjoy a bit of spice, pepperoni is a beloved choice in our house. I remember the first time I decided to make a pepperoni pizza; I was so pleased with how the edges of the pepperoni curled up and got crispy. It made for a delightful contrast against the gooey cheese!
Vegetarian Options
For anyone looking for vegetarian options, I have a few favorites! I often load my pizza with vibrant veggies like bell peppers, mushrooms, and red onions. One of my go-to combinations is roasted zucchini and artichokes, topped with some feta cheese. Every bite feels fresh and light, and it’s a great way to get my veggie intake for the day. I also love adding arugula on top after baking for that peppery finish!
Creative and Unique Topping Combinations
If you’re feeling adventurous, I highly recommend trying some creative toppings. One of my favorite combinations is BBQ chicken with red onions and cilantro. The sweetness of the BBQ sauce pairs perfectly with the savory chicken. Another fun idea is a breakfast pizza with scrambled eggs, bacon, and a sprinkle of cheese, making it great for brunch gatherings. I’ve even done dessert pizzas, using Nutella and strawberries, which are always a treat after a savory meal. The key is to have fun and experiment with whatever flavors excite you! You might even want to try making Fudgy Sourdough Discard Brownies (You Won’t Taste The Tang) for dessert!
Frequently Asked Questions (FAQs)
Can I use any type of sourdough discard?
Absolutely! You can use any type of sourdough discard you have. Whether it’s from a whole wheat starter, a rye starter, or the classic white flour starter, it all works. The flavor may vary slightly depending on the type of flour used in your starter, but that’s part of the fun! I remember using my whole wheat discard once, and it gave the dough a lovely depth of flavor that everyone enjoyed. If you’re experimenting, just be aware that the hydration levels may differ, so you might need to tweak the amount of water or flour you use.
How long can I store the pizza dough?
After making your pizza dough, you can store it in the refrigerator for up to three days. Just make sure it’s in an airtight container. I’ve often found that the dough gets even better after resting in the fridge for a day or two, as the flavors continue to develop. If you need to keep it longer, you can freeze it. I typically wrap the dough tightly in plastic wrap and then place it in a freezer-safe bag. When you’re ready to use it, just thaw it in the refrigerator overnight. It’s like having a little pizza surprise waiting for you!
Can I freeze the pizza dough?
Yes, you can definitely freeze the pizza dough! I find this to be a great time-saver for those spontaneous pizza nights. After kneading your dough and allowing it to rise, simply shape it into a ball, wrap it tightly in plastic wrap, and place it in a freezer-safe bag. When you’re ready to make pizza, remove it from the freezer and let it thaw in the refrigerator overnight. Make sure to allow it some time to come to room temperature before shaping it into your pizza. I’ve done this multiple times, and it always turns out delicious!
What to do if the dough is too sticky?
If your dough is too sticky, don’t worry; it happens to the best of us! First, try dusting your work surface and your hands with a little extra flour while you knead. I’ve also found that letting the dough rest for a few minutes can help, as it allows the flour to absorb some of the moisture. If it remains sticky after kneading, you can add a small amount of flour, about a tablespoon at a time, until you reach the right consistency. Just be careful not to add too much flour, as it can make the dough tough. Trust me, I’ve learned this lesson the hard way!
Tips for a Successful Pizza Night
Preparing Ahead of Time
One of the best tips I can share is to prepare as much as you can ahead of time. If you plan on making pizza for dinner, consider making the dough earlier in the day or even the night before. Letting it rest in the fridge not only enhances the flavor but also saves you time when it’s pizza-making time. I also like to prep my toppings ahead of time, chopping vegetables and cooking any proteins in advance. This way, when it comes time to assemble the pizzas, everything is ready to go, making the process smooth and enjoyable!
Setting Up a Pizza Making Station
Creating a designated pizza-making station can make the experience even more fun! I like to lay out all my ingredients and tools on the kitchen counter, including the dough, sauces, cheeses, and toppings. I even set up a small assembly line so everyone can get involved. It turns into a family activity where everyone can customize their own pizza. I’ve noticed that when my kids get to choose their toppings, they’re way more excited to eat what they create. Plus, it’s a great way to bond and share some laughs while we cook together!
Pairing Drinks with Your Homemade Pizza
Don’t forget about drinks! Pairing a delicious beverage with your homemade pizza can elevate the whole experience. I often enjoy a nice glass of red wine with my pizza, especially with those classic tomato-based toppings. If you’re looking for something non-alcoholic, a sparkling water with a splash of lemon or a homemade lemonade is refreshing and delightful. I’ve even made a fun mocktail with some basil-infused syrup and club soda, which paired nicely with my veggie pizza. The right drink can really complete the meal and make the evening feel special!
Frequently Asked Questions
What is sourdough discard?
Sourdough discard is the portion of sourdough starter that you remove before feeding it with fresh flour and water. This practice helps maintain a healthy starter and prevents it from growing uncontrollably.
What are the benefits of using sourdough discard in cooking?
Using sourdough discard helps reduce food waste, adds a unique tangy flavor to dishes, enhances the complexity of the dough, and contains beneficial bacteria and yeasts that contribute to a healthier gut.
How should I store sourdough discard?
Sourdough discard should be stored in an airtight container in the refrigerator, where it can last up to two weeks. It can also be frozen in small portions using ice cube trays.
What ingredients do I need to make sourdough discard pizza dough?
You will need 1 cup sourdough discard, 2 cups all-purpose flour (more for dusting), 1 teaspoon salt, 1 teaspoon sugar (optional), 1 tablespoon olive oil, and warm water as needed.
Can I use different types of flour for pizza dough?
Yes, you can use different types of flour such as bread flour for a chewier crust or mix in whole wheat flour for a bit of whole grain flavor. Just be mindful that hydration levels may change and you might need to adjust the water content.
How do I knead the pizza dough for optimal texture?
Knead the dough on a lightly floured surface for about 8 to 10 minutes until it becomes smooth and elastic. Use the heel of your hand to push the dough away from you and fold it back over itself to develop the gluten structure.
How long should I let the dough rest and ferment?
After kneading, let the dough rest in a lightly oiled bowl covered with a damp cloth or plastic wrap for at least an hour at room temperature. A longer fermentation period, up to three hours, can enhance the flavor.
Can I freeze the pizza dough?
Yes, you can freeze the pizza dough. After allowing it to rise, shape it into a ball, wrap it tightly in plastic wrap, and place it in a freezer-safe bag. Thaw it in the refrigerator overnight when you’re ready to use it.
What should I do if the dough is too sticky?
If the dough is too sticky, dust your work surface and hands with extra flour while kneading. Allowing the dough to rest for a few minutes can also help. If needed, add a small amount of flour gradually until the right consistency is reached.
What are some classic and vegetarian pizza topping ideas?
Classic toppings include Margherita with fresh mozzarella and pepperoni. For vegetarian options, consider vibrant veggies like bell peppers, mushrooms, and red onions, or combinations like roasted zucchini and artichokes topped with feta cheese.