
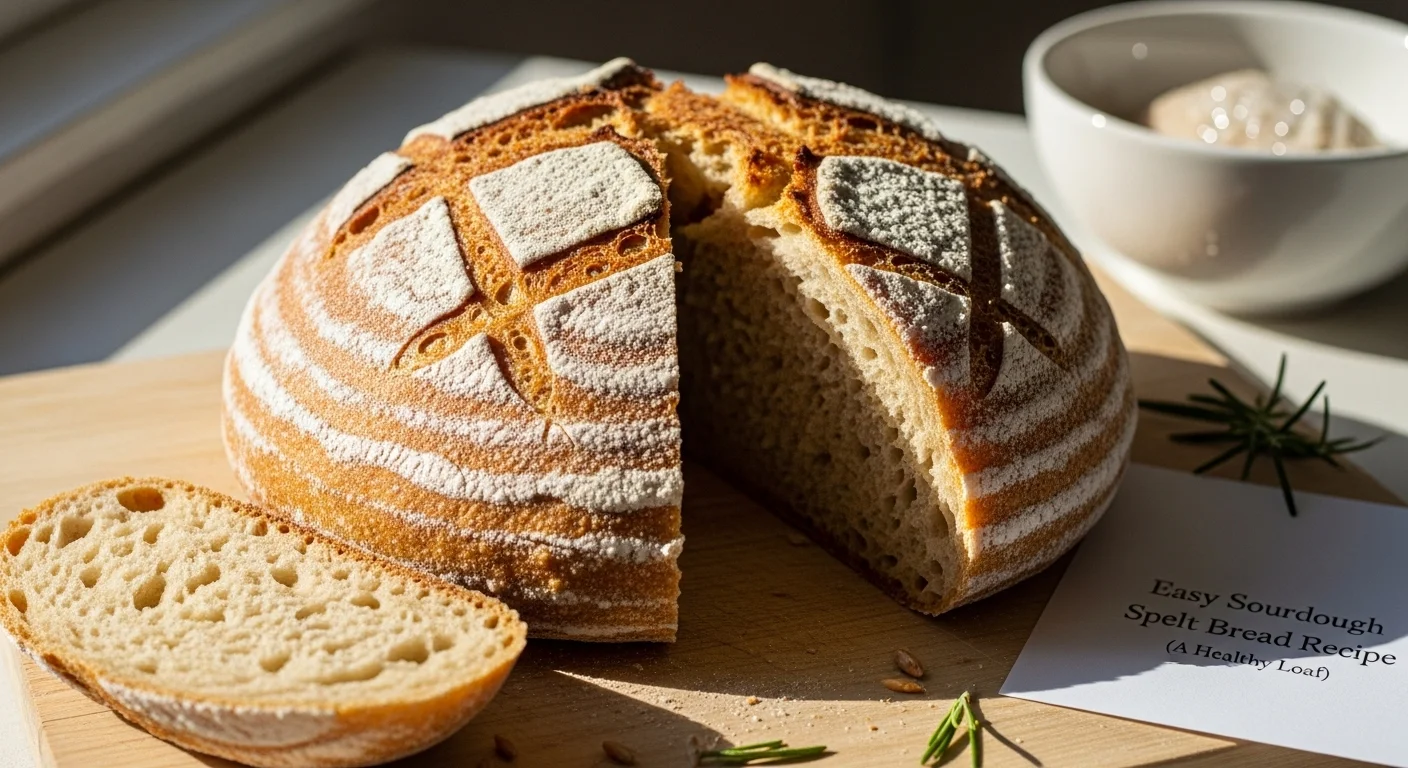
If you’re looking for a delicious and healthy bread option, you’ve come to the right place! This easy sourdough spelt bread recipe will not only satisfy your cravings but also nourish your body with wholesome ingredients. Read Interesting article: The Best Spelt Sourdough Bread (A Healthy, Nutty Loaf)
Understanding Sourdough Bread
What is Sourdough?
Sourdough bread is a unique type of bread that relies on wild yeast and bacteria for fermentation. Unlike commercial bread, which often uses instant yeast, sourdough is made by cultivating a starter—a mixture of flour and water that captures the natural yeast and bacteria from the environment. I remember the first time I made my sourdough starter; it felt like magic as it bubbled and grew over the days. The fermentation process gives sourdough its characteristic tangy flavor and chewy texture, which I absolutely love.
The Health Benefits of Sourdough
One of the things that drew me to sourdough bread is its numerous health benefits. For starters, sourdough is easier to digest compared to regular bread. The fermentation process breaks down gluten and phytic acid, making nutrients more available to our bodies. I’ve noticed that I feel less bloated after enjoying a slice of sourdough compared to other breads. Additionally, sourdough has a lower glycemic index, which means it won’t spike your blood sugar as quickly. This makes it a great option for those of us looking to maintain steady energy levels throughout the day.
Another bonus? Sourdough is rich in prebiotics, which are beneficial for gut health. My journey into baking sourdough has not only been delicious but also educational as I learned about how the gut microbiome plays a crucial role in overall health. I truly believe that nourishing our bodies with wholesome foods like sourdough can lead to a happier, healthier life. Read Interesting article: What’s The Best Sourdough English Muffin Recipe? This One.
Why Choose Spelt Flour?
Now, let’s talk about spelt flour. I discovered spelt flour during my quest for healthier baking options, and it has since become a staple in my kitchen. Spelt is an ancient grain that is closely related to wheat but has a slightly nuttier flavor and a lighter texture. One of the main reasons I prefer spelt flour is its nutritional profile. It’s higher in protein and fiber compared to regular all-purpose flour, which helps keep me feeling full longer.
Furthermore, spelt contains a unique form of gluten that some people find easier to digest. Although it’s not gluten-free, many who have mild sensitivities to wheat can tolerate spelt better. When I bake with spelt, I love how it adds depth and character to my bread. Plus, it gives my sourdough a beautiful golden color that’s simply appetizing.
Using spelt flour in my sourdough bread has not only enhanced the flavor but also provided a healthier alternative for my family and me. Whether you’re new to baking or a seasoned pro, incorporating spelt flour into your sourdough recipe can elevate your baking game while offering a nutritious option.
Ingredients for Easy Sourdough Spelt Bread
Essential Ingredients
Now that we’ve explored the amazing benefits of sourdough and spelt flour, let’s dive into the ingredients you’ll need for this easy sourdough spelt bread. Here’s a simple list:
- 1 cup active sourdough starter
- 2 cups warm water (about 110°F)
- 4 cups spelt flour
- 1 teaspoon salt
These ingredients are simple but powerful. My sourdough starter is the heart of the bread, providing the fermentation that gives it that delightful tang. The warm water helps activate the yeast in the starter, ensuring a great rise. Of course, the spelt flour is the star of the show, while salt enhances the flavor and helps strengthen the dough.
Optional Ingredients for Flavor Variations
If you’re feeling adventurous, there are plenty of optional ingredients you can add to enhance your sourdough spelt bread. Some of my favorites include:
- Seeds (like sunflower, pumpkin, or sesame) for added crunch
- Herbs (like rosemary or thyme) for a savory twist
- Dried fruits (like cranberries or raisins) for a hint of sweetness
- Nuts (like walnuts or pecans) for extra texture
Experimenting with different flavors has been one of the most enjoyable parts of my sourdough journey. I remember making a loaf with rosemary and sea salt, and it was a hit in my home!
Where to Find Quality Spelt Flour
Finding good-quality spelt flour is essential for successful baking. I usually check my local health food store or farmers’ market for freshly milled spelt flour. Many grocery stores carry it in the organic section, but I’ve found that local sources often offer better quality. Online retailers are also a great option if you want to explore different brands. I recommend looking for flour that is labeled as “whole grain” for the most nutritional benefits.
Now that you have a good understanding of sourdough bread, its health benefits, and the ingredients you need, you’re well on your way to baking a delicious sourdough spelt bread that will impress yourself and your loved ones. Let’s get those baking tools ready and dive into the equipment we’ll need!
Equipment Needed
Baking Tools and Utensils
Before you dive into baking, it’s important to gather the right tools. I’ve learned that having the right equipment makes the entire process smoother and more enjoyable. Here’s a list of the essential baking tools you’ll need for making sourdough spelt bread:
- Mixing Bowls: I recommend using a large mixing bowl for combining your ingredients, ideally one that is easy to clean.
- Dough Scraper: This handy tool helps in handling and shaping the dough. It’s become one of my favorite tools in the kitchen!
- Kitchen Scale: Weighing your ingredients ensures accuracy, especially with flour. I found using a scale really improves the consistency of my bread.
- Proofing Basket: Also known as a banneton, this helps shape the dough and supports it during the second rise. I love how it leaves a beautiful pattern on the crust!
- Sharp Knife or Razor Blade: For scoring the bread before baking—this is where you can get creative with designs!
- Oven Mitts: Safety first! Protecting my hands when handling hot items is a must.
- Cooling Rack: Once the bread is done baking, allowing it to cool properly is essential for the best texture.
Having these tools on hand made my sourdough experience enjoyable. I remember the first time I used a dough scraper—it felt like I was part of a cool baking club!
Choosing the Right Baking Container
The baking container you choose can greatly affect the outcome of your bread. I’ve experimented with different options, and here are my recommendations:
- Dutch Oven: This is my go-to choice for baking sourdough. It creates a steamy environment that helps develop a crusty exterior. Plus, I love how evenly it heats!
- Baking Stone: If you prefer a crispier crust, a baking stone is a great option. It retains heat well, providing a nice oven spring.
- Loaf Pan: Using a standard loaf pan can yield a more uniform shape. I’ve found it’s a good choice for everyday loaves.
When selecting a container, consider what suits your baking style best. I remember my first time using a Dutch oven, and the result was just stunning—a golden, crusty loaf that smelled incredible!
Maintaining Your Sourdough Starter
Your sourdough starter is like a pet—it requires care and attention. In my experience, keeping it healthy and active is crucial for great bread. Here’s how I maintain mine:
- Feeding Schedule: I typically feed my starter once a week if it’s in the fridge. If I’m baking frequently, I keep it at room temperature and feed it daily. It’s amazing to see it bubble and grow!
- Flour and Water Ratios: I use a 1:1:1 ratio of starter, flour, and water when feeding. This keeps the starter strong and ready for baking.
- Storage: If I’m not using my starter often, I can store it in the fridge. Just make sure to take it out for a couple of feedings before baking day to wake it up!
- Signs of Health: I look for bubbles and a pleasant tangy smell to know my starter is ready to go. If it’s not bubbly, I might need to give it a few extra feedings.
Taking care of my sourdough starter has been one of the most rewarding parts of my baking journey. I love the connection I feel to the process as I nurture it, and it feels like having a little piece of magic in my kitchen.
Step-by-Step Recipe for Easy Sourdough Spelt Bread
Preparing the Sourdough Starter
Getting your sourdough starter ready is the first step in making this delicious bread. I always make sure my starter is active and bubbly, as this guarantees a good rise in my loaf. If you’ve been feeding your starter regularly, it should be ready to use. Just remember to give it a good stir before measuring out one cup for the recipe. I always love the smell of my starter, it’s like a little reminder of all the love and effort I’ve put into nurturing it!
Mixing the Ingredients
Once your starter is prepped, it’s time to mix the ingredients. In a large mixing bowl, combine the active sourdough starter with the warm water. I like to use my whisk to break up any clumps of starter. Then, I gradually add in the spelt flour and salt. I’ve found that using my hands to mix everything together is the best way to get a feel for the dough. It’s sticky at first, but don’t worry, it will come together as we progress!
Kneading the Dough
Kneading is where the magic happens! I typically turn the dough out onto a lightly floured surface and begin kneading it by folding and pushing it with my palms. This process helps develop the gluten structure, giving the bread its lovely chewy texture. I knead for about 8-10 minutes, or until the dough is smooth and elastic. If it feels too sticky, I sprinkle a little more flour on the surface. I remember the first time I kneaded dough; it felt so satisfying to see it transform under my hands!
First Rise: Bulk Fermentation
After kneading, I shape the dough into a ball and place it in a lightly greased bowl, covering it with a clean kitchen towel or plastic wrap. This is what we call the bulk fermentation stage. I usually let it rise for about 4-6 hours at room temperature. You can tell it’s ready when it has doubled in size and feels puffy. I often take a peek at it throughout the day, and it’s always exciting to see how much it has risen!
Shaping the Dough
Once the dough has completed its first rise, it’s time to shape it. I gently punch it down to release the air, then turn it out onto a floured surface. I shape it into a round or oval loaf, depending on what I’m in the mood for. To shape, I pull the edges of the dough toward the center and flip it over so the seam is on the bottom. I then use my hands to create tension on the surface by gently rotating the dough on the counter. I love this part because it feels like I’m crafting something special!
Second Rise: Proofing
After shaping, I place the dough into the proofing basket, seam side up, and cover it again. This second rise typically takes about 1-2 hours, depending on the temperature of my kitchen. I’ve learned to be patient during this stage. Sometimes I even take a break and enjoy a cup of tea while I wait. When the dough has puffed up and holds a slight indent when I poke it, I know it’s ready for baking.
Baking the Bread
Now comes the moment of truth! I preheat my oven to 450°F (230°C) and place my Dutch oven inside to heat up as well. This step is key for achieving that perfect crust. Once preheated, I carefully remove the Dutch oven (watch out—it’s hot!). I then gently flip the dough out of the proofing basket and onto a piece of parchment paper for easy transfer. Scoring the top with a sharp knife or razor blade is my favorite part; it allows the bread to expand beautifully while baking. I place the dough into the hot Dutch oven, cover it, and bake for about 30 minutes. The anticipation builds as the wonderful aroma fills my kitchen!
Cooling and Storing the Bread
After 30 minutes, I remove the lid and let it bake for an additional 15-20 minutes until it’s golden brown and sounds hollow when tapped. I’ve found that letting the bread cool on a wire rack is crucial for achieving the right texture. As hard as it is to wait, I usually let it cool for at least an hour before slicing into it. The first slice is always a moment of pure joy—there’s nothing quite like the taste of freshly baked sourdough spelt bread! When it comes to storing, I like to wrap it in a clean kitchen towel or paper bag to keep it fresh. If I have leftovers, I usually freeze some for later. I love knowing I have a delicious treat waiting for me in the freezer! Read Interesting article: Beautiful Sourdough Fougasse Recipe (An Artistic Loaf)
Tips for Perfecting Your Sourdough Spelt Bread
Common Mistakes to Avoid
As I dove deeper into the world of sourdough spelt bread, I stumbled upon a few common mistakes that can really throw off your baking adventure. One of the biggest pitfalls I’ve encountered is not paying attention to the timing of the rises. I’ve had days where I got too caught up in other tasks and let my dough sit too long, resulting in over-proofed bread. The texture can turn out off, and you might lose that lovely rise. Trust me, it’s better to check on your dough regularly and keep an eye on its volume rather than relying solely on the clock.
Another mistake I’ve made is neglecting to properly measure my flour. It’s easy to scoop directly from the bag and end up with too much flour, which can lead to a dry loaf. I learned that fluffing the flour before scooping it into the measuring cup can help. It’s a small change, but it has made a noticeable difference in my bread. Remember, baking is a science, and precision matters!
Understanding Dough Consistency
Dough consistency can be a bit tricky, especially with spelt flour, which behaves differently than regular all-purpose flour. In my experience, spelt dough tends to be stickier, so it’s important to adjust your expectations. If the dough feels too wet, I’ve found that adding a little extra flour gradually can help. On the other hand, if the dough feels too dry, a splash of water can work wonders. Getting a feel for the dough is something that develops over time, so don’t hesitate to trust your instincts!
Adjusting for Humidity and Temperature
Humidity and temperature can significantly impact how your dough behaves. I’ve noticed that on humid days, my dough rises faster and can become overly sticky. On those days, I’ll often reduce the amount of water slightly or add a touch more flour. Conversely, in dry conditions, I might need to increase the water to achieve the right consistency. I recommend keeping a journal of your baking experiments—it’s a great way to track what works best in different conditions! It’s empowering to understand how the environment affects your bread.
Serving Suggestions and Pairings
Best Toppings for Sourdough Spelt Bread
The moment I slice into my sourdough spelt bread, I’m already dreaming of the toppings. One of my all-time favorite combinations is avocado and a sprinkle of sea salt. The creaminess of the avocado complements the chewy texture of the bread beautifully. I’ve also enjoyed spreading some homemade hummus and topping it with fresh veggies for a light lunch. On cozy evenings, I love slathering on butter and a drizzle of honey—it’s a simple yet delicious treat.
Delicious Sandwich Ideas
When it comes to sandwiches, the possibilities are endless! I frequently whip up a classic turkey and cheese sandwich, but I’ve also ventured into gourmet territory with roasted veggies, pesto, and goat cheese. For a hearty meal, a grilled cheese with sharp cheddar and sliced tomatoes never fails to satisfy. I’ve even made a breakfast sandwich with eggs and spinach, all tucked between two slices of my fresh bread. It’s a fun way to get creative and tailor the flavors to my mood!
Complementary Side Dishes
Sourdough spelt bread pairs wonderfully with a variety of side dishes. I find that serving it alongside a fresh salad brings a nice balance to the meal. A bowl of hearty soup is another favorite pairing; the crusty bread is perfect for dipping! I also enjoy serving it with a charcuterie board—cheeses, meats, olives, and nuts all complement the flavors of the bread. It’s a delightful way to impress guests or simply enjoy a cozy meal at home!
Frequently Asked Questions (FAQs)
Can I Use Regular Flour Instead of Spelt?
Yes, you can certainly use regular flour in place of spelt flour. However, keep in mind that the flavor and texture of the bread may change. Spelt gives a nuttier taste and a slightly different crumb. If you’re looking for a healthier option, I recommend giving spelt a try!
How Long Does Sourdough Spelt Bread Last?
When stored properly, sourdough spelt bread can last for about 3-5 days at room temperature. I like to keep it wrapped in a clean kitchen towel or paper bag to maintain its crust. If you want to keep it longer, freezing is a great option!
Can I Freeze Sourdough Spelt Bread?
Absolutely! Freezing sourdough spelt bread is an excellent way to preserve its freshness. I usually slice the bread before freezing it, so I can grab a piece whenever I need it. Just make sure to wrap it well in plastic wrap or a freezer bag.
How Do I Know When the Bread is Done Baking?
The best way to determine if your bread is done is to tap the bottom of the loaf; if it sounds hollow, it’s ready! I also like to check for a deep golden-brown crust. If you’re unsure, you can always use an instant-read thermometer—an internal temperature of about 200°F (93°C) indicates that it’s done.
Final Thoughts
Baking sourdough spelt bread has been a rewarding journey for me. Each step—from nurturing my starter to savoring the first slice—has filled my kitchen with joy and delicious aromas. I hope you find as much satisfaction in your baking adventures as I have. Remember, it’s not just about the bread but also the experiences and love that go into every loaf. So, roll up your sleeves, trust the process, and enjoy the magic of baking! You’ve got this!
Frequently Asked Questions
What is sourdough bread?
Sourdough bread is a unique type of bread that relies on wild yeast and bacteria for fermentation. It is made by cultivating a starter—a mixture of flour and water that captures natural yeast and bacteria from the environment, giving sourdough its characteristic tangy flavor and chewy texture.
What are the health benefits of sourdough bread?
Sourdough bread is easier to digest than regular bread, as the fermentation process breaks down gluten and phytic acid, making nutrients more available. It has a lower glycemic index, which helps maintain steady energy levels and is rich in prebiotics that benefit gut health.
Why should I choose spelt flour for baking?
Spelt flour is an ancient grain that is higher in protein and fiber compared to regular all-purpose flour, helping to keep you feeling full longer. It contains a unique form of gluten that some people find easier to digest, and it adds a nuttier flavor and lighter texture to baked goods.
What ingredients do I need for easy sourdough spelt bread?
You will need 1 cup of active sourdough starter, 2 cups of warm water (about 110°F), 4 cups of spelt flour, and 1 teaspoon of salt. Optional ingredients include seeds, herbs, dried fruits, or nuts for flavor variations.
What baking tools are essential for making sourdough spelt bread?
Essential tools include mixing bowls, a dough scraper, a kitchen scale, a proofing basket, a sharp knife or razor blade, oven mitts, and a cooling rack.
How do I maintain my sourdough starter?
Maintain your sourdough starter by feeding it once a week if stored in the fridge or daily if kept at room temperature. Use a 1:1:1 ratio of starter, flour, and water when feeding, and look for bubbles and a pleasant tangy smell to ensure it’s healthy.
What is the process for baking sourdough spelt bread?
The process includes preparing your sourdough starter, mixing the ingredients, kneading the dough, allowing it to rise, shaping it, proofing, and finally baking it in a preheated oven, typically in a Dutch oven for optimal results.
Can I freeze sourdough spelt bread?
Yes, you can freeze sourdough spelt bread to preserve its freshness. It is recommended to slice the bread before freezing and wrap it well in plastic wrap or a freezer bag.
How can I tell when the bread is done baking?
To check if the bread is done, tap the bottom of the loaf; if it sounds hollow, it’s ready. Additionally, look for a deep golden-brown crust, or use an instant-read thermometer to check for an internal temperature of about 200°F (93°C).
What are some good toppings for sourdough spelt bread?
Some popular toppings for sourdough spelt bread include avocado with sea salt, homemade hummus with fresh veggies, butter with a drizzle of honey, and various sandwich fillings like turkey and cheese or roasted veggies with pesto.