
Imagine pulling a batch of warm, puffy pita bread from your oven, each pocket ready to hold delicious fillings. Making sourdough pita bread is not only rewarding but also a delightful culinary adventure!
Understanding Sourdough Pita Bread
What is Sourdough Pita Bread?
Sourdough pita bread is a unique twist on traditional pita bread, using a sourdough starter instead of commercial yeast. This fermentation process gives the bread its distinct flavor and texture, resulting in a tangy taste and soft, fluffy interior. For me, the appeal of sourdough pita lies in its tangy taste and soft, fluffy interior. When baked properly, the pita puffs up beautifully, creating a pocket that’s perfect for stuffing with your favorite fillings. I remember the first time I tried making sourdough pita—watching them puff in the oven was nothing short of magical! Read Interesting article: Soft & Fluffy Sourdough Naan Bread (A Skillet Recipe)
Benefits of Using Sourdough
Using sourdough in pita bread brings a host of benefits. First and foremost, the fermentation process enhances the bread’s flavor, giving it a depth that regular bread lacks. I’ve found that sourdough also improves digestibility, thanks to the natural acids produced during fermentation. This means it can be easier on the stomach for some people. Additionally, the longer fermentation time allows for better nutrient absorption, making sourdough a healthier option than many commercial breads.
Difference Between Regular and Sourdough Pita Bread
The primary difference between regular and sourdough pita bread is the leavening agent. Regular pita is typically made with commercial yeast, which rises quickly, while sourdough relies on a starter that ferments over time. This difference affects not just the flavor but also the texture. Regular pita can sometimes be dense, while sourdough pita tends to be lighter and airier. I’ve experimented with both, and I can confidently say that the sourdough version has a complexity of flavor that keeps me coming back for more. Read Interesting article: Everyone’s Recreating This Cheesy Veg Panini and I Get It
Essential Ingredients for Sourdough Pita Bread
Sourdough Starter
Your sourdough starter is the heart of this recipe. It’s a mixture of flour and water that captures wild yeast and bacteria from the environment. I keep my starter at room temperature, feeding it daily to ensure it’s bubbly and active when I’m ready to bake. If you don’t have a starter yet, you can easily create one at home or get one from a friend. Just remember, a healthy starter is the key to puffy pita!
Flour Types (Bread Flour vs. All-Purpose Flour)
When it comes to flour, I’ve found that using bread flour yields the best results for sourdough pita. Its higher protein content helps create a better structure, resulting in that desirable puffiness. However, all-purpose flour can work too if that’s what you have on hand. I often like to blend the two for a balance of texture and flavor. Experimenting with different flours is part of the fun!
Water Quality and Temperature
The quality of water can affect the final product. I usually opt for filtered water, avoiding anything heavily chlorinated, as it can inhibit yeast activity. Temperature also plays a crucial role—ideally, you’ll want your water to be around room temperature. If it’s too hot or too cold, it can impact how well your dough rises. I’ve learned through experience that warm water gives my dough a nice boost without risking the health of my starter.
Salt and Its Importance
Salt is essential not only for flavor but also for controlling fermentation. I typically use kosher salt in my baking, as it dissolves nicely and enhances the overall taste of the bread. Be cautious with the amount; too much can inhibit the yeast, while too little can lead to bland bread. I’ve made that mistake before and learned to be precise with my measurements!
Optional Ingredients for Flavor Variations
If you want to get creative, there are many optional ingredients you can add for extra flavor. Some of my favorites include herbs like rosemary or thyme, spices such as cumin or za’atar, or even a splash of olive oil for richness. These can elevate your sourdough pita from simple to extraordinary. I remember adding fresh garlic to a batch once, and it was a game-changer!
Step-by-Step Guide to Making Sourdough Pita Bread
Preparing the Sourdough Starter
Before diving into the pita-making process, it’s important to ensure your sourdough starter is ready. I typically take my starter out of the fridge the night before I plan to bake. I feed it with equal parts of flour and water, which helps to wake it up and activate the wild yeast. I love watching it bubble and rise, knowing that it’s gearing up for a fun baking session. Once it’s doubled in size and has that lovely, tangy aroma, you’ll know it’s ready to go!
Mixing the Dough
When the starter is active, it’s time to mix the dough. I usually combine my starter with water in a bowl and give it a good stir. After that, I add the flour and salt, mixing it until it forms a shaggy dough. I remember the first time I mixed the dough; it was a bit of a sticky mess, but it felt so rewarding to know that I was creating something from scratch. Don’t worry about getting a perfect consistency at this stage; just make sure everything is combined well.
Kneading Techniques for Softness
Kneading is essential for developing the gluten structure, which gives the pita its unique texture. I like to turn the dough out onto a lightly floured surface and start kneading. I find the process therapeutic—it’s almost like a mini workout! Knead for about 8-10 minutes until the dough is smooth and elastic. If you find it too sticky, don’t hesitate to add a little more flour, but be careful not to add too much. I’ve learned that a slightly tacky dough yields the best results!
First Rise: Importance of Fermentation
Once kneaded, place the dough in a lightly oiled bowl, cover it with a damp cloth, and let it rise. I usually leave it in a warm spot for about 4-6 hours or until it doubles in size. This is when the magic happens! The fermentation process allows the flavors to develop, and I always get so excited when I check on it and see how much it has grown. Sometimes, I’ll even poke the dough to see if it springs back, which indicates it’s ready for the next step.
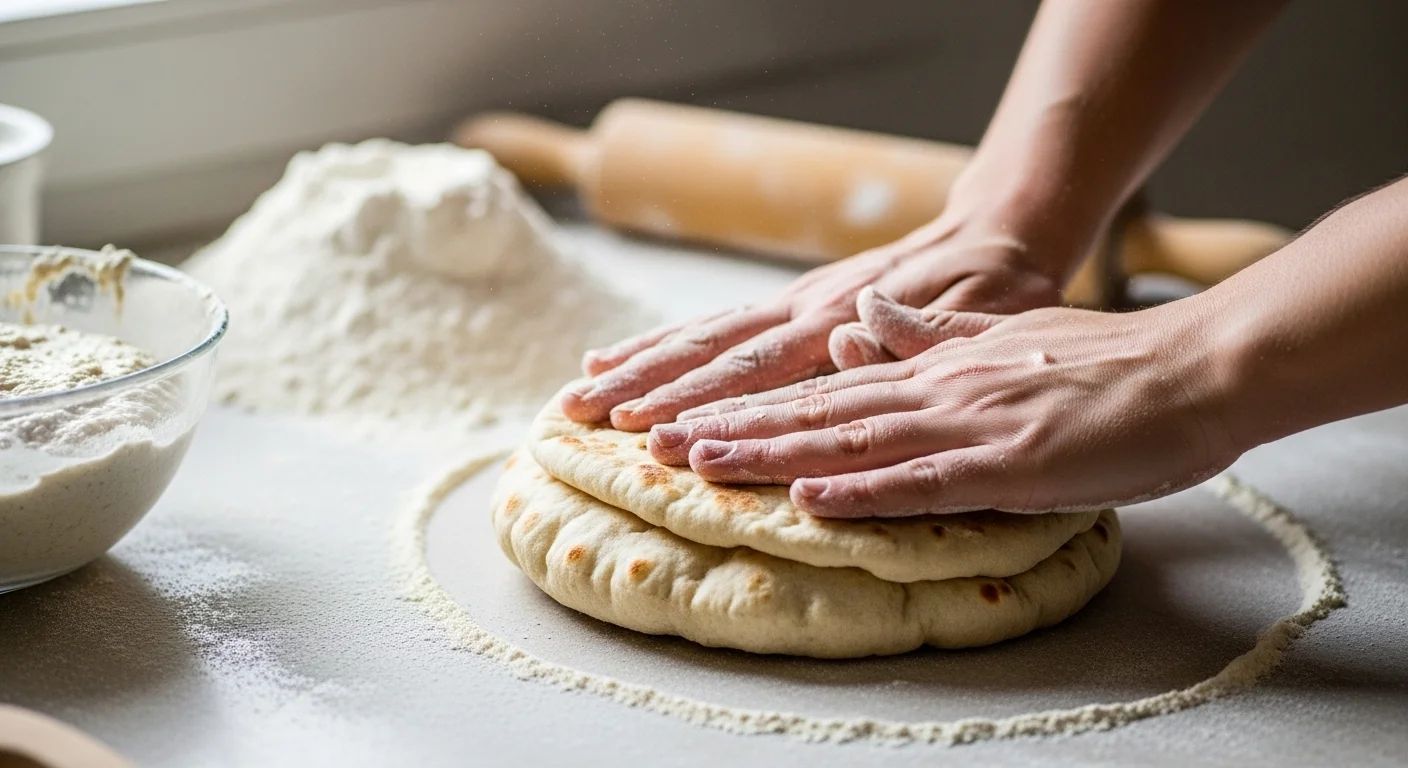
Shaping the Pitas
After the first rise, it’s time to divide the dough into equal pieces for shaping the pitas. I like to gently punch down the dough to release the air and then turn it out onto a floured surface. I usually weigh the pieces to ensure they’re about the same size—around 80 grams works well for me. Then, I shape each piece into a ball and let them rest for 20-30 minutes. This resting period helps relax the gluten, making it easier to roll out later.
Second Rise: Achieving Puffiness
Once the dough balls have rested, I start to roll them out into circles. I aim for about ¼ inch thickness, but not too thin, as this can affect the puffing. I remember the first time I rolled them too thin; they didn’t puff up as I’d hoped! After rolling, I cover them with a kitchen towel to let them rise for another 30 minutes. This second rise is crucial as it helps create that perfect pocket in the pita.
Baking Techniques for Perfect Pitas
When ready to bake, I preheat my oven to a high temperature—around 475°F (245°C) works best for me. I also like to place a baking stone or a heavy baking tray in the oven to heat up. The heat from the stone helps create the steam needed for the pitas to puff up beautifully. I place a few pitas at a time on the hot surface and bake for about 5-7 minutes, or until they are nicely puffed and lightly golden. The first time I pulled out a batch of perfectly puffed pitas, I felt like a baking rockstar! The aroma that fills the kitchen is truly unbeatable.
Tips for Achieving Puffy and Soft Pita Bread
Using the Right Oven Temperature
A hot oven is key to achieving that beautiful puff. I’ve learned that if my oven isn’t hot enough, the pitas won’t puff as they should. I always make sure to preheat for at least 30 minutes to ensure everything is nice and toasty.
Steam in the Oven: Why It Matters
Steam helps create a moist environment in the oven, which is crucial for getting that puff. I’ve found that placing a pan with water at the bottom of the oven while preheating can help. The steam creates the perfect conditions for the dough to rise rapidly as it cooks.
Thickness of Pitas: Finding the Balance
Finding the right thickness for your pitas is a bit of an art. If they’re too thick, they won’t puff properly; too thin, and they’ll harden. I like to aim for about ¼ inch, but I always recommend playing around with thickness to see what works best for you.
Timing: How Long to Bake
Timing is everything! I usually keep a close eye on my pitas. They can go from perfectly baked to overdone in just a minute or two. It’s always better to check early and often. The key is to pull them out when they’re puffed and just turning golden.
Common Mistakes to Avoid
Over-Kneading or Under-Kneading the Dough
Kneading might seem straightforward, but it can be tricky! I’ve definitely experienced both sides of this error. Over-kneading can lead to tough pita bread, while under-kneading results in a dough that lacks the gluten development needed for that lovely puff. I’ve found that kneading for about 8-10 minutes usually does the trick for me. It’s all about finding that sweet spot where the dough is smooth and elastic, so I keep a close eye on the texture. I remember a batch that ended up being overly tough, and I learned to trust my instincts when it comes to the feel of the dough!
Incorrect Sourdough Starter Maintenance
Maintaining a healthy sourdough starter is crucial for successful baking. I used to neglect mine sometimes, thinking it would be fine. However, if your starter isn’t bubbly and active, it can lead to disappointing results. I’ve learned that regular feeding—especially before baking—is essential. I try to feed mine at least once a day if I’m baking frequently. If I’m in a baking lull, I’ll keep it in the fridge and feed it once a week. Having a consistent routine has made a noticeable difference in my baking adventures!
Not Allowing Enough Rise Time
I can’t stress this enough: patience is key! When I first started, I was often eager to move on to the next step and would cut the rising time short. This resulted in dense pitas that didn’t puff up like I wanted. Now, I’ve learned to respect the dough’s need for time to ferment and rise properly. I usually set a timer and check on it occasionally, but I’ve come to appreciate the process. The longer rise not only improves the flavor but also helps develop that airy texture we all crave. Read Interesting article: This TikTok Chicken Melt Is Too Easy Not to Make
Baking on an Improper Surface
The surface you bake on can make a huge difference in how your pitas turn out. I made the mistake of baking on a cold baking sheet once, and my pitas didn’t puff at all! Now, I always preheat a baking stone or a heavy baking tray. This helps create the intense heat needed for that initial puff when the dough hits the hot surface. I’ve found that using a baking stone gives me the best results, as it retains heat well and provides an even baking surface. The thrill of pulling perfectly puffed pitas from the oven makes the extra effort worth it!
Storing and Reheating Sourdough Pita Bread
Best Practices for Storage
After all that hard work, it’s important to store your sourdough pita bread properly to keep it fresh. I usually let them cool completely on a wire rack before storing them. Once they’re cool, I stack them and place them in a zip-top bag or an airtight container. This helps maintain their softness. I’ve found that keeping them at room temperature for a couple of days is fine, but if I want to keep them longer, I pop them in the freezer. Just make sure to separate them with parchment paper before freezing so they don’t stick together!
How to Reheat Pita Bread Effectively
Reheating is where I can sometimes go wrong! I’ve tried various methods, but I’ve discovered that the oven is my best friend for reheating pita. I preheat my oven to about 350°F (175°C) and wrap the pita in aluminum foil. This keeps them warm and soft without drying them out. I heat them for about 5-10 minutes, and they come out just like fresh! For a quicker option, I sometimes use a skillet over medium heat. Just a minute on each side brings back that delicious warmth and softness.
Serving Suggestions and Pairings
Traditional Dips (Hummus, Baba Ganoush)
One of my favorite ways to enjoy sourdough pita is with dips. Hummus and baba ganoush are classic choices that never disappoint. The warm, fluffy bread is perfect for scooping up these creamy delights. I remember hosting a small gathering where I served my freshly baked pitas alongside a variety of dips, and everyone loved it! I always make sure to have a few different flavors, like roasted red pepper hummus or a spicy version, to keep things exciting.
Using Pita Bread in Wraps and Sandwiches
Pita bread is so versatile! I often use it as a wrap for grilled veggies, falafel, or even leftover meats. Stuffing them with a fresh salad and a drizzle of tahini sauce makes for a quick and healthy meal. I remember one busy week when I made a batch of pitas and used them for quick lunches. It was such a lifesaver! I just stuffed them with whatever I had on hand, and it felt like I was eating something special, even on a hectic day.
Incorporating into Mediterranean Dishes
Aside from dips and wraps, sourdough pita can easily be incorporated into many Mediterranean dishes. I love using them as a base for gyros or serving them with a hearty stew. They soak up the flavors beautifully! I once made a Mediterranean-inspired dinner with spiced lamb and roasted vegetables, and the homemade pitas really elevated the meal. It’s amazing how a simple bread can enhance the entire dining experience!
Frequently Asked Questions (FAQs)
Can I use whole wheat flour?
Absolutely! I’ve experimented with whole wheat flour in my sourdough pita bread, and it adds a wonderful nutty flavor. However, I recommend blending it with bread flour for the best results. Whole wheat flour has less gluten, which can affect the puffiness of the pitas. A good ratio I’ve found is about 50/50; this way, you still get that lovely texture while adding some whole grain goodness.
How do I know when my sourdough starter is ready?
Knowing when your sourdough starter is ready is crucial for baking. I look for a few key indicators: it should be bubbly, have doubled in size, and have a pleasant tangy aroma. A simple test I use is the “float test.” I drop a small spoonful of the starter into a glass of water; if it floats, it’s ready to use! If it sinks, it needs more time or feeding. Trusting your senses and observing your starter is part of the fun!
What if my pitas don’t puff up?
Don’t worry; I’ve been there! If your pitas don’t puff up, it can be due to several factors. First, check your oven temperature; it needs to be hot! Another reason could be the thickness of the rolled-out dough—too thin or too thick can affect puffing. Additionally, if your dough hasn’t had enough rise time, that can also lead to disappointing results. Remember, practice makes perfect, and each batch is a learning experience!
Can I freeze sourdough pita bread?
Yes, you can definitely freeze sourdough pita bread! I find it’s best to let the pitas cool completely, then stack them with parchment paper in between and place them in a freezer-safe bag. They can last for up to three months. When you’re ready to enjoy them, just reheat in the oven or skillet, and they’ll taste almost like fresh out of the oven!
Final Thoughts
Baking sourdough pita bread has been a delightful journey for me. Each step, from nurturing my sourdough starter to watching those pitas puff up in the oven, has brought both challenges and joy. I’ve learned the importance of patience, experimenting with flavors, and the pure satisfaction of creating something delicious from scratch. I hope my experiences inspire you to embark on your own sourdough pita adventure. The rewards—warm, fluffy pitas ready to be filled with your favorite ingredients—are truly worth it. So, roll up your sleeves, gather your ingredients, and let’s make some magic in the kitchen!