
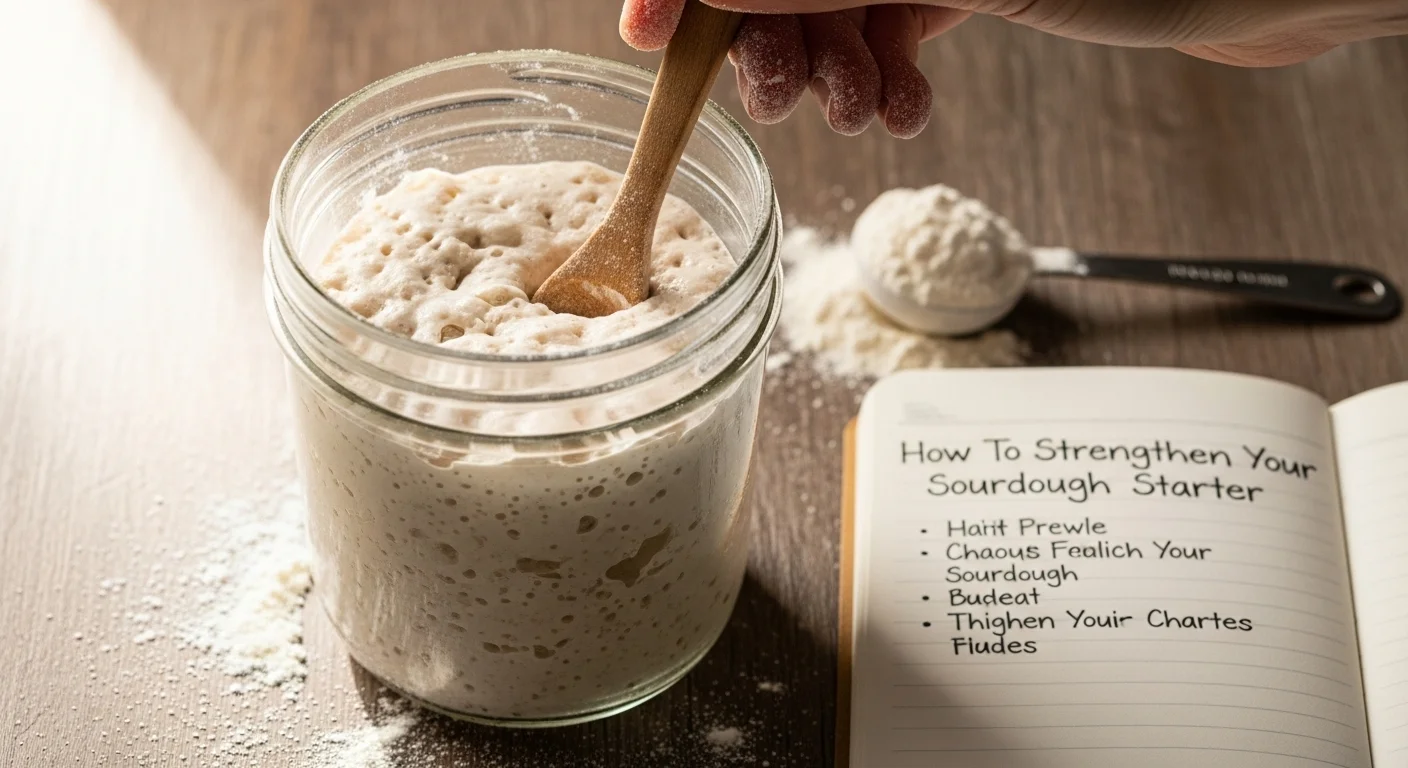
Have you ever struggled with a sourdough starter that just wouldn’t rise? You’re not alone! I’ve been there too, but I discovered some simple tips to strengthen my starter, making baking a delightful experience.
Understanding Your Sourdough Starter
What is a Sourdough Starter?
A sourdough starter is a living culture made from flour and water. It contains wild yeast and bacteria that ferment the dough, giving sourdough its unique flavor and texture. When I first started my baking journey, I was amazed to learn that this mixture could create bread without commercial yeast! The starter captures the natural yeasts and bacteria from the environment, which are essential for fermentation. You literally create your own leavening agent! I remember the excitement I felt when I first saw bubbles forming in my starter; it felt like magic in my kitchen.
The Role of Wild Yeast and Bacteria
Wild yeast and bacteria work together in harmony within your sourdough starter. The wild yeast ferments the sugars in the flour, producing carbon dioxide that makes the bread rise. Meanwhile, lactic acid bacteria contribute to the tangy flavor and improve the bread’s shelf life. Understanding this balance is crucial for anyone looking to strengthen their starter. I noticed that when I paid closer attention to my starter’s environment, it thrived. I really believe that nurturing these microorganisms is like tending to a little garden; when they’re happy, you’ll be rewarded with delicious bread.
Benefits of a Strong Sourdough Starter
Having a strong sourdough starter opens the door to amazing baking possibilities. First off, a well-fed starter increases the rise and texture of your bread, giving it that beautiful airy crumb I love. It also enhances the flavor, making each loaf deliciously complex. When my starter was strong, I felt more confident experimenting with different bread recipes. Plus, a robust starter can be more forgiving if you forget a feeding now and then. I found that when I kept my starter in good shape, I could whip up a loaf of bread anytime I craved it. It’s like having a reliable friend in the kitchen! You can even explore recipes like What’s The Best Sourdough English Muffin Recipe? This One.
Signs of a Weak Sourdough Starter
Inactivity and Lack of Bubbles
One of the first signs I learned to look for in a weak sourdough starter is inactivity. If you notice that your starter isn’t bubbling after feeding, it’s probably time to reassess your methods. I used to panic when my starter sat dormant, but I realized I needed to check its feeding schedule and environment. A bubbly starter is a happy starter, and it indicates that the wild yeast is active and working hard!
Off Smells and Unpleasant Tastes
Another red flag for me was when my starter started to smell off. A healthy sourdough starter should have a pleasantly tangy aroma. If it smells like vinegar or rotten, it’s a sign that something is amiss. I remember when my starter had an unpleasant scent; it was a wake-up call to change my feeding routine. I learned that a smelly starter could result from over-fermentation or an unbalanced feeding schedule.
Separation of Liquid (Hoop)
The separation of liquid, often referred to as “hoop,” can also indicate a weak starter. If you see a layer of liquid on the top, it usually means your starter is hungry. I used to think this was a normal occurrence, but I quickly learned that it was a sign to feed it more regularly. When I adjusted my feeding schedule, I noticed that my starter became more active, and I didn’t have to deal with that frustrating pool of liquid anymore.
Essential Ingredients for Strengthening Your Starter
Flour Types: Bread Flour vs. All-Purpose Flour
The type of flour you use can significantly affect your starter’s health. I found that using bread flour, which has a higher protein content, gave my starter more strength and structure. While all-purpose flour is easier to find, I often recommend experimenting with bread flour for that extra boost. I also love incorporating whole grain flours occasionally; they provide additional nutrients that wild yeast and bacteria thrive on.
Water Quality and Temperature
Water quality is another factor that shouldn’t be overlooked. Using filtered or bottled water can make a difference, especially if your tap water contains chlorine, which can hinder yeast growth. I’ve noticed my starter responds better when I use room temperature water. Warm water can kickstart the fermentation process, making it more active. Experimenting with water temperature helped me figure out my starter’s sweet spot.
Using a Feeding Schedule
Establishing a consistent feeding schedule is essential for a thriving sourdough starter. I’ve tried different routines, and I found that feeding my starter once every 12 hours worked best for me. This regularity helps keep the yeast and bacteria well-fed and active. I like to mark my calendar with feeding reminders, so I don’t forget. It feels rewarding knowing that I’m caring for my little culture.
Simple Tips to Strengthen Your Sourdough Starter
Regular Feedings: How Often to Feed
Feeding my sourdough starter regularly is one of the most crucial steps I’ve learned for keeping it strong. I typically feed my starter every 12 hours, which really seems to keep the yeast and bacteria happy. However, the frequency can vary depending on how active you want your starter to be and the temperature of your environment. In warmer months, I noticed my starter became more energetic, so I ended up feeding it more often. I recommend observing your starter closely to find the right rhythm for feedings. It’s like nurturing a pet; you need to learn its needs and patterns. I also keep a journal to track feedings and any changes I notice, which helps me stay consistent.
Optimal Temperature for Fermentation
The temperature where I keep my starter can make a big difference in its activity level. I’ve discovered that a warm spot in my kitchen is ideal for fermentation, usually around 75°F to 85°F. If it’s too cold, the fermentation slows down, and if it gets too hot, it can create an imbalance. I sometimes use a proofing box or a warm oven (turned off, of course) to maintain the right temperature. It’s a little experiment every time! I remember one winter when my starter struggled in the cooler room; simply moving it to a warmer spot brought it back to life. Finding that sweet temperature is key to a vibrant starter.
Hydration Levels: Adjusting Water Content
Hydration levels play a vital role in how my sourdough starter behaves. I’ve tried different hydration ratios, and I found that a 1:1:1 ratio (equal parts flour, water, and starter by weight) usually works wonders. However, if I want a more liquid starter for specific recipes, I might adjust the water a bit to create a 1:1.5:1 ratio. It’s fascinating to see how these small changes can impact the starter’s activity! I noticed that a thicker starter tends to ferment more slowly but can develop deeper flavors. It’s like the science of baking right in my kitchen!
Using Whole Grain Flours for Boosting Activity
Incorporating whole grain flours has become one of my favorite tricks for boosting my starter’s activity. Whole wheat or rye flours are packed with nutrients, and I’ve found that they really energize my starter. I usually replace a small portion of my regular flour with whole grain flour during feedings, and it’s amazing to see the difference. My starter becomes more bubbly and active, and the bread I make with it ends up having a richer flavor. I always say, why not give our starters the best? It’s all about experimenting and discovering what works best for you! You can also try making a Beautiful Sourdough Fougasse Recipe to enjoy the benefits of a healthy starter.
Creating a Consistent Environment
Consistency is key in the world of sourdough, and I’ve learned that creating a stable environment for my starter makes a world of difference. I try to keep it away from drafts and direct sunlight, as these can disrupt the fermentation process. I also avoid moving it around too much because changes in temperature and humidity can stress the yeast. To help establish this stable environment, I’ve designated a specific spot in my kitchen just for my starter. This little nook has become a sacred space where my sourdough magic happens! I believe that the more we nurture our starters, the better they respond, and that’s truly rewarding.
Advanced Techniques for Experienced Bakers
Retarding the Starter for Flavor Development
Once I felt more confident with my sourdough skills, I ventured into retarding my starter to develop a deeper flavor profile. This technique involves refrigerating the starter after feeding, which slows down the fermentation process. I typically do this overnight, and it allows the flavors to become more complex. When I brought it back to room temperature, the activity was often at its peak, and the aroma was heavenly. I love the tangy notes that develop through this method; it adds a whole new dimension to my bread!
Using Discard in Other Recipes
I’ve also discovered the joy of using sourdough discard in various recipes. Instead of wasting the starter I remove during feedings, I incorporate it into pancakes, waffles, or even pizza dough. It feels great to reduce waste while still enjoying the benefits of my starter. I remember the first time I made sourdough pancakes; they were fluffy and had that delightful tang that I love in sourdough bread. It’s a win-win situation, and I recommend considering how versatile sourdough discard can be! You can even use it to create A Beginner’s Sourdough Sandwich Loaf (Soft & Easy).
Rejuvenating an Old Starter
If I ever let my starter sit in the fridge for too long, I’ve learned how to bring it back to life. It’s like a little resurrection ritual! I typically remove it from the fridge and let it come to room temperature before feeding it. Then, I give it a couple of feedings, and within a day or two, I notice it bubbling and becoming active again. It’s reassuring to know that my starter is resilient; with a bit of care, it can bounce back. I think this process has taught me the importance of patience and nurturing in baking.
Common Mistakes to Avoid
Overfeeding vs. Underfeeding
One of the biggest mistakes I made early on was not understanding the balance of feeding my sourdough starter. I used to think that more was better, so I fed it too often, thinking it would make it stronger. However, overfeeding can dilute the yeast and bacteria, leading to a weakened starter. I learned that it’s crucial to find that sweet spot where my starter feels nurtured but not overwhelmed. On the flip side, underfeeding can lead to a lack of activity and a sad, lifeless starter. I found that keeping a consistent feeding schedule while observing my starter’s behavior helped me avoid these pitfalls. It’s all about listening to what my starter is telling me!
Ignoring Temperature Fluctuations
Temperature is a game-changer for sourdough starters, and I’ve seen firsthand how easily they can be affected by their surroundings. I used to keep my starter in a spot that had a lot of temperature changes throughout the day. This inconsistency led to unpredictable behavior in my starter. I remember one summer, my starter went from bubbling beautifully to just sitting there like a lump because it got too warm. Now, I make it a priority to find a stable environment, away from drafts and heat sources. I even invested in a small thermometer to monitor the temperature of my starter’s resting place. This attention to detail has made a significant difference in its health!
Using the Wrong Flour Types
Choosing the right flour for my sourdough starter was another mistake I encountered. In the beginning, I didn’t realize how much flour type mattered, and I stuck strictly to all-purpose flour. While it can work, I found that switching to bread flour made my starter much more vigorous. I also experimented with whole grain flours and found they packed a punch of nutrients that kept my starter thriving. It’s been an exciting journey discovering how different flours can impact the flavor and activity level of my starter. I recommend playing around with different types as you find what works best for you!
When to Use Your Strengthened Sourdough Starter
Timing for Baking Bread
Knowing when to use my sourdough starter has been a learning curve. I used to feel unsure and would often miss the optimal time for baking. I discovered that the best time to bake is when my starter has doubled in size and is bubbly and active. This usually occurs about 4 to 6 hours after a feeding, depending on the temperature and the starter’s activity level. I’ve learned to trust my gut and observe the starter instead of relying solely on the clock. This has helped me achieve much better results in my bread baking!
Signs Your Starter is Ready for Baking
There are a few signs I’ve learned to look for that indicate my starter is ready to bake. First and foremost, I check for the “float test.” I take a small amount of my starter and drop it into a glass of water. If it floats, that’s a good sign that it’s active and ready to leaven my bread. Additionally, I pay attention to the aroma; a well-fed starter should smell pleasantly tangy rather than sour or off. When I see a good amount of bubbles and my starter has risen nicely, I know it’s showtime for baking!
Types of Bread You Can Make
Once my starter is healthy and robust, I’ve found that the possibilities for bread are endless! I love making classic sourdough bread, but I’ve also experimented with various recipes like focaccia, baguettes, and even sourdough pizza crust. Each type of bread offers a unique flavor and texture, and it’s been so rewarding to see how my starter adds to each recipe. I really believe that a well-cared-for starter can elevate any bread-making adventure. So, don’t be afraid to dive into different recipes and let your starter shine!
Final Thoughts
Reflecting on my journey with sourdough starters, I realize how much it has taught me about patience, observation, and creativity in baking. I used to think that bread-making was just about following a recipe, but I’ve come to appreciate the art and science behind maintaining a vibrant starter. Each loaf tells a story of all the care and attention I put into nurturing my little culture.
I believe that understanding your sourdough starter goes beyond just the basics. It’s about forming a connection with it, observing its moods, and learning what makes it thrive. For me, the process of baking sourdough is a dialogue; my starter speaks to me through its bubbles, aroma, and activity levels. I’ve found joy in the little things, like the first sight of bubbles peeking through the surface or the delightful scent wafting from the bowl after a good feed.
As I continue to explore and refine my techniques, I encourage you to embrace the journey as well. There will be ups and downs, and that’s perfectly okay. I’ve had my fair share of failures, but each setback taught me valuable lessons. Whether it’s realizing the importance of temperature control or experimenting with different flour types, every experience is a step toward mastering the craft.
So, if you’re just starting or have been at it for a while, take a moment to appreciate your sourdough starter. Pour love and care into it, and you’ll be rewarded with the most delicious bread that showcases your hard work. I can’t wait to see what you create in your kitchen. Happy baking!
Frequently Asked Questions
What is a sourdough starter?
A sourdough starter is a living culture made from flour and water that contains wild yeast and bacteria. It ferments the dough, giving sourdough its unique flavor and texture.
What role do wild yeast and bacteria play in a sourdough starter?
Wild yeast ferments the sugars in the flour, producing carbon dioxide that causes the bread to rise. Meanwhile, lactic acid bacteria contribute to the tangy flavor and improve the bread’s shelf life.
How can I tell if my sourdough starter is weak?
Signs of a weak sourdough starter include inactivity and lack of bubbles, off smells, unpleasant tastes, and separation of liquid on the top, often referred to as “hoop.”
What type of flour is best for strengthening my sourdough starter?
Using bread flour, which has a higher protein content, is recommended for a stronger sourdough starter. Whole grain flours can also provide additional nutrients that benefit wild yeast and bacteria.
How often should I feed my sourdough starter?
Feeding your sourdough starter every 12 hours is a common practice for maintaining its strength, although the frequency can vary based on the starter’s activity and environmental temperature.
What temperature is ideal for fermenting my sourdough starter?
The ideal temperature for fermenting a sourdough starter is around 75°F to 85°F. Keeping the starter in a warm spot can enhance its activity, while extreme cold or heat can slow down fermentation.
How can I boost my sourdough starter’s activity?
Incorporating whole grain flours into your feeding routine and adjusting hydration levels can significantly boost your sourdough starter’s activity. A 1:1:1 ratio (equal parts flour, water, and starter by weight) is often effective.
What are some common mistakes to avoid when maintaining a sourdough starter?
Common mistakes include overfeeding or underfeeding the starter, ignoring temperature fluctuations, and using the wrong types of flour, which can all negatively impact the starter’s health.
When is the best time to use my sourdough starter for baking?
The best time to use your sourdough starter is when it has doubled in size and is bubbly and active, typically 4 to 6 hours after feeding.
What types of bread can I make with a healthy sourdough starter?
With a healthy sourdough starter, you can make various types of bread, including classic sourdough bread, focaccia, baguettes, and even sourdough pizza crust.