
Have you ever craved cake but didn’t want to deal with the hassle of baking? No-bake cakes are your answer! They are easy to make, require minimal ingredients, and are perfect for beginners.
Why Choose a No-Bake Cake?
No-bake cakes are a delightful option for those who might feel intimidated by traditional baking. I remember the first time I wanted to impress my friends with a dessert, but I had zero baking skills. The thought of measuring flour, sifting, and dealing with an oven seemed daunting. That’s when I stumbled upon the world of no-bake cakes, and my dessert game changed completely! They are not only quick to prepare, but they also allow for creativity. You can customize flavors and toppings to suit your taste, making every cake unique.
The Basic Ingredients
One of the best things about no-bake cakes is how simple the ingredients are. Most recipes require just a few staples that you might already have in your pantry. Here’s a breakdown of what you’ll typically need:
- Base: This usually consists of crushed cookies or graham crackers mixed with melted butter. I love using Oreo cookies for a rich flavor, but any favorite cookie works!
- Filling: Cream cheese, whipped cream, or pudding often serve as the creamy filling. I find that cream cheese gives a lovely richness, while whipped cream adds a light, airy texture.
- Flavorings: This is where you can get creative! Vanilla extract, cocoa powder, fruit purees, or even flavored extracts can enhance the taste.
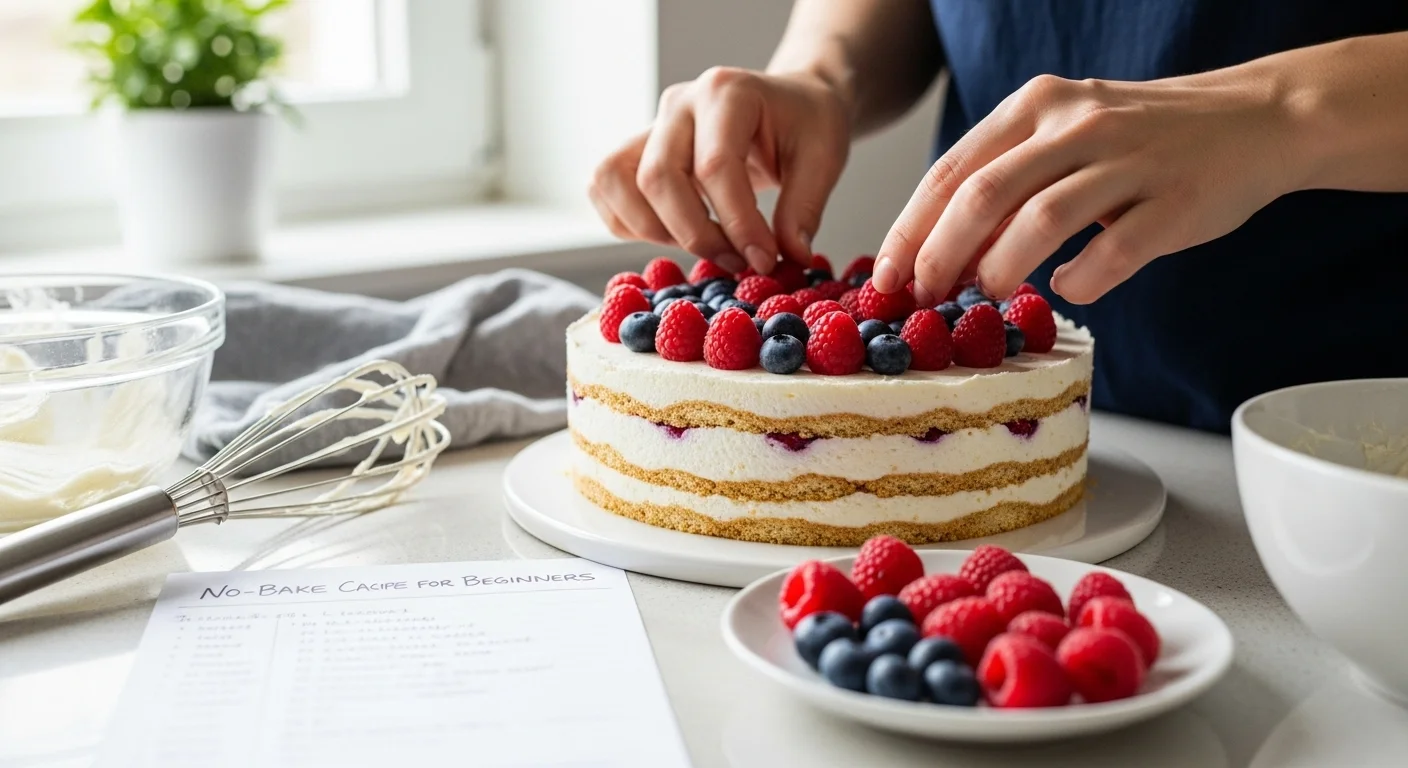
- Toppings: Fresh fruits, chocolate shavings, or even a drizzle of caramel can elevate your cake. I often let my kids help with this part, and it’s a fun way to get them involved.
Step-by-Step Recipe: No-Bake Oreo Cake
Now, let me share with you my go-to no-bake cake recipe that never fails to impress. It’s an Oreo cake, and it’s as easy as it sounds. Here’s how I make it:
Ingredients:
- 24 Oreo cookies (crushed)
- 1/2 cup unsalted butter (melted)
- 8 oz cream cheese (softened)
- 1 cup powdered sugar
- 2 cups whipped cream (or cool whip)
- Extra Oreos for garnish
Instructions:
- Prepare the base: In a mixing bowl, combine the crushed Oreo cookies and melted butter. Stir them together until the mixture resembles wet sand.
- Form the crust: Press the Oreo mixture firmly into the bottom of a 9-inch springform pan. I like to use a flat measuring cup to ensure it’s packed tightly. Place it in the refrigerator to set while you prepare the filling.
- Make the filling: In another bowl, beat the softened cream cheese until it’s smooth. Gradually add the powdered sugar, mixing until combined. Then, fold in the whipped cream gently. I find that folding helps keep the mixture fluffy.
- Layer it up: Take the crust out of the fridge and spread the cream cheese mixture evenly over the crust. I like to leave some of the crushed Oreos aside for garnish, so I sprinkle those on top.
- Chill: Cover the cake with plastic wrap and let it chill in the refrigerator for at least 4 hours, or overnight if you can wait that long! I often make this the day before a gathering so it’s ready to go.
Tips for Success
While no-bake cakes are forgiving, there are a few tips I’ve learned along the way that can make your experience even smoother:
- Use room temperature ingredients: Make sure your cream cheese is softened. It blends much better when it’s at room temperature.
- Don’t skip the chilling time: Letting your cake sit in the fridge allows it to set properly. I once rushed this step and ended up with a messy cake!
- Experiment with flavors: Feel free to swap out the Oreos for other cookies or add in fruit purees for a twist. I’ve enjoyed making strawberry and blueberry versions as well.
Making a no-bake cake is genuinely one of the most satisfying experiences. I’ve done it for birthdays, brunches, and even just a sweet treat for myself. There’s something magical about preparing a dessert that doesn’t require an oven, and I think you’ll love it too! So, gather your ingredients and let’s get started on this delicious journey together!
Creative Variations on No-Bake Cakes
One of the things I love most about no-bake cakes is their versatility. Once I got the hang of the basic recipe, I started experimenting with different flavors and styles. This is where the real fun begins! Here are some delicious twists I’ve tried and enjoyed.
1. No-Bake Chocolate Peanut Butter Cake
For all the chocolate and peanut butter lovers out there, this one is a must-try! Imagine a rich chocolate crust made from crushed chocolate cookies paired with a creamy peanut butter filling. The combination is heavenly!
To make this cake, I swap out the Oreo crust for a mixture of crushed chocolate cookies and melted butter. For the filling, I blend together cream cheese, peanut butter, and powdered sugar until smooth. I then fold in whipped cream to lighten it up. The result is a decadent dessert that’s always a hit at gatherings.
2. Fruit and Yogurt No-Bake Cake
If you’re looking for something lighter, I recommend a fruit and yogurt no-bake cake. This is perfect for hot summer days when you want something refreshing. I use a graham cracker crust, but you can also try a nut-based crust for a healthier option.
For the filling, I mix Greek yogurt with honey and a splash of vanilla extract. Next, I fold in fresh fruit like strawberries, blueberries, or peaches. After layering the filling over the crust, I let it chill. This cake is not only delicious but also a bit healthier, making it a great choice for breakfast or brunch!
3. No-Bake Matcha Cheesecake
As a fan of matcha, I couldn’t resist creating a no-bake matcha cheesecake. The vibrant green color is beautiful, and the earthy flavor of matcha adds a unique twist. To make this cake, I start with a simple cookie crust, which can be made from crushed vanilla cookies or even graham crackers.
The filling is made by mixing softened cream cheese, sugar, and matcha powder. I fold in whipped cream to give it that light, airy texture. Once it’s all layered in the crust, I let it chill until it’s set. This cake is perfect for those who appreciate a little sophistication in their desserts!
4. No-Bake Lemon Blueberry Cake
This one is a fresh and zesty delight! The combination of tangy lemon and sweet blueberries creates a fantastic flavor profile. For the crust, I often use crushed shortbread cookies, which add a buttery taste that complements the filling beautifully.
For the filling, I whip together cream cheese, lemon juice, lemon zest, and powdered sugar. Then, I fold in some whipped cream and gently mix in fresh blueberries. When I layer this mixture over the crust and let it chill, it transforms into a bright, refreshing cake that’s perfect for any occasion!
5. No-Bake Mint Chocolate Cake
If you’re a fan of mint chocolate chip ice cream, this cake will be right up your alley! I create a chocolate cookie crust, just like in my Oreo cake, but then I add a minty twist to the filling. The filling consists of cream cheese, powdered sugar, whipped cream, and a few drops of mint extract. I also like to add green food coloring for that classic mint chocolate look.
After layering the filling over the crust, I like to top it with chocolate shavings and a sprig of fresh mint. This cake is a crowd-pleaser, and the minty freshness is a delightful surprise!
6. No-Bake S’mores Cake
If you’re craving that classic campfire treat, this no-bake s’mores cake will satisfy your sweet tooth! I start with a graham cracker crust, which sets the stage for all the delicious layers to come. For the filling, I mix together cream cheese, marshmallow fluff, and whipped cream for a fluffy, sweet layer.
To mimic the s’mores experience, I layer in some mini chocolate chips and mini marshmallows between the filling layers. Once I’ve added all the layers, I let it chill. When it’s ready to serve, I like to toast some more marshmallows on top for that campfire feel. This cake is such a fun nostalgia trip!
Storing and Serving Your No-Bake Cakes
After all that hard work in creating these delightful desserts, you’ll want to ensure they stay fresh. I’ve learned that no-bake cakes can usually be stored in the refrigerator for about 3 to 5 days, although they’re often best enjoyed within the first couple of days. Just remember to keep them covered with plastic wrap or in an airtight container to maintain their flavor and texture.
When it comes to serving, I like to use a sharp knife to slice through the layers and keep the pieces neat. For a fun presentation, try serving slices on a colorful plate or garnishing with fresh fruit, whipped cream, or chocolate sauce. It’s all about making it look as good as it tastes!
So, whether you’re throwing a party or just looking for a sweet treat at home, these creative variations on no-bake cakes are sure to impress! I’m always excited to try new combinations and see what flavors work well together, and I encourage you to get adventurous in your kitchen too!
Common Mistakes to Avoid with No-Bake Cakes
In my journey of making no-bake cakes, I’ve stumbled upon a few pitfalls that I’d love to help you avoid. Learning from my mistakes has made my baking experience much smoother. Here are some common missteps and how you can steer clear of them:
1. Using the Wrong Pan
This might seem trivial, but the type of pan you use can make a huge difference in the final product. I’ve learned the hard way that using a regular cake pan can lead to disaster. A springform pan is ideal because it allows for easy removal of the cake without damaging its structure. If you don’t have one, just make sure to line your pan with parchment paper so you can lift the cake out easily.
2. Overmixing the Filling
When I first started making no-bake cakes, I thought that the more I mixed, the better it would be. But overmixing can lead to a dense filling instead of the light, airy texture we’re aiming for. Instead, I’ve found that gently folding in whipped cream or other ingredients helps maintain that fluffy consistency. It’s all about being gentle and treating the mixture with care.
3. Skipping the Chilling Step
One time, I got too excited and served my no-bake cake without allowing it to chill long enough. The result? A sloppy, messy dessert that didn’t hold its shape. Trust me—resist the urge to cut corners. The chilling time is crucial for the cake to set properly. I always aim to chill mine overnight if I can, but at least four hours is a must. Your patience will pay off!
4. Not Measuring Ingredients Accurately
When I first started out, I thought I could eyeball the ingredients. However, I quickly realized that precision is key, especially with cream cheese and whipped cream. Using too much or too little can throw off the texture and flavor. I recommend using measuring cups and spoons to ensure you get the right amounts every time.
5. Ignoring Temperature
Temperature plays a significant role in how your cake turns out. I’ve made the mistake of using cold cream cheese straight from the fridge, which made it tough to blend smoothly. Always remember to let your cream cheese come to room temperature before mixing. It blends much more easily and yields a creamier filling. The same goes for other ingredients; room temperature helps everything come together nicely.
6. Forgetting to Taste
It’s easy to get caught up in the process and forget to taste your filling and layers as you go along. I’ve learned that sampling at different stages helps ensure that the flavors are just right. Don’t be afraid to adjust sweetness or add a hint of flavoring if it needs a little something extra. Remember, cooking is as much about your personal preference as it is about following a recipe!
7. Not Decorating or Garnishing
Once, I made a no-bake cake without any decorations, thinking it would be fine as is. To my surprise, it looked quite plain when I served it. Now, I always take a few extra minutes to add garnishes. A sprinkle of crushed cookies, fresh fruit, or even a drizzle of chocolate sauce can elevate the presentation and make it more inviting. It’s the little touches that make a big difference!
Pairing No-Bake Cakes with Drinks
After we’ve whipped up these delicious no-bake cakes, I love thinking about what drinks to serve alongside them. The right beverage can enhance the dessert experience, and I’ve found some delightful pairings that you might want to try.
Coffee and Espresso
If you’re a coffee lover like me, pairing a rich no-bake cake with a cup of coffee or espresso is a match made in heaven. The bitterness of the coffee complements the sweetness of the cake beautifully. I often serve my chocolate and peanut butter no-bake cake with a strong cup of coffee, and it really brings out the flavors.
Milk
Classic and straightforward, a glass of cold milk is a timeless pairing with any dessert. I find that it works especially well with cakes that have a chocolate base, like my mint chocolate cake. The creaminess of the milk balances the richness of the cake, making each bite even more enjoyable.
Fruit Juices
For those who prefer something fruity, a refreshing glass of juice can be a delightful choice. I often make a fruit and yogurt no-bake cake and enjoy it with a glass of freshly squeezed orange juice. The citrusy notes uplift the dessert and add a refreshing contrast.
Herbal Teas
If you’re looking for a lighter option, herbal teas can be a lovely accompaniment. I love serving my lemon blueberry no-bake cake with a cup of chamomile or mint tea. The warm, soothing flavors of the tea complement the bright notes of the cake, creating a peaceful dessert experience.
As we explore the world of no-bake cakes together, I hope these tips and drink pairings inspire you to create your own delicious treats. With a bit of creativity and a willingness to experiment, the possibilities are endless! Let’s keep making memories in the kitchen, one cake at a time!
Final Thoughts
As I reflect on my journey with no-bake cakes, I can’t help but feel a sense of joy and accomplishment. These no-bake creations have not only satisfied my sweet tooth but also brought people together. Whether it was a birthday party, a family gathering, or just a casual get-together with friends, I’ve seen how a simple dessert can spark conversations and create unforgettable memories.
I believe the beauty of no-bake cakes lies in their simplicity and adaptability. Once you get a grasp of the basic recipe, the sky’s the limit. I remember the first time I hosted a gathering and served my no-bake Oreo cake; everyone raved about it, and I felt a rush of pride in serving something I had made. That experience motivated me to explore even more flavors and variations, turning my kitchen into a creative space where I could experiment and share my love for desserts.
One of the most rewarding aspects of making no-bake cakes is how they can cater to various dietary preferences. For instance, I’ve made dairy-free versions by substituting traditional ingredients with coconut cream or vegan cream cheese. These adaptations not only make desserts accessible to everyone but also challenge me to think outside the box. I’ve enjoyed creating flavors that accommodate different diets, ensuring that guests with allergies or dietary restrictions don’t feel left out.
As we dive deeper into this dessert adventure, I encourage you to embrace your creativity. Don’t be afraid to mix flavors that might seem unconventional at first. I’ve discovered some of my favorite combinations through a bit of trial and error. Like the time I paired almond extract with chocolate—it was a delightful surprise! Experimenting with seasonal ingredients is also a fantastic way to keep things fresh and exciting. Using ripe summer berries or autumn-spiced flavors can transform your no-bake cake into a seasonal delight.
Another thing I’ve learned is the importance of presentation. It’s often said that we eat with our eyes first, and I couldn’t agree more. Taking a little time to decorate your no-bake cake can make a huge difference in how it’s received. I’ve enjoyed playing with different garnishes, from fresh fruit to decorative chocolate shavings, and I’ve seen how this little effort elevates the whole dessert experience. It’s like wrapping a gift beautifully; it makes the anticipation of tasting it so much sweeter!
Let’s not forget about the joy of sharing these treats. I’ve found that baking (or in this case, assembling) for others is an act of love. Bringing a no-bake cake to a potluck or gifting it to a neighbor has opened doors to new friendships and strengthened existing ones. Each time I see someone take a bite of a cake I made, the smile that spreads across their face is worth all the effort I put in. It’s a reminder of how food can connect us and create a sense of community.
As you embark on your no-bake cake journey, don’t hesitate to share your creations with family and friends, or even on social media! I’ve loved seeing the responses when I post my latest dessert. It’s a chance to inspire others to get in the kitchen and try their hand at no-bake cakes. Plus, receiving feedback and tips from fellow dessert enthusiasts has helped me grow and experiment even more.
In closing, I hope you feel inspired to dive into the world of no-bake cakes. It’s a delightful and rewarding experience that I think everyone should try at least once. Remember, the heart of baking—no matter how simple or complex—is not just about the end result but the joy and creativity that come along the way. So, gather your ingredients, get your hands a little messy, and let’s create some sweet memories together. Happy baking, or should I say, happy assembling!
Frequently Asked Questions
“`htmlWhat are no-bake cakes?
No-bake cakes are desserts that can be made without using an oven. They are easy to prepare, require minimal ingredients, and are perfect for beginners.
What basic ingredients do I need to make a no-bake cake?
The basic ingredients for a no-bake cake typically include a base made from crushed cookies or graham crackers mixed with melted butter, a creamy filling such as cream cheese or whipped cream, flavorings like vanilla extract or cocoa powder, and toppings such as fresh fruits or chocolate shavings.
How long does it take for a no-bake cake to set in the refrigerator?
A no-bake cake should chill in the refrigerator for at least 4 hours, though it’s recommended to let it chill overnight for the best results.
Can I customize flavors in no-bake cakes?
Yes! No-bake cakes are very versatile, allowing you to swap out ingredients, add different flavorings, or try various toppings to create unique flavor combinations.
What is a common mistake to avoid when making no-bake cakes?
One common mistake is skipping the chilling step. Allowing your no-bake cake to chill properly is crucial for it to set and hold its shape. Rushing this step can lead to a messy dessert.
How should I serve and present my no-bake cake?
Use a sharp knife to slice through the layers neatly. For presentation, consider serving slices on colorful plates and garnishing with fresh fruit, whipped cream, or chocolate sauce to enhance the dessert’s appeal.
How long can no-bake cakes be stored?
No-bake cakes can typically be stored in the refrigerator for about 3 to 5 days, although they are best enjoyed within the first couple of days.
What type of pan is recommended for making no-bake cakes?
A springform pan is ideal for making no-bake cakes as it allows for easy removal without damaging the cake. If you don’t have one, lining a regular cake pan with parchment paper can also work.
Can I make no-bake cakes that cater to dietary restrictions?
Yes, no-bake cakes can be adapted for various dietary preferences by substituting traditional ingredients with alternatives such as coconut cream or vegan cream cheese, making them accessible to those with dietary restrictions.
What drinks pair well with no-bake cakes?
Good drink pairings for no-bake cakes include coffee or espresso, cold milk, fruit juices like freshly squeezed orange juice, and herbal teas such as chamomile or mint tea, depending on the flavors of the cake.
“`