
Indulging in a sweet treat doesn’t have to mean sacrificing health or ethics. These No-Bake Vegan Twix Bars are a delicious blend of caramel, chocolate, and crunch that you can whip up in no time! Read Interesting article: Quick Sausage And Peppers Skillet (A 30-Minute Meal)
Overview of No-Bake Vegan Twix Bars
What are No-Bake Vegan Twix Bars?
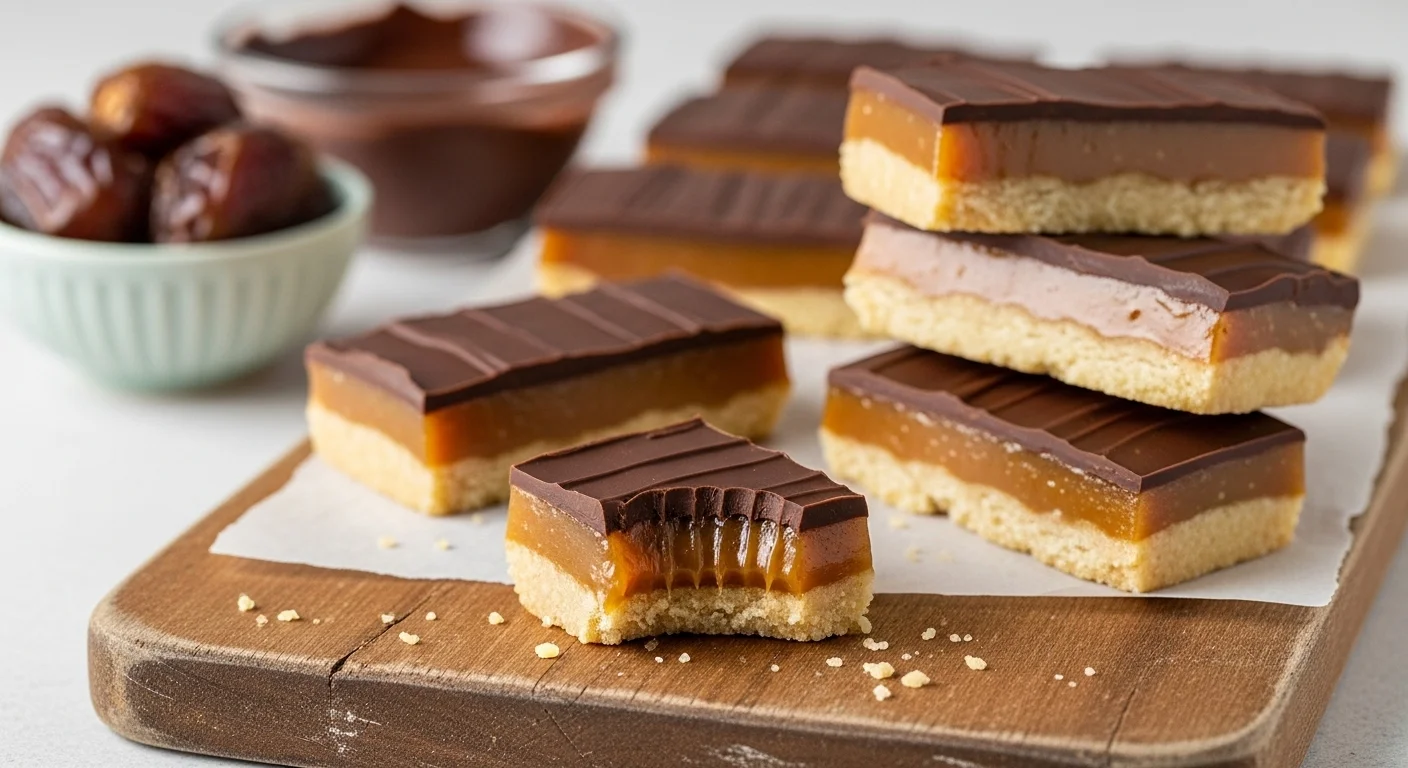
No-Bake Vegan Twix Bars are a delightful plant-based twist on the classic candy bar that many of us grew up loving. These bars consist of three layers: a crunchy base, a gooey vegan caramel, and a rich chocolate coating. What makes them even more appealing is that they require no baking, making them a perfect treat for any occasion, whether it’s a quick snack or a dessert for a gathering. I first stumbled upon this recipe while searching for healthier dessert options, and I knew I had to try making my own version. The result? A satisfying and guilt-free indulgence that I can enjoy without compromising my lifestyle choices.
Health Benefits of Vegan Treats
One of the biggest perks of vegan desserts, like these No-Bake Vegan Twix Bars, is that they often contain whole-food ingredients and fewer processed components. For instance, instead of refined sugars, we can use natural sweeteners such as dates or maple syrup, which provide vitamins and minerals along with their sweetness. I’ve noticed that by choosing vegan treats, I feel lighter and more energized, which is a pleasant change from traditional desserts that can leave me feeling sluggish. Additionally, many vegan ingredients are packed with nutrients. Nuts, seeds, and plant-based sweeteners not only satisfy cravings but also contribute to a balanced diet. Read Interesting article: Slim Down Smart: Meal Prep for Weight Loss 101 – 5 Essential Strategies
Why Choose No-Bake Desserts?
No-bake desserts have a special place in my heart for several reasons. First, they save time. Who doesn’t love a recipe that comes together in just a few minutes? No ovens or complicated techniques are involved, allowing us to work at our own pace. I remember the first time I made these bars; I was amazed at how quickly everything came together – it felt like magic! Secondly, no-bake recipes often require fewer dishes, which means less cleanup afterward. That’s a win-win in my book! Also, no-bake desserts tend to retain a fresher taste and texture because they aren’t subjected to heat. The ingredients remain vibrant and flavorful, which makes these bars all the more enjoyable. Plus, they work wonderfully for warm weather, as they don’t heat up the kitchen while we’re preparing them.
Key Ingredients for No-Bake Vegan Twix Bars
Base Layer: Ingredients and Alternatives
The base layer of these No-Bake Vegan Twix Bars is usually made from a blend of nuts and dates. I personally love using almonds for their crunch and flavor, but feel free to substitute with cashews or walnuts if you prefer. The dates serve as a natural sweetener that binds everything together while adding a caramel-like flavor. I often recommend soaking the dates in warm water for a few minutes to soften them up, making it easier to blend. If you’re looking for gluten-free options, simply ensure that the nuts and any additional ingredients are certified gluten-free. Also, if you need a nut-free alternative, you can use seeds like sunflower or pumpkin seeds instead.
Vegan Caramel: How to Make it
The caramel layer is where the magic happens! Making vegan caramel is surprisingly simple. I usually blend together medjool dates, almond milk, and a touch of vanilla extract. This combination creates a creamy, dreamy caramel that’s not only delicious but also nutritious. To enhance the flavor, I like to add a pinch of sea salt, which contrasts beautifully with the sweetness. If you want a richer taste, consider using coconut cream instead of almond milk for a thicker, creamier consistency. I’ve experimented with other sweeteners, but I always find that dates give the best results in terms of flavor and texture.
Chocolate Coating: Options and Tips
For the chocolate coating, I typically go for dark chocolate, which provides a rich flavor that complements the sweetness of the caramel. I’ve found that using vegan chocolate chips is the easiest route; just melt them down and dip each bar into the chocolate. If you’re feeling adventurous, you can add a splash of coconut oil to the melted chocolate for a smoother consistency. If you want to avoid chocolate altogether, consider using a carob coating for a different flavor profile. I remember one time, I mixed in some almond butter into the chocolate, which not only added a delicious nutty taste but also made the coating thicker and more luxurious!
Nut and Seed Options for Texture
In my experience, adding nuts and seeds to the base layer not only enhances the flavor but also adds a delightful crunch. I usually toss in some chia seeds or hemp seeds for added nutrition. If you enjoy textures, try sprinkling some crushed nuts on top before chilling the bars – it adds an extra layer of crunch that elevates the whole experience. No matter which nuts or seeds you choose, make sure they’re chopped into small pieces so they don’t overpower the other layers. The balance of textures in these bars is what makes them so satisfying.
Step-by-Step Recipe for No-Bake Vegan Twix Bars
Preparation Time and Serving Size
When it comes to whipping up these No-Bake Vegan Twix Bars, I love that the preparation is quick and easy! Typically, it takes me about 30 minutes from start to finish. Once you’ve made them, you can cut them into about 12 bars, depending on how big you want to serve them. I find that this size is just right for a satisfying treat without overdoing it. Plus, they’re perfect for sharing with friends and family or for having on hand for those late-night cravings!
Step 1: Making the Base Layer
To start, gather your ingredients for the base layer. You’ll need about a cup of nuts (I often use almonds), a cup of Medjool dates, and a pinch of sea salt. I usually begin by soaking the dates for about 10 minutes in warm water to soften them up. Once they’re nice and plump, I drain them and toss them into a food processor along with the nuts and salt. Here’s where the fun begins! I blend everything until it forms a sticky, crumbly mixture. If it feels too dry, I might add a tiny splash of water or a dash of maple syrup to help it come together. Once you have a good consistency, I press the mixture firmly into the bottom of a lined 8×8 inch pan, making sure it’s even. This step is crucial because it sets the foundation for the entire bar!
Step 2: Preparing the Vegan Caramel
Next up is the vegan caramel layer, which is my absolute favorite part. I take about a cup of soaked Medjool dates (soaked the same way as before, of course) and blend them in the food processor with a half cup of almond milk and a splash of vanilla extract. I find that blending for a minute or two really helps to create a smooth and creamy texture. At this stage, I like to taste the caramel, and if it needs more sweetness or flavor, I add a pinch of sea salt or a tablespoon of coconut cream for richness. Once it’s silky and delicious, I pour it over the pressed base layer and spread it out evenly with a spatula. This layer is where the bars really start to take shape, and I can almost taste the sweetness already!
Step 3: Assembling the Bars
With the base and caramel layers in place, it’s time to assemble the bars. I like to let the caramel layer set slightly in the fridge for about 15-20 minutes. While it firms up, I prepare the chocolate coating. I melt about a cup of dark vegan chocolate chips in a microwave-safe bowl, heating in short bursts to avoid burning. Once smooth, I’m ready for the final assembly! I take the chilled pan out of the fridge, and with a sharp knife, I cut the bars into the desired size. This part feels rewarding as I see all three layers come together. I dip each bar into the melted chocolate, making sure they’re well coated. Sometimes, I even drizzle a bit of extra chocolate on top for an artistic touch!
Step 4: Coating with Chocolate
Coating the bars in chocolate is where I get to be a bit creative! I’ve found that using a fork helps me lift the bars out of the chocolate without making a mess. After dipping each bar, I let the excess chocolate drip off before placing them on a lined baking sheet. If I’m feeling adventurous, I might sprinkle some crushed nuts or sea salt on top before the chocolate hardens. This adds a lovely crunch and makes the bars visually appealing. It’s a great way to get the kids involved too; they love helping with the sprinkles!
Step 5: Chilling and Serving
After dipping, the last step is to chill the bars again. I usually pop them back into the fridge for at least an hour to let the chocolate set completely. Once they’re firm, I can’t help but sneak a taste! The moment I bite into one, I’m always reminded of why I love these bars so much—the creamy caramel, the crunch of the base, and the rich chocolate all work together to create a satisfying treat. When I’m ready to serve them, I cut them into neat squares or rectangles and arrange them on a beautiful platter. They’re perfect for parties or as a sweet snack during the week. Trust me, once you try making these, you’ll find yourself reaching for them again and again!
Variations and Substitutions
Gluten-Free Options
Making these No-Bake Vegan Twix Bars gluten-free is easier than you might think! As I mentioned earlier, using nuts as the base layer is a fantastic option, but I always check that the nuts and any additional ingredients are certified gluten-free to avoid any cross-contamination. Instead of traditional graham crackers or biscuits that contain gluten, we can also use gluten-free oats. When I want to switch things up, I blend gluten-free oats with the nuts and dates, giving the bars an even heartier texture without compromising flavor. It’s a great way to cater to gluten-sensitive friends or family members while still delivering an amazing treat!
Nut-Free Adjustments
If you’re in a nut-free zone or simply prefer to skip the nuts, there are plenty of alternatives! I’ve had success using seeds instead. Sunflower seeds, pumpkin seeds, or even a mix of both can create a delicious base layer. When I tried this for my friend’s kids’ party, the kids devoured the bars without realizing they were nut-free! Just be sure to chop the seeds finely before adding them to the mix to ensure a smooth texture when blended with the dates. You could also experiment with puffed rice or quinoa for a crunchy base, which adds an exciting twist to the bars and keeps them nut-free!
Flavor Variations: Adding Spices or Extracts
One of the joys of making No-Bake Vegan Twix Bars is that they are a blank canvas for flavor! While I love the classic combination, we can easily elevate the taste by adding spices or extracts. I often sprinkle in a dash of cinnamon or nutmeg into the base layer for a warm, cozy flavor. If I’m in the mood for something more exotic, a hint of cardamom or ginger can be delightful. Sometimes, I even add a splash of almond extract or peppermint extract into the caramel layer for a refreshing twist! These little changes can transform the entire experience and make it feel like a new treat every time. Read Interesting article: Deliciously Cheap Meals: A Full Week of Dinners on a Dime
Storage and Shelf Life
Best Practices for Storing No-Bake Vegan Twix Bars
After all the hard work of making these scrumptious bars, storing them properly is key to enjoying them at their best. I always recommend keeping the bars in an airtight container to maintain their freshness. Layering parchment paper between the bars prevents them from sticking together, which is especially helpful if you’ve made a big batch. I usually keep them in the fridge, where they stay firm and ready for snacking. The cool environment helps preserve their texture and keeps the chocolate coating from melting!
How Long Do They Last?
In my experience, these No-Bake Vegan Twix Bars can last in the fridge for about a week, although they rarely last that long in my house! They’re usually gone within a few days because they’re so irresistible. If you want them to last longer, it’s best to freeze them. I often make double batches, so I have some stashed away for those unexpected cravings. If stored properly, they can last in the freezer for up to three months, making them a perfect treat to have on hand.
Freezing for Longer Storage
Freezing these bars is super simple! I cut them into individual portions and wrap each one tightly in plastic wrap or aluminum foil. Then, I place them in a freezer-safe bag or container. When I’m ready to enjoy one, all I need to do is take it out and let it thaw in the fridge for a bit or at room temperature for about 10–15 minutes. This way, I can indulge in a delicious, sweet treat any time I want without feeling guilty. It feels good to have a stash of homemade goodies that are both healthy and satisfying!
Common Questions about No-Bake Vegan Twix Bars
Can I Use Different Sweeteners?
Absolutely! While I love using Medjool dates for their natural sweetness and binding properties, you can explore other sweeteners if you prefer. Maple syrup, agave nectar, or even brown rice syrup work wonderfully in the caramel layer. Just keep in mind that the texture might vary slightly depending on the sweetener you choose. I’ve tried using agave in a pinch, and it turned out great! Just be cautious with the quantity, as some sweeteners can be sweeter than dates.
What Can I Use Instead of Coconut Oil?
If you’re looking to skip the coconut oil, there are other options available! For me, a great alternative is using a neutral oil such as canola or grapeseed oil. You could also try using vegan butter for a richer flavor. I’ve experimented with olive oil in the chocolate coating as well, and while it’s not traditional, it adds an interesting depth that some people really dig! Just remember that each oil has its own taste profile, so choose one that complements your overall flavor.
Are No-Bake Vegan Twix Bars Healthy?
From my perspective, these bars are a healthier alternative to traditional candy bars. They use whole-food ingredients and natural sweeteners, which provide nutrients alongside their deliciousness. While they’re still a treat, they offer more health benefits than many sugar-laden snacks. That said, moderation is key! I love having these bars as a part of my balanced diet without feeling guilty about indulging. After all, life is about enjoying the sweeter things, right?
Frequently Asked Questions
“`htmlWhat are No-Bake Vegan Twix Bars?
No-Bake Vegan Twix Bars are a plant-based version of the classic candy bar, consisting of three layers: a crunchy base, gooey vegan caramel, and a rich chocolate coating. They require no baking, making them a quick and easy treat for various occasions.
What are the health benefits of vegan treats like No-Bake Vegan Twix Bars?
Vegan desserts often contain whole-food ingredients and fewer processed components. They can include natural sweeteners like dates or maple syrup, which provide vitamins and minerals. Vegan treats can make you feel lighter and more energized compared to traditional desserts.
Why choose no-bake desserts?
No-bake desserts save time, require fewer dishes, and tend to retain a fresher taste and texture. They are quick to prepare without the need for an oven, making them perfect for warm weather and easy cleanup.
What ingredients are used for the base layer of No-Bake Vegan Twix Bars?
The base layer is typically made from a blend of nuts (like almonds) and dates. The dates serve as a natural sweetener and binder. Alternatives such as cashews, walnuts, or seeds (like sunflower or pumpkin seeds) can also be used.
How is the vegan caramel made?
The vegan caramel is made by blending soaked Medjool dates, almond milk, and a touch of vanilla extract until smooth. Adding a pinch of sea salt enhances the flavor, and coconut cream can be used for a richer consistency.
What type of chocolate is recommended for the coating?
Dark chocolate is typically used for the coating because it complements the sweetness of the caramel. Vegan chocolate chips can be melted down for easy dipping, and coconut oil can be added for a smoother consistency.
How long does it take to prepare No-Bake Vegan Twix Bars?
Preparation typically takes about 30 minutes from start to finish, allowing you to cut the bars into approximately 12 servings, depending on the desired size.
How should No-Bake Vegan Twix Bars be stored?
It’s best to store No-Bake Vegan Twix Bars in an airtight container in the fridge, with parchment paper between layers to prevent sticking. They can last about a week in the fridge and up to three months in the freezer if properly wrapped.
Can I use different sweeteners in the recipe?
Yes, other sweeteners like maple syrup, agave nectar, or brown rice syrup can be used instead of Medjool dates. However, the texture may vary slightly based on the sweetener chosen.
Are No-Bake Vegan Twix Bars considered healthy?
These bars are a healthier alternative to traditional candy bars, using whole-food ingredients and natural sweeteners that provide nutrients. While they are still a treat, they offer more health benefits than many sugar-laden snacks when consumed in moderation.
“`