
Soft, fluffy gluten-free dinner rolls can transform any holiday meal into something truly special. Whether you’re hosting a festive gathering or enjoying a cozy dinner at home, these rolls will have everyone asking for seconds. Read Interesting article: Themed Dinner Nights: The Funniest, Easiest Way to Meal Plan
Understanding Gluten-Free Baking
When I first ventured into gluten-free baking, I was both excited and a bit apprehensive. The thought of creating delicious, soft rolls without gluten seemed daunting. But as I learned more about the science and ingredients involved, I discovered that gluten-free baking can be incredibly rewarding. Let’s dive into some key concepts that will help you understand gluten-free baking better.
What is Gluten and Why Avoid It?
Gluten is a type of protein found in wheat, barley, and rye. It gives bread its chewy texture and helps it rise. For many people, especially those with celiac disease or gluten sensitivity, consuming gluten can lead to a range of unpleasant symptoms, from digestive issues to fatigue. Personally, I’ve seen friends and family members who feel significantly better after switching to a gluten-free diet. This realization inspired me to explore gluten-free baking options, and I wanted to create something that everyone could enjoy—without sacrificing taste or texture.
Common Gluten-Free Flours Used in Baking
One of the most crucial aspects of gluten-free baking is choosing the right flours. I remember being overwhelmed by the variety available, but I soon found a few favorites that work beautifully in rolls. Here are some common gluten-free flours:
- Almond Flour: Made from finely ground almonds, this flour adds a light, nutty flavor and moisture to baked goods.
- Coconut Flour: This flour absorbs a lot of moisture, so it’s best used in combination with other flours.
- Brown Rice Flour: A staple in gluten-free baking, it provides a mild flavor and works well in many recipes.
- Oat Flour: Made from ground oats, this flour is great for adding a wholesome taste to rolls, as long as you use certified gluten-free oats.
- Gluten-Free All-Purpose Flour Blends: These blends usually contain a mix of various gluten-free flours and starches, and I find them convenient for many recipes.
Each flour has its unique characteristics, and experimenting with them can lead to new and exciting flavors in your baking. I remember trying different combinations to find the perfect mix for my dinner rolls, which made the process even more enjoyable. Read Interesting article: Everyone’s Making This 5-Min Lazy Chicken Bowl
The Science of Gluten-Free Dough
Understanding the science behind gluten-free dough can help demystify the baking process. Unlike traditional dough, gluten-free dough lacks the elasticity and structure that gluten provides. This means we need to incorporate some substitutes to achieve that desirable texture.
In gluten-free baking, we often rely on binders and leaveners to mimic the properties of gluten. I’ve learned that using a combination of xanthan gum or guar gum helps to hold the ingredients together. It’s fascinating how something so small can make such a big difference! Additionally, yeast plays a vital role in creating the rise we love in rolls. I remember the excitement of watching my dough rise, even without gluten, and it made me feel like a true baker.
When mixing your ingredients, it’s essential to be gentle. Unlike traditional dough, gluten-free mixes can be more fragile. I’ve found that mixing by hand rather than using an electric mixer often leads to a lighter texture. It’s a bit of a labor of love, but the results are worth it!
As I experimented with gluten-free baking, I realized that patience is key. Allowing the dough to rest and rise properly helps develop the flavors and texture. My first few attempts weren’t perfect, but I learned to embrace the process and enjoy the journey of creating something delicious.
Understanding these basics will empower you to create the most delightful soft and fluffy gluten-free dinner rolls for your holiday gatherings. As I continue to bake and experiment, I’m excited to share what I’ve learned with you, making it easier for us to enjoy these delicious treats together!
Key Ingredients for Soft & Fluffy Gluten-Free Dinner Rolls
As I delved deeper into gluten-free baking, I realized that certain ingredients play a crucial role in achieving those soft and fluffy dinner rolls we all crave. It’s almost like a secret formula, and I can’t wait to share it with you! Let’s break down the key components that make these rolls irresistible.
Essential Gluten-Free Flours
While I’ve already touched on different types of gluten-free flours, it’s essential to highlight which ones are the absolute best for creating those pillowy rolls. I’ve found that using a blend of flours often yields the best results. For example, combining almond flour with brown rice flour creates a lovely texture and flavor balance. The almond flour adds moisture, while the brown rice flour gives structure.
Another great option I’ve experimented with is oat flour. It lends a wholesome taste, and when mixed with other flours, it makes the rolls even tastier. I’ve talked to friends who prefer using gluten-free blends from the store, which can save time. Just remember to check the ingredients to ensure they’re high-quality and free of additives.
Binders and Leaveners: Xanthan Gum and Yeast
Binders and leaveners are the unsung heroes of gluten-free baking. When I first started, I didn’t fully appreciate how important they were until I experienced the difference firsthand. Xanthan gum is a must-have in my pantry. It acts as a binding agent, helping to give the dough some stretch and hold it all together. I remember when I forgot to add it once, and my rolls turned out flat—it was a bit disappointing!
Alongside xanthan gum, yeast plays a vital role in making our rolls rise. I find that using fresh yeast gives the best results. There’s something so satisfying about watching the dough puff up, filled with air bubbles, creating that light texture we all love. It’s like a little miracle in the kitchen! When using yeast, make sure to activate it properly. I usually mix it with warm water and a bit of sugar and let it sit for a few minutes until it becomes frothy. That’s when I know it’s ready to work its magic.
Moisture-Rich Ingredients: Eggs, Milk, and Oils
Another essential factor in achieving soft rolls is moisture. I’ve found that using eggs not only helps with binding but also adds richness. If you’re looking for a vegan option, there are great egg substitutes like flaxseed meal or applesauce. The key is to ensure that whatever you choose retains some moisture in the dough.
When it comes to milk, I usually opt for almond or oat milk, which complements the flavors beautifully. The fat content is essential, so I also love adding a bit of oil—olive oil or melted coconut oil work wonderfully. I remember the first time I brushed the tops of my rolls with a bit of melted butter before baking; it made a world of difference in flavor and appearance!
Flavor Enhancers: Herbs, Spices, and Sweeteners
Now, let’s talk about flavor! I believe that even the simplest rolls can be elevated with the right seasonings. I often add garlic powder or herbs like rosemary and thyme to the dough for a savory twist. It’s amazing how a little extra flavor can make our dinner rolls the star of the meal. I also enjoy experimenting with sweeteners; a touch of honey or maple syrup adds a nice hint of sweetness without overpowering the rolls.
One of my favorite memories is when I decided to add a sprinkle of sea salt on top just before baking. It created a delightful contrast to the sweetness, making the rolls incredibly addictive. I think it’s these small touches that can truly transform our gluten-free baking into something extraordinary.
By understanding and selecting these key ingredients, we can create soft and fluffy gluten-free dinner rolls that everyone will love. I’m excited to share my favorite recipe with you, which combines all these elements perfectly, so we can enjoy the magic of baking together!
Step-by-Step Recipe for Gluten-Free Dinner Rolls
Preparation: Gathering Ingredients and Tools
Before diving into the baking process, I love to prepare my kitchen and gather all the ingredients I’ll need. It makes everything flow so much smoother. For these gluten-free dinner rolls, you’ll want to have the following ingredients ready:
- 2 cups gluten-free all-purpose flour blend
- 1 cup almond flour
- 1 tablespoon xanthan gum
- 1 packet (about 2 ¼ teaspoons) of active dry yeast
- 1 cup warm almond milk (or any milk of your choice)
- 2 large eggs (or flaxseed meal or applesauce for a vegan option)
- ¼ cup olive oil or melted coconut oil
- 1 tablespoon honey or maple syrup (optional)
- 1 teaspoon salt
- Any desired herbs or spices for flavor
I also recommend having a mixing bowl, a whisk, measuring cups and spoons, a baking sheet lined with parchment paper, and a clean kitchen towel handy. Setting everything out in advance helps me get into the baking zone!
Mixing the Dough: Techniques for Best Results
Once I’ve got my ingredients lined up, it’s time to mix the dough. I start by activating the yeast. In a small bowl, I combine the warm almond milk, honey (if using), and yeast. I let it sit for about 5 to 10 minutes until it becomes frothy. This step is crucial because it shows that the yeast is alive and ready to help our rolls rise!
In a large mixing bowl, I combine the gluten-free flour blend, almond flour, xanthan gum, and salt. I give it a good mix with a whisk to ensure everything is evenly distributed. Then, I add the frothy yeast mixture, eggs, and olive oil to the dry ingredients. I usually start mixing with a spatula, gradually bringing everything together. You can feel the dough coming to life!
Once the mixture is almost combined, I switch to my hands. I find that kneading it gently for just a minute or two helps create a cohesive dough. Gluten-free dough doesn’t need as much kneading as traditional dough, so this part is quick. If it feels too sticky, I sprinkle a bit more flour on top.
Proofing the Rolls: Importance of Rising Time
Proofing is one of my favorite parts of the baking process because it feels like magic! After mixing, I cover the bowl with a clean kitchen towel and let it sit in a warm spot for about 30 to 60 minutes. This allows the dough to rise and develop those lovely air bubbles that make our rolls fluffy.
I’ve learned that if my kitchen is a bit chilly, I can turn my oven on to the lowest setting for a few minutes and then turn it off. It creates a warm environment perfect for proofing. During this time, I often use the moment to clean up my workspace or prep any sides I’ll be serving with the rolls.
Baking Instructions: Achieving the Perfect Texture
Once the dough has risen, I gently punch it down to release any excess air. Then, I form the dough into small balls, about the size of a golf ball. I place them on my prepared baking sheet, leaving a bit of space between each roll to allow for further rising. After shaping them, I cover the rolls again and let them rise for another 20 to 30 minutes.
While they’re rising, I preheat my oven to 375°F (190°C). The smell of the preheating oven is always a delightful anticipation! After the second rise, I like to brush the tops of the rolls with a little melted butter or olive oil — it adds a beautiful golden color and flavor. If I’m feeling a bit fancy, I sprinkle on some sea salt or herbs at this point.
I bake the rolls in the oven for about 15 to 20 minutes, or until they’re golden brown and cooked through. I know they’re ready when a toothpick inserted in the center comes out clean. The aroma wafting through my kitchen is always the best part!
Cooling and Storing: Tips for Freshness
Once the rolls are out of the oven, I let them cool on the baking sheet for about 5 minutes before transferring them to a wire rack. This helps them maintain their fluffy texture. It’s so tempting to dive in right away, but I’ve learned that letting them cool just a bit makes a big difference.
If we don’t devour them all at once, I like to store the leftover rolls in an airtight container at room temperature for a couple of days. For longer storage, they freeze beautifully! I wrap them individually in plastic wrap and place them in a freezer bag. When I want to enjoy them again, I simply let them thaw at room temperature or pop them in the oven for a few minutes to warm them up.
Now that we’ve got the recipe down, I’m excited to share some tips for perfecting these gluten-free dinner rolls even further!
Tips for Perfecting Your Gluten-Free Dinner Rolls
Common Mistakes to Avoid
As I’ve experimented with gluten-free baking, I’ve realized that there are a few common pitfalls that many of us can fall into. One of the biggest mistakes is not measuring ingredients accurately. I remember the first time I just eyeballed the flour! Let’s just say the results weren’t what I hoped for. Using a kitchen scale can help ensure precision, which is vital in gluten-free baking.
Another mistake I’ve made is not allowing enough time for proofing. Rushing this step leads to dense rolls, and I learned the hard way that patience pays off. Making sure the dough rises properly is crucial for achieving the fluffy texture we’re after. I’ve also noticed that using expired yeast can be a disaster. Always check the expiration date before adding it to your mix—trust me, I’ve had my share of flat rolls because of this!
Lastly, don’t be afraid to experiment, but remember to stick to the proportions suggested in the recipe initially. I got a bit too adventurous once and swapped flours without considering how each one behaves. Sometimes, a little tweak can lead to delightful discoveries, but it’s good to start with a solid base before venturing out!
Adjusting Texture and Flavor to Your Preference
One of the great things about baking gluten-free is that you can tailor the flavors and textures to suit your preferences. If you like your rolls a bit sweeter, consider adding a touch more honey or maple syrup. I’ve found that even a teaspoon more can create a delightful difference! For savory rolls, try incorporating different herbs or even cheese if you’re not strictly dairy-free.
If you want to adjust the texture, playing with the flour blend can yield amazing results. For instance, adding a bit of coconut flour can give a denser, more cake-like roll, while increasing the almond flour can add a moist and rich flavor. I love experimenting with the ratios until I find the perfect mix that satisfies my taste buds.
Moreover, if you find your rolls are consistently too dry, it might be worth trying to add more moisture, whether through an extra egg or a little more oil. Adjusting ingredients to find that perfect balance is part of the joy of baking!
How to Make Dinner Rolls Ahead of Time
There have been many times when I’ve wanted to prepare ahead for special occasions. Making gluten-free dinner rolls in advance can be a real lifesaver! One of my favorite tricks is to prepare the dough and let it rise, then shape the rolls and place them on the baking sheet. Instead of baking them right away, I cover the tray with plastic wrap and pop it in the fridge. You can do this the night before, and the next day, you just need to let them sit at room temperature while the oven preheats, and then bake as usual.
If you want to go a step further, you can freeze the shaped rolls. I often freeze them before the second rise—just make sure to wrap them well in plastic wrap and place them in a freezer bag. When you’re ready to bake, simply let them thaw overnight in the fridge and then allow them to rise at room temperature for about 30 to 60 minutes before baking. This way, you can enjoy fresh rolls with minimal last-minute effort!
Serving Suggestions for Holiday Meals
Pairing with Traditional Holiday Dishes
When it comes to serving gluten-free dinner rolls, I love to think about how they can complement the entire meal. These rolls work beautifully alongside a variety of traditional holiday dishes. I often serve them with roasted turkey or honey-glazed ham, and they’re perfect for soaking up gravy or sauces. I’ve even seen people use them as a base for mini sandwiches during gatherings.
Creative Toppings and Spreads
Don’t forget about the toppings! I think a little creativity can really enhance the experience. For a simple yet delicious option, a spread of herb-infused butter or garlic butter can elevate the rolls to another level. I’ve even made a citrus-infused butter that added a fresh twist. If you’re feeling adventurous, try adding some pesto or a savory spread made from olives or sun-dried tomatoes.
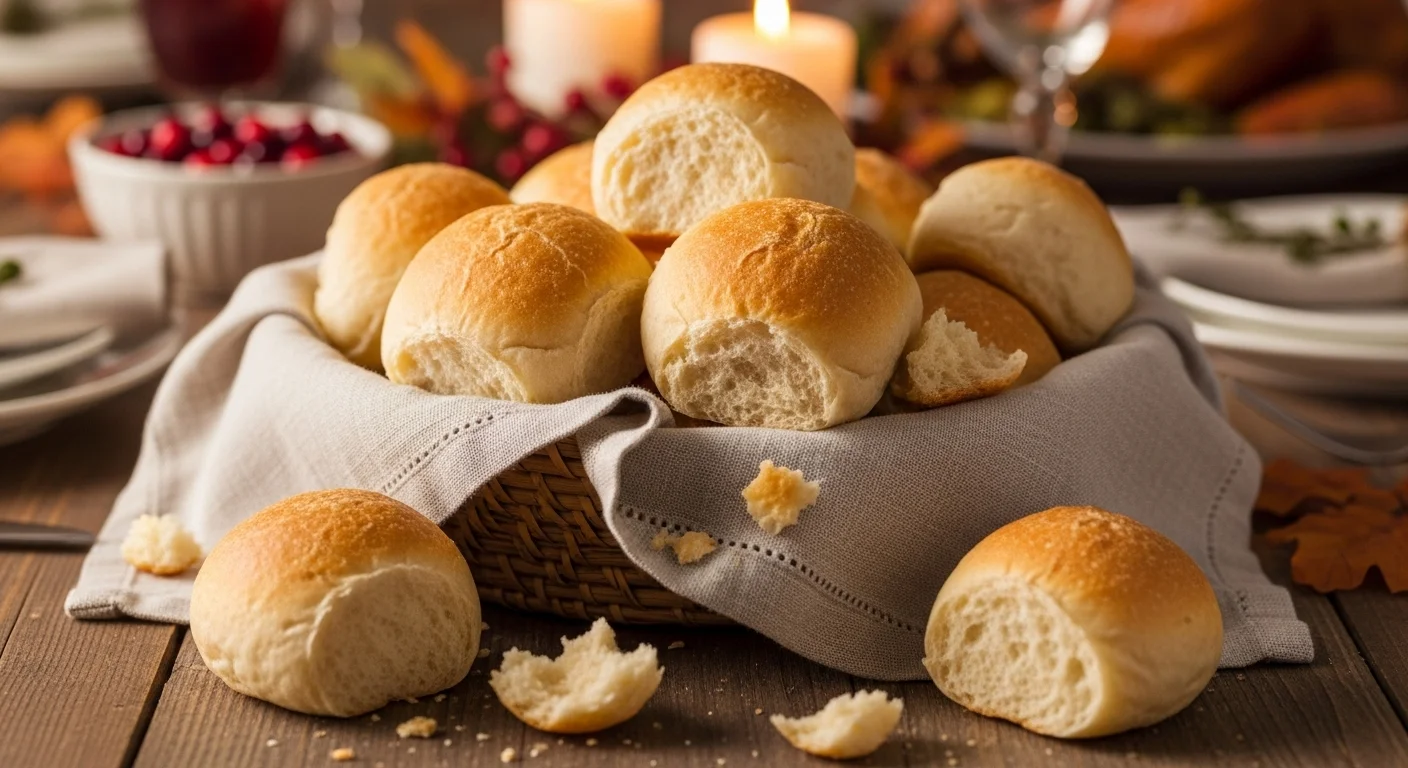
Presentation Ideas for Festive Occasions
Presentation matters, especially during the holidays. I love to arrange my rolls in a beautiful basket lined with a festive cloth. Adding a sprinkle of fresh herbs on top just before serving can bring a lovely pop of color. I also enjoy placing a small dish of flavored butter or a unique spread alongside the rolls for guests to enjoy. It’s all about creating an inviting atmosphere where everyone feels welcome to dig in!
FAQs About Gluten-Free Dinner Rolls
Can Gluten-Free Dinner Rolls Be Made Vegan?
Absolutely! I’ve explored many vegan alternatives in my baking journey. Using flaxseed meal or applesauce in place of eggs works wonderfully. Additionally, plant-based milks and oils can easily substitute for dairy ingredients, making it simple to adapt this recipe for a vegan diet.
How to Reheat Leftover Dinner Rolls?
If you find yourself with leftover rolls, reheating them is easy! I recommend wrapping them in foil and placing them in a preheated oven at 350°F (175°C) for about 10-15 minutes. This keeps them nice and soft. Alternatively, you can microwave them for about 10-15 seconds, but be careful not to overdo it, or they may become tough!
Are Gluten-Free Dinner Rolls Freezer-Friendly?
Yes, they freeze beautifully! I often wrap each roll individually in plastic wrap and then place them in a freezer bag. This way, I can take out just what I need and enjoy them fresh whenever I want!
Additional Gluten-Free Bread Recipes to Try
Gluten-Free Dinner Loaf
This versatile loaf is great for sandwiches or toast! It’s a simple recipe that yields a soft and flavorful bread that pairs well with any meal.
Gluten-Free Garlic Breadsticks
Who doesn’t love garlic bread? These breadsticks are great for dipping into marinara sauce or serving alongside pasta dishes.
Gluten-Free Buns for Burgers
Perfect for summer BBQs or any casual meal, these gluten-free buns will hold up to any burger and are sure to impress your guests!
Final Thoughts
Embarking on the journey of gluten-free baking has truly transformed how I approach meals, especially during the holidays. I’ve found joy in creating delicious, soft, and fluffy dinner rolls that everyone can enjoy, regardless of their dietary restrictions. The process of trial and error has not only honed my skills but has also made me appreciate the small victories along the way.
Whether you’re a seasoned baker or just starting, I encourage you to embrace the adventure of gluten-free baking with an open heart and a dash of creativity. Remember, each roll is a little piece of love, meant to be shared with family and friends. So gather your ingredients, roll up your sleeves, and let’s make some gluten-free dinner rolls that will surely be the highlight of your meals! Read Interesting article: Everyone’s Talking About This Quick Chicken Stir Bowl
Frequently Asked Questions
What are gluten-free dinner rolls?
Gluten-free dinner rolls are soft, fluffy rolls made without gluten-containing ingredients, suitable for those with celiac disease or gluten sensitivity. They can enhance holiday meals and are enjoyed by everyone.
What is gluten, and why should some people avoid it?
Gluten is a type of protein found in wheat, barley, and rye. Some people, especially those with celiac disease or gluten sensitivity, should avoid it because it can cause digestive issues and fatigue.
What common gluten-free flours can be used in baking?
Common gluten-free flours include almond flour, coconut flour, brown rice flour, oat flour (using certified gluten-free oats), and gluten-free all-purpose flour blends.
What role do binders and leaveners play in gluten-free baking?
Binders like xanthan gum help hold gluten-free dough together, while leaveners like yeast create rise and lightness in the rolls, compensating for the lack of gluten.
How do I achieve the right texture for gluten-free dinner rolls?
To achieve the right texture, it’s essential to use a blend of gluten-free flours, incorporate binders like xanthan gum, and ensure proper mixing and proofing of the dough.
Can gluten-free dinner rolls be made ahead of time?
Yes, you can prepare the dough in advance, shape the rolls, and refrigerate or freeze them before baking. This allows for fresh rolls with minimal last-minute effort.
What are some good serving suggestions for gluten-free dinner rolls during holiday meals?
Gluten-free dinner rolls pair well with roasted turkey or honey-glazed ham and are great for soaking up gravy. They can also be used for mini sandwiches or served with flavored butters and spreads.
How should leftover gluten-free dinner rolls be stored?
Leftover rolls can be stored in an airtight container at room temperature for a couple of days or frozen individually for longer storage. To enjoy them later, thaw at room temperature or warm them in the oven.
What mistakes should I avoid when making gluten-free dinner rolls?
Common mistakes include not measuring ingredients accurately, not allowing enough time for proofing, and using expired yeast. It’s essential to follow the recipe proportions and be patient during the rising process.
Are gluten-free dinner rolls suitable for a vegan diet?
Yes, gluten-free dinner rolls can be made vegan by substituting eggs with flaxseed meal or applesauce and using plant-based milk and oils in place of dairy ingredients.