
Have you ever wanted to bake your own sourdough bread but felt overwhelmed by the process? Don’t worry, I’ve been there too. This guide is here to simplify everything for you, making sourdough approachable and fun! Read Interesting article: A Guide To Same Day Sourdough Bread (No Overnight Proof)
Understanding Sourdough Bread
What is Sourdough Bread?
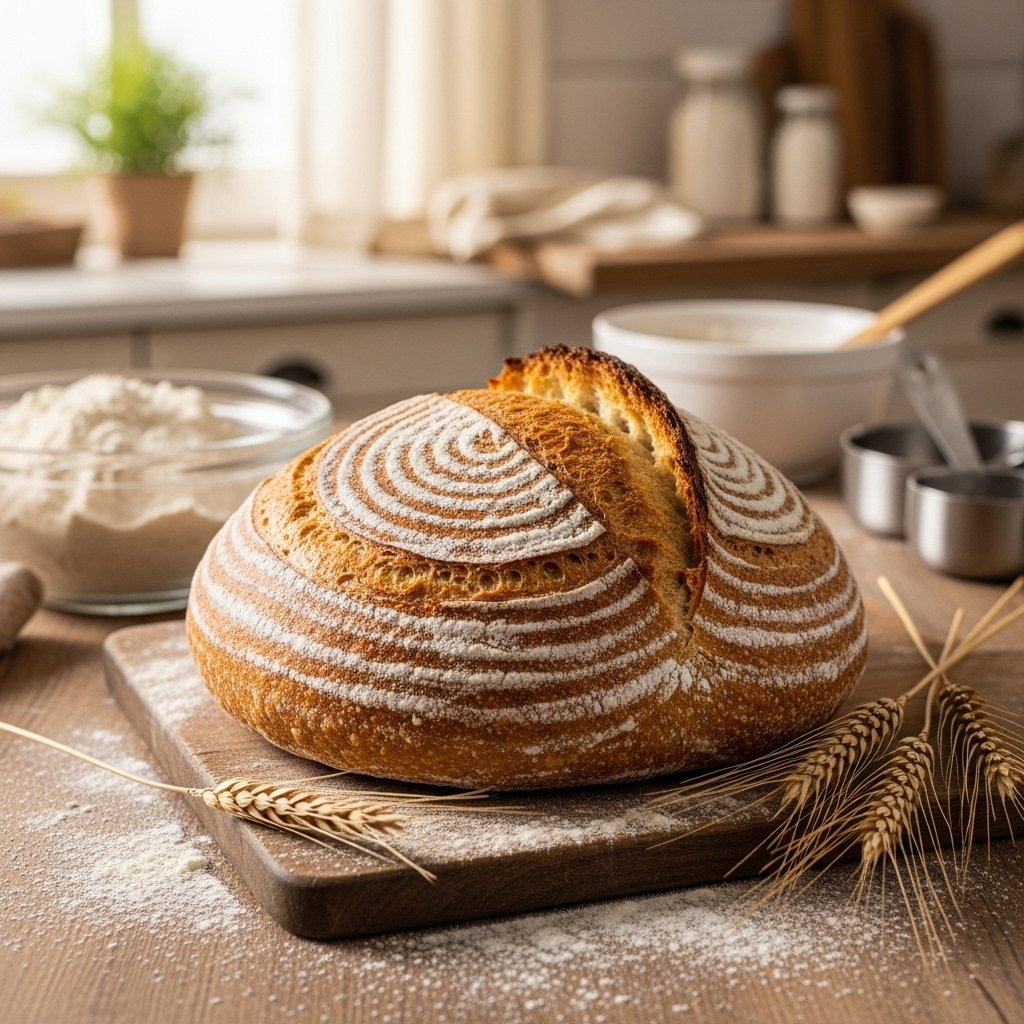
Sourdough bread is a type of bread that’s made using natural fermentation. Instead of using commercial yeast, sourdough relies on a culture of wild yeast and bacteria that live in a sourdough starter. This gives sourdough its unique tangy flavor and chewy texture. I remember the first time I tasted a slice of freshly baked sourdough—it had this amazing depth of flavor that I just couldn’t get over. I knew I had to learn how to make it myself!
History of Sourdough Bread
The history of sourdough bread is rich and fascinating. It’s believed that sourdough was one of the first forms of leavened bread, dating back thousands of years to ancient civilizations. The Egyptians are often credited with discovering this method of bread-making around 1500 BC. They noticed that dough left out would ferment and rise on its own, leading to the delicious bread we enjoy today. Learning about this history made me appreciate sourdough even more. It’s like a little piece of history in every loaf!
Benefits of Eating Sourdough Bread
There are so many reasons to love sourdough bread, both for its taste and its health benefits. In my experience, one of the biggest perks is that it’s easier to digest than regular bread. The fermentation process breaks down gluten and phytic acid, making nutrients more available for our bodies. Plus, sourdough has a lower glycemic index compared to other breads, which means it doesn’t spike your blood sugar as much. I’ve found that I feel fuller and more satisfied after eating sourdough, which is a win in my book!
Moreover, sourdough is often made with whole grains, which means it’s higher in fiber and nutrients. The probiotics from the fermentation process can also be beneficial for gut health. It’s comforting to know that I’m not just indulging in a delicious treat, but also eating something good for me. If you haven’t tried sourdough yet, I highly recommend giving it a shot. You might just become as obsessed as I am!
Essential Ingredients for Sourdough Bread
Flour Types (Bread Flour, Whole Wheat, etc.)
The type of flour you choose is crucial in sourdough baking. I’ve found that bread flour is often the go-to choice because of its higher protein content, which helps develop gluten and gives the bread structure. Whole wheat flour is also a fantastic option if you want a nuttier flavor and added nutrients. I like to mix different types of flour in my recipes to experiment with flavors and textures. It’s amazing how a simple change in flour can completely transform the final product!
Water Quality and Temperature
Water might seem like a simple ingredient, but it can make a big difference in your sourdough. I always use filtered water because tap water can contain chlorine and other chemicals that could inhibit the fermentation process. Temperature is also essential; I’ve learned that using water at room temperature (around 70°F or 21°C) helps activate the yeast in my starter. If the water is too hot or too cold, it can slow down fermentation, and that’s something we want to avoid.
Salt: Importance and Types
Salt is another key ingredient in sourdough. It not only enhances flavor but also helps strengthen the dough. I prefer using kosher or sea salt, as they dissolve easily and don’t contain additives. Just a small amount (usually around 2% of the flour weight) is enough to make a difference. I can’t stress enough how important it is not to skip the salt—it’s what elevates sourdough from good to great!
Sourdough Starter: What It Is and How to Use It
A sourdough starter is like a pet; it needs care and feeding! It’s a mixture of flour and water that captures wild yeast and bacteria from the environment. I remember feeling so proud when I first created my starter—it was like nurturing a living thing. To use it, I simply feed it regularly and let it ferment. When it’s bubbly and doubled in size, it’s ready to be mixed into my dough. Using a well-established starter can make all the difference in your bread’s flavor and rise.
Now that we’ve covered the essentials, you’re well on your way to understanding the wonderful world of sourdough bread. Just remember, the key is patience and practice. I’ve had my fair share of flops, but each loaf is a lesson learned. Let’s keep this journey going together—there’s so much more to discover about making your own sourdough bread! Read Interesting article: How To Get A Rustic Sourdough Bread Loaf (A Simple Guide)
Creating Your Sourdough Starter
What is a Sourdough Starter?
A sourdough starter is essentially a living culture of flour and water that captures wild yeast and bacteria from the environment. I love to think of it as the heart of sourdough baking. When I first started, I was amazed at how this simple mixture could transform into something so magical. You feed it, nurture it, and in return, it gives you the power to bake delicious bread. It’s like having a little piece of nature working in your kitchen!
Ingredients Needed for Starter
Creating your sourdough starter is straightforward and requires just two main ingredients: flour and water. I usually opt for all-purpose flour or whole wheat flour, but you can experiment with different types. I’ve found that whole wheat flour tends to kickstart the fermentation process faster because it has more nutrients and wild yeast. As for water, remember to use filtered or distilled water for the best results. The purity of the water really does make a difference in the outcome.
Step-by-Step Guide to Making a Starter
Getting started with your sourdough starter is a fun and rewarding process! Here’s a simple step-by-step guide that I followed:
- Day 1: In a clean jar, mix 100 grams of flour and 100 grams of water. Stir until the mixture is smooth. Cover it loosely with a cloth or plastic wrap—this allows air to circulate while keeping dust out.
- Day 2: You might not see much activity yet, and that’s okay! Stir the mixture once or twice and let it sit at room temperature.
- Day 3: By now, you should notice some bubbles forming. This means the wild yeast is starting to work! Discard half of the starter and feed it again with 100 grams of flour and 100 grams of water.
- Day 4: Continue to feed your starter daily. It should start to smell tangy and become more bubbly. You might want to switch to a feeding schedule of 1:1:1 (equal parts starter, flour, and water) if it’s getting active.
- Day 5: If your starter has doubled in size within 4 to 6 hours of feeding, it’s ready to use! If not, keep feeding it daily until it shows consistent activity.
This whole process took me about five to seven days, but patience is key. Once it’s ready, you can use it in your baking adventures!
Common Problems and Solutions
As with any new endeavor, you might run into some issues while creating your sourdough starter. I know I did! Here are a few common problems and how to tackle them:
- No bubbles: If your starter isn’t bubbling, it may be too cold. Try moving it to a warmer spot in your kitchen or using slightly warmer water.
- Smells off: A sour smell is normal, but if it smells like rotten or has a layer of liquid on top (called hooch), it may need more frequent feedings. Discard the liquid and feed it again.
- Slow rise: If your starter is slow to rise, it may need to be fed more flour or kept warmer. Another tip is to use whole wheat flour for a boost of nutrients.
- Too runny: If your starter is too runny, try increasing the flour to water ratio slightly. A thicker starter can help with structure and fermentation.
Remember, it’s all part of the journey! I found that keeping a journal of my starter’s progress helped me learn and adjust as needed. Each time I tackled a problem, I felt more connected to the bread-making process.
The Sourdough Bread Making Process
The Sourdough Bread Making Process
Preparing the Dough: Mixing and Autolyse
Once my sourdough starter is bubbly and ready to go, the next step is preparing the dough. I usually start by measuring out my flour and water. The best part? I love using a kitchen scale for accuracy—it makes a noticeable difference in my baking. I typically mix about 500 grams of flour with 350 grams of water. This ratio can vary based on the type of flour I use, so I always keep an eye on the dough’s consistency.
After mixing the flour and water in a large bowl, I let it rest for about 30 minutes to an hour—this phase is called autolyse. During this time, the flour absorbs the water, and gluten begins to develop. I find that allowing the dough to rest makes it easier to knead later on and improves the overall texture of the bread. It’s like giving the dough a little spa day!
Bulk Fermentation: What to Expect
Next comes bulk fermentation. I usually transfer the dough to a clean bowl and cover it with a damp cloth or plastic wrap to keep it moist. This phase typically lasts about 4 to 6 hours, depending on the temperature of my kitchen. During this time, I like to perform a few stretch and folds every 30 minutes. This helps build strength in the dough without overworking it. I remember being amazed at how the dough would rise and bubble, giving me a glimpse of the beautiful bread to come.
During bulk fermentation, I pay close attention to the dough’s texture and aroma. It should become puffy and slightly elastic. If I see it rising nicely and smelling a bit tangy, I know I’m on the right track. It’s fascinating to think about how the wild yeast and bacteria in my starter are working hard to create something delicious!
Shaping the Dough: Techniques and Tips
After bulk fermentation, it’s time to shape the dough. I gently turn it out onto a floured surface, being careful not to deflate it too much. I remember when I first started shaping my dough; it felt a bit intimidating, but with some practice, I found my groove. I usually shape it into a round or oval loaf, depending on my baking vessel.
One tip that really helped me was to use a technique called the “bench rest.” After shaping, I let the dough rest for about 20 to 30 minutes before the final shaping. This helps relax the gluten, making it easier to shape again. When I’m ready for the final shape, I make sure to create tension on the surface of the dough. This tension helps achieve a nice rise in the oven.
Proofing: How Long and Where?
Proofing is the next step, and it’s crucial for developing flavor and texture. I often let my shaped dough proof in a banneton (a special basket) lined with a cloth to help maintain its shape. I find that a longer proof at a cooler temperature (like the fridge overnight) enhances the flavor. Sometimes, I’ll leave it in the fridge for 12 to 18 hours. It’s amazing how much flavor can develop overnight!
If I’m short on time, I’ll proof at room temperature for about 2 to 4 hours. I look for the dough to puff up significantly but not double in size. A good test is to poke the dough gently; if it springs back slowly, it’s ready to bake. I’ve learned to trust my instincts during this part of the process because every dough is different.
Baking: Oven Setup and Techniques
Finally, the moment of truth arrives—baking! I preheat my oven to around 450°F (230°C) and place a Dutch oven inside. Preheating the Dutch oven is key to getting a great crust. When I’m ready to bake, I carefully transfer the dough into the hot pot, being cautious not to burn myself. I often score the top of the dough with a sharp blade to control how it expands in the oven. It’s a little intimidating at first, but I enjoy the artistic aspect of it.
Covering the Dutch oven with a lid traps steam, which is essential for getting that beautiful crust. After about 30 minutes, I remove the lid and let the bread bake for another 15 to 20 minutes until it’s golden brown and crackly. I can’t help but peek through the oven window, watching my dough transform into a gorgeous loaf. The smell of baking sourdough fills my kitchen, and it’s an experience that never gets old.
Once it’s done, I let it cool on a wire rack for at least an hour before slicing. I know it can be tough to wait, but slicing into a warm loaf can ruin the texture. Trust me, the wait is worth it!
Common Variations of Sourdough Bread
Whole Wheat Sourdough
Whole wheat sourdough is one of my personal favorites. It brings a heartier flavor and adds a nutritional punch. When I bake whole wheat sourdough, I like to experiment with the proportions of whole wheat flour compared to bread flour. I’ve found that a 50/50 mix gives me the best balance of flavor and texture. Whole wheat flour not only enhances the taste but can make the bread denser, which can be a delightful change from the traditional white sourdough. I remember the first time I sliced into a loaf of whole wheat sourdough; the nutty aroma filled my kitchen, and I couldn’t wait to spread some butter on a warm slice!
Rye Sourdough
If you’re looking to explore different flavors, rye sourdough is a fantastic option. The earthy, slightly sweet taste of rye flour makes for a unique loaf. I often mix rye flour in with my bread flour, starting with about 25% rye and gradually increasing it as I get more comfortable. Rye has a different hydration level, so I’ve learned to adjust my water accordingly. The texture of rye sourdough can be denser, but it has a rich flavor that pairs beautifully with toppings like cream cheese or smoked salmon. One bite of a slice of rye sourdough, and I’m transported to a cozy café in Europe! Read Interesting article: A Beginner’s Guide To Rye Sourdough Bread (So Flavorful)
Flavored Sourdough (Herbs, Cheese, etc.)
Adding flavors to my sourdough is one of the most enjoyable aspects of baking. I love infusing my loaves with herbs, cheeses, or even spices. For example, I often add fresh rosemary and roasted garlic right into the dough. The aroma that fills my kitchen while baking is absolutely heavenly! I’ve also experimented with adding grated cheese, like Parmesan or cheddar, which creates a delightful crust and savory center. When trying flavored sourdough, I usually add these ingredients during the mixing stage or just before the final shaping. The creativity involved in making flavored sourdough keeps baking exciting, and I can never wait to see how they turn out!
Troubleshooting Common Sourdough Issues
Dense Bread: Causes and Fixes
One of the most common issues I’ve faced when baking sourdough is ending up with a dense loaf. There are several reasons this can happen. Sometimes, I didn’t give the dough enough time to rise, or I didn’t knead it well enough to develop the gluten. I’ve found that practicing patience and paying attention to the dough’s texture can really help. If my bread comes out too dense, I make a note to extend the bulk fermentation time next time or check my starter to ensure it’s bubbly and active.
Overproofed or Underproofed Bread
Getting the proofing just right can be tricky. I’ve definitely had my fair share of overproofed and underproofed loaves. An overproofed loaf might collapse in the oven, while an underproofed loaf won’t rise as well. I’ve learned to trust my instincts and look for visual cues: the dough should be puffy and spring back slowly when poked. If I ever find my dough is overproofed, I’ve started to use it as a base for a new loaf, mixing in a bit of extra flour and water to revive it.
Crust Issues: Too Thick or Too Soft
The crust can also be a source of frustration. I’ve had times when my crust turned out too thick and hard, making it difficult to slice. This can happen if I bake at too high a temperature or for too long. Conversely, if the crust is too soft, I remember that I might not have used enough steam in the oven. I’ve come to appreciate the balance; a good crust should be crisp yet tender. Experimenting with baking times and oven temperatures has helped me find what works best for me.
Flavor Problems: Sourness Level
Lastly, the flavor of my sourdough can sometimes be a bit off. I’ve had loaves that were too sour, which can happen if my starter is overactive or I let the dough ferment for too long. On the flip side, some of my breads have come out lacking that tangy flavor I love. I’ve learned to adjust my fermentation times and to experiment with different feeding schedules for my starter. It’s all about finding the right balance for my taste preferences!
Storing and Using Sourdough Bread
Best Practices for Storing Sourdough
Once I’ve baked my sourdough, I want to ensure it stays fresh for as long as possible. I’ve found that the best way to store it is in a paper bag or wrapped in a kitchen towel. This allows the bread to breathe while preventing it from getting too hard. I try to avoid plastic wrap, as it can trap moisture and lead to a soggy loaf. When I do this, my bread stays fresh for several days. If I notice any leftover slices, I freeze them to enjoy later!
Freezing Sourdough Bread
Freezing my sourdough has been a game changer. I’ve learned to slice my bread before freezing it so that I can take out just what I need. I wrap each slice tightly in parchment paper and then place them in a freezer bag. This way, I can grab a slice whenever I want a quick toast or sandwich. When I’m ready to eat, I simply pop a slice in the toaster or let it thaw at room temperature. It’s like having fresh sourdough on hand whenever I want!
How to Revive Stale Sourdough
If I ever find myself with stale sourdough, I’ve discovered some great ways to revive it. A quick and easy method is to sprinkle a little water on the crust and pop it in a hot oven for a few minutes. This refreshes the crust and brings back that warm, soft interior. I’ve also used stale sourdough in recipes like bread pudding or croutons, which help minimize waste and make delicious new dishes!
Frequently Asked Questions about Sourdough Bread
How Long Does it Take to Make Sourdough Bread?
Making sourdough bread is a time investment that’s absolutely worth it. From start to finish, it usually takes me about 24 hours, considering the time for the starter, bulk fermentation, proofing, and baking. It might seem daunting, but the hands-on time is minimal, and every step feels rewarding!
Can I Use Store-Bought Starter?
Absolutely! I’ve used store-bought starters before, and they can be a great way to jumpstart your sourdough journey. Just be sure to feed it and care for it as you would with a homemade starter. The flavor might be slightly different, but it can still yield fantastic bread!
What Equipment Do I Need?
To get started with sourdough, I recommend having a kitchen scale, mixing bowls, a bench scraper, a banneton for proofing, and a Dutch oven for baking. These tools make the process smoother and help achieve better results. I’ve found that investing in quality tools can really enhance my baking experience!
Is Sourdough Bread Gluten-Free?
Sourdough bread made with traditional wheat flour is not gluten-free. However, there are gluten-free sourdough recipes out there that use alternative flours like rice, almond, or buckwheat. I’ve seen some wonderful results, but I recommend following a specific gluten-free recipe to ensure success.
Resources for Further Learning
Books on Sourdough Baking
If you’re eager to dive deeper into the world of sourdough, there are some fantastic books available. I particularly enjoyed “The Bread Baker’s Apprentice” by Peter Reinhart, which offers great insights into the science and art of bread baking. Another favorite of mine is “Tartine Bread” by Chad Robertson, which inspired my love for sourdough.
Online Courses and Tutorials
There are numerous online courses and video tutorials that can guide you through the sourdough process. I’ve found platforms like MasterClass and Skillshare offer valuable insights from expert bakers. Watching them in action has helped me improve my technique and confidence!
Community Forums and Support Groups
Joining a sourdough community can be incredibly helpful. I’ve benefited from forums like The Fresh Loaf and Facebook groups where passionate bakers share their experiences, tips, and troubleshooting advice. Connecting with others who share my passion for sourdough has enriched my baking journey!
Final Thoughts
Creating sourdough bread has been one of the most rewarding experiences of my baking journey. It’s a blend of science and art that allows for endless creativity and experimentation. Through my successes and failures, I’ve learned to appreciate the process as much as the delicious end result. Whether you’re a beginner or a seasoned baker, I hope this guide has inspired you to embark on your own sourdough adventure. Embrace the journey, be proud of your creations, and most importantly, enjoy every slice of your homemade sourdough!
Frequently Asked Questions
What is sourdough bread?
Sourdough bread is a type of bread made using natural fermentation, relying on a culture of wild yeast and bacteria from a sourdough starter instead of commercial yeast. This process gives sourdough its unique tangy flavor and chewy texture.
How long does it take to make sourdough bread?
Making sourdough bread typically takes about 24 hours from start to finish, considering the time needed for the starter, bulk fermentation, proofing, and baking.
Can I use store-bought starter?
Yes, store-bought starters can be used to jumpstart your sourdough journey. Just ensure to feed and care for it as you would with a homemade starter.
What equipment do I need to start making sourdough bread?
Essential equipment includes a kitchen scale, mixing bowls, a bench scraper, a banneton for proofing, and a Dutch oven for baking. These tools help make the process smoother and improve results.
Is sourdough bread gluten-free?
No, traditional sourdough bread made with wheat flour is not gluten-free. However, gluten-free sourdough recipes do exist that use alternative flours like rice, almond, or buckwheat.
What are the benefits of eating sourdough bread?
Sourdough bread is easier to digest than regular bread due to the fermentation process, which breaks down gluten and phytic acid. It also has a lower glycemic index, is often made with whole grains, and contains probiotics beneficial for gut health.
What is a sourdough starter?
A sourdough starter is a living culture made of flour and water that captures wild yeast and bacteria from the environment, serving as the foundation for sourdough baking.
What types of flour should I use for sourdough bread?
Common choices include bread flour for its higher protein content, which helps develop gluten, and whole wheat flour for a nuttier flavor and added nutrients. Mixing different flours can also enhance flavors and textures.
How should I store sourdough bread?
Sourdough bread is best stored in a paper bag or wrapped in a kitchen towel to allow it to breathe, preventing it from becoming too hard. Avoid plastic wrap, as it can lead to a soggy loaf.
What are some common problems when making sourdough bread?
Common issues include dense bread due to insufficient rise or kneading, overproofed or underproofed loaves, crusts that are too thick or too soft, and flavor problems like excessive sourness. Each issue has specific adjustments that can help improve the outcome.