
Making sourdough bread with all-purpose flour? Yes, it works! I’ve tried it, and I’m excited to share how you can create this delicious, tangy bread at home with just a few simple ingredients. Read Interesting article: Easy Sourdough Discard Quick Bread (No-Wait Recipe)
Understanding Sourdough Bread
What is Sourdough Bread?
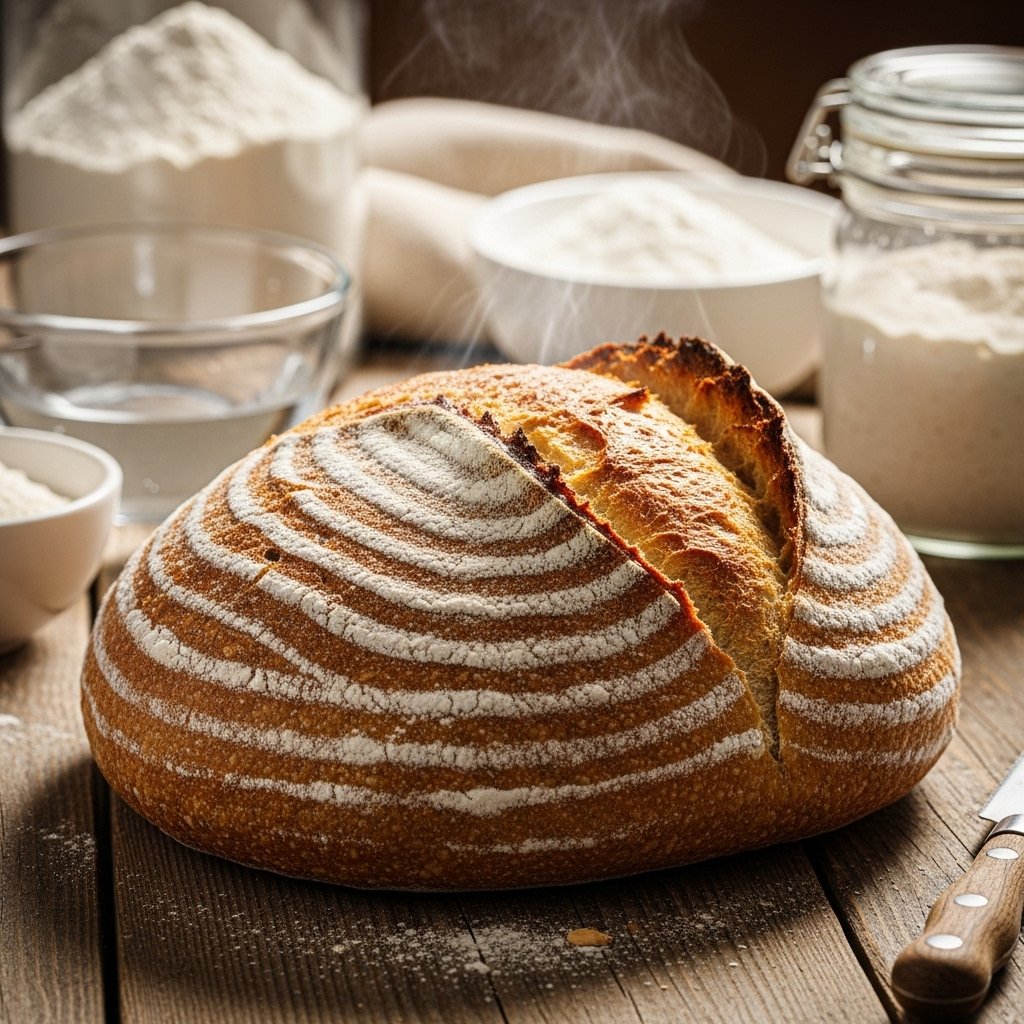
Sourdough bread is a type of bread that uses naturally occurring yeast and lactic acid bacteria for fermentation. Unlike breads made with commercial yeast, sourdough has a unique tangy flavor and chewy texture, thanks to the slow fermentation process. I remember the first time I tasted a freshly baked sourdough loaf; the crust was golden brown and crispy, while the inside was soft and slightly sour. It was love at first bite!
History of Sourdough Bread
The history of sourdough bread goes back thousands of years. It is believed to have originated in ancient Egypt around 1500 BC. Back then, bread was made from a mixture of flour and water that was left out, allowing wild yeast to ferment the dough. I’ve often wondered how such a simple process could lead to something so satisfying. Over the centuries, sourdough became a staple in many cultures, especially in Europe. It wasn’t until the Gold Rush in the mid-1800s that sourdough gained popularity in the United States, particularly in San Francisco. That city’s unique microclimate contributed to its vibrant sourdough culture, which is still celebrated today.
Health Benefits of Sourdough Bread
There are several health benefits to sourdough bread that I’ve come to appreciate. Firstly, the fermentation process breaks down gluten, making it easier to digest for some people. Although it’s not gluten-free, many find it a more tolerable option compared to regular bread. Additionally, sourdough has a lower glycemic index than other breads, which means it can help regulate blood sugar levels. The presence of beneficial bacteria also contributes to gut health. I’ve noticed that when I indulge in homemade sourdough, I feel satisfied and energized rather than sluggish, which is always a plus!
Why Use All Purpose Flour?
Characteristics of All Purpose Flour
All-purpose flour is a versatile staple in many kitchens. It’s a blend of hard and soft wheat, which gives it a moderate protein content of around 10-12%. This protein level allows for a good balance between structure and tenderness in baked goods. I love how easy it is to work with all-purpose flour; it doesn’t require much fuss, and it’s readily available at any grocery store. Plus, it allows for a lighter loaf compared to bread flour, making it a fantastic choice for sourdough.
Comparison with Bread Flour
When I first started making sourdough, I was torn between using all-purpose flour and bread flour. Bread flour contains a higher protein content (around 12-14%), which helps create a stronger gluten structure. This can lead to a chewier texture and a more substantial rise. However, I found that using all-purpose flour still yields great results! The difference is often subtle, and I appreciate the convenience of all-purpose flour. It’s like having the best of both worlds—delicious sourdough without the need for specialty ingredients. Read Interesting article: Easy Sourdough Spelt Bread Recipe (A Healthy Loaf)
Benefits of Using All Purpose Flour in Sourdough
Opting for all-purpose flour in sourdough bread can lead to several benefits. For one, it makes the process more accessible to beginners. Since I started baking sourdough, I’ve noticed that using all-purpose flour was less intimidating, especially when trying to perfect my techniques. Additionally, all-purpose flour often results in a lighter crumb, which I find complements the tangy flavor of sourdough beautifully. The mild taste also allows the natural flavors of the sourdough starter to shine through without competition. I often get compliments on my loaves, and I think using all-purpose flour plays a role in that!
Essential Ingredients for Sourdough Bread
Active Sourdough Starter
Having a healthy and active sourdough starter is essential for making great sourdough bread. It’s like the heart of your bread-making process. I remember the first time I fed my starter, waiting anxiously to see if it would bubble and rise. When it did, I felt like I had unlocked a magical secret! A strong starter is full of wild yeast and bacteria, which are crucial for fermentation and developing that wonderful tangy flavor. I recommend feeding your starter regularly and keeping it at a consistent temperature to ensure it stays lively. If you’re just starting, it’s worth taking the time to nurture your starter to see the amazing results it can produce in your bread!
Water Quality and Temperature
Water plays a significant role in sourdough bread-making. I’ve learned that using filtered or spring water can make a noticeable difference. Tap water can sometimes contain chlorine or other chemicals that might hinder the fermentation process. I also pay attention to the temperature of the water. Ideally, you want it to be around 75°F to 80°F when mixing your dough. This temperature range helps activate the yeast without causing it to overheat and die. I’ve noticed that when I take the time to monitor my water temperature, my dough rises better, leading to a more successful bake!
Salt’s Role in Fermentation
Salt is not just for flavor; it plays a vital role in the fermentation process. I used to think it was just a seasoning, but I quickly learned that it controls yeast activity and strengthens gluten structure. When I add salt to my dough, I notice it helps develop a better crumb and enhances the overall flavor of the bread. I typically use kosher salt or sea salt, as they dissolve easily and don’t contain additives. It’s important to mix the salt well into the dough, as it can be detrimental to the yeast if it comes into direct contact too soon. Finding the right balance with salt has definitely improved my sourdough loaves.
Flavor Enhancers (Optional Ingredients)
While the basic recipe for sourdough is simple, incorporating optional ingredients can elevate your bread to new heights. I’ve experimented with adding ingredients like honey, malt, or even a splash of olive oil to enhance flavor and texture. These additions can bring a subtle sweetness or richness to the bread. I’ve also tried adding a bit of vinegar to my dough, which can help with the dough’s structure and flavor. Another fun way to experiment is by mixing in ingredients like garlic or cheese to create unique flavor profiles. I love how each variation can change the entire character of the loaf, making it a fun adventure every time I bake! Read Interesting article: Crispy Sourdough Grissini Recipe (Easy Italian Breadsticks)
Step-by-Step Guide to Making Sourdough Bread with All Purpose Flour
Creating Your Sourdough Starter
Starting a sourdough starter from scratch might seem daunting, but I promise it’s easier than you think! Begin with equal parts flour and water—about 100 grams of each works well. I usually use all-purpose flour, but you can also mix in some whole wheat flour for added nutrition and flavor. Combine them in a clean jar and mix until there are no dry lumps. Cover it loosely with a lid or cloth, allowing air to circulate while keeping dust out. I remember checking on my starter every day, feeding it with the same ratio of flour and water. After about 5 to 7 days, you should see bubbles and notice a pleasant, sour aroma. That’s when you know your starter is ready to use!
Preparing the Dough
Once your starter is active, it’s time to prepare the dough. I typically use a ratio of 1 part starter to 2 parts flour and 1 part water. For example, if you have 100 grams of starter, you would add 200 grams of flour and 100 grams of water. Mix everything together in a large bowl until it forms a shaggy dough. I find that using my hands is the best way to ensure everything is well combined. The dough might seem a bit sticky at first, but don’t worry; that’s perfectly normal!
Bulk Fermentation Process
This is where the magic happens! After preparing the dough, let it rest at room temperature for several hours—typically around 4 to 6 hours, depending on the temperature of your kitchen. During this time, the dough will rise and develop flavor. I like to perform stretch and folds every 30 minutes during the first few hours to help strengthen the gluten. Just wet your hands to avoid sticking, grab one side of the dough, stretch it up, and fold it over. Repeat this around the entire dough. It’s fascinating to watch how the dough transforms during this period!
Shaping the Dough
After bulk fermentation, it’s time to shape the dough. I gently turn it out onto a lightly floured surface and pat it down to release some gas. Then, I shape it into a round or oval loaf, depending on my preference. I’ve learned that being gentle is key—too much pressure can deflate the dough’s lovely bubbles. Once shaped, I place the dough seam side down into a floured proofing basket. Cover it with a cloth and let it rest for another 1 to 3 hours, or until it looks puffy and ready to bake.
Proofing Techniques
Proofing is crucial for developing the final texture of your bread. I often use the “poke test” to check if the dough is ready. I gently poke the surface with my finger; if it springs back slowly, it’s ready to bake. If it springs back quickly, it needs more time. You can also refrigerate the shaped dough for a cold proof overnight, which enhances the flavor and makes it easier to score before baking. This technique has become my go-to, especially for busy days!
Baking Your Sourdough Bread
When it’s finally time to bake, preheat your oven to a high temperature—around 450°F works well. I love using a Dutch oven, as it creates steam that helps develop a beautiful crust. After preheating, carefully place the dough into the hot pot (I like to line it with parchment paper for easier removal). I score the top with a sharp knife or razor blade, which allows the bread to expand in the oven. Then, cover it and bake for about 30 minutes. Afterward, I remove the lid and bake for an additional 15 to 20 minutes until the crust is golden brown. The aroma that fills my kitchen during baking is absolutely heavenly!
Common Challenges and Solutions
Dough Not Rising
One of the most frustrating challenges I faced when I started making sourdough bread was when my dough just wouldn’t rise. I remember checking on it every hour, hoping to see some action, only to find it looking the same as before. It turns out that several factors can affect the rise of your dough. First, I learned that my sourdough starter should be active and bubbly before I mix it into the dough. If it’s not at its peak, the dough might not rise properly. Another thing to consider is the temperature of your kitchen. If it’s too cold, the fermentation process slows down, so I often try to find a warm spot in my home or even use my oven’s light to create a cozy environment for the dough. Patience is key here; sometimes, the dough just needs a little more time to do its magic!
Crust Too Hard or Soft
When it comes to the crust, I’ve had my fair share of experiences. I remember baking a loaf that came out with a crust so hard that I felt like I needed a chainsaw to cut into it! On the flip side, I’ve also had loaves with crusts that were too soft, lacking that satisfying crunch I craved. After some trial and error, I realized that the baking time and temperature play a significant role in achieving the perfect crust. I typically preheat my oven to 450°F and bake the bread covered for half of the time to help create steam, then uncover it to allow the crust to brown nicely. If I notice the crust is getting too hard too quickly, I cover the loaf with foil to protect it. Monitoring the baking process closely has helped me achieve the crust I desire!
Flavor Issues
Flavor is everything when it comes to sourdough! There were times when my loaves tasted a bit flat or lacked that tangy kick I was hoping for. I’ve discovered that the length of the bulk fermentation can significantly influence the flavor. The longer the dough ferments, the more flavor develops. I like to let my dough rise until it has roughly doubled in size, which can take anywhere from 4 to 6 hours, depending on the temperature. If you’re not getting that desired tang, you might also consider using a portion of whole wheat flour in your dough, as it tends to enhance the flavor profile. Experimenting with different fermentation times and flour blends has made a noticeable difference in the taste of my bread!
Texture Problems
Texture issues can be quite a bummer, especially when you’re aiming for that perfect chewy crumb. I’ve had loaves that felt too dense or gummy, which can be disheartening after all that effort. One common culprit is under-kneading or under-mixing the dough. I’ve learned that I need to develop the gluten properly for that ideal texture, which can be achieved through the stretch and fold method during bulk fermentation. Another factor is hydration levels. If my dough is too dry, the crumb can end up dense, while overly wet dough might not hold its shape. I recommend starting with a hydration level of around 70% and adjusting based on how the dough feels. Keeping a journal of my experiences helped me refine my technique and achieve a better texture over time!
Tips for Perfecting Your Sourdough Bread
Using a Dutch Oven vs. Baking Stone
I’ve experimented with both a Dutch oven and a baking stone, and each has its own benefits. Using a Dutch oven has become my favorite method because it traps steam, which is crucial for achieving that beautiful crust. When I preheat the Dutch oven, I find that the heat retention is fantastic, leading to a great oven spring. On the other hand, a baking stone can give a perfectly baked loaf too, but I need to ensure there’s enough steam in the oven—sometimes I throw a few ice cubes onto the baking tray to create steam. I recommend trying both methods to see which one yields the results you love!
Understanding Hydration Levels
Hydration might sound like a technical term, but it’s actually quite simple—it refers to the ratio of water to flour in your dough. I’ve learned that higher hydration levels lead to a more open crumb and a lighter loaf, while lower hydration can create a denser bread. When I first started, I stuck to a lower hydration level, thinking it would be easier, but I soon realized that embracing a higher hydration level has helped me achieve that airy texture I love in sourdough. If you’re new to this, start with a 70% hydration and see how it feels. Adjusting hydration can be a fun experiment that impacts both the texture and the flavor of your bread!
Timing for Best Results
Timing in sourdough bread-making can feel like juggling at times. I’ve found that planning is crucial for getting the best results. If I want to bake in the morning, I’ll often prepare my dough the night before and let it ferment overnight in the fridge. This cold fermentation not only develops flavor but also makes the dough easier to handle. I’ve learned to set reminders for each stage of the process, whether it’s feeding my starter or checking on the bulk fermentation. Having a structured schedule has helped me feel more confident and organized in my baking journey!
Frequently Asked Questions
What is sourdough bread?
Sourdough bread is a type of bread that uses naturally occurring yeast and lactic acid bacteria for fermentation, resulting in a unique tangy flavor and chewy texture due to the slow fermentation process.
What are the health benefits of sourdough bread?
Sourdough bread is easier to digest for some people because the fermentation process breaks down gluten. It also has a lower glycemic index than other breads, which can help regulate blood sugar levels, and the presence of beneficial bacteria contributes to gut health.
Can I use all-purpose flour to make sourdough bread?
Yes, all-purpose flour works well for making sourdough bread. It provides a good balance of structure and tenderness and allows for a lighter loaf compared to bread flour.
What is the difference between all-purpose flour and bread flour?
All-purpose flour has a moderate protein content of around 10-12%, while bread flour contains a higher protein content (around 12-14%). This higher protein helps create a stronger gluten structure, leading to a chewier texture and a more substantial rise.
What role does water play in sourdough bread-making?
Water is crucial for activating the yeast and facilitating fermentation. Using filtered or spring water can improve the process, and the ideal temperature for mixing the dough is around 75°F to 80°F.
Why is salt important in sourdough bread?
Salt plays a vital role in controlling yeast activity, strengthening gluten structure, and enhancing the overall flavor of the bread. It’s important to mix it well into the dough to prevent it from harming the yeast.
How do I create a sourdough starter?
To create a sourdough starter, mix equal parts flour and water (about 100 grams each) in a clean jar. Cover it loosely to allow air circulation, and feed it with the same ratio daily. After about 5 to 7 days, it should become bubbly and ready for use.
What is bulk fermentation in sourdough bread-making?
Bulk fermentation is the resting period after preparing the dough, typically lasting 4 to 6 hours. This time allows the dough to rise and develop flavor, and performing stretch and folds during this period can help strengthen the gluten.
What should I do if my sourdough dough is not rising?
If your dough isn’t rising, ensure that your sourdough starter is active and bubbly before mixing it in. Also, consider the temperature of your kitchen, as a too-cold environment can slow down fermentation. Patience may be needed, as the dough sometimes requires more time to rise.
How can I achieve the perfect crust on my sourdough bread?
To achieve the perfect crust, preheat your oven to around 450°F and bake the bread covered for the first half of the time to create steam. If the crust is getting too hard, covering it with foil can help protect it during baking.