
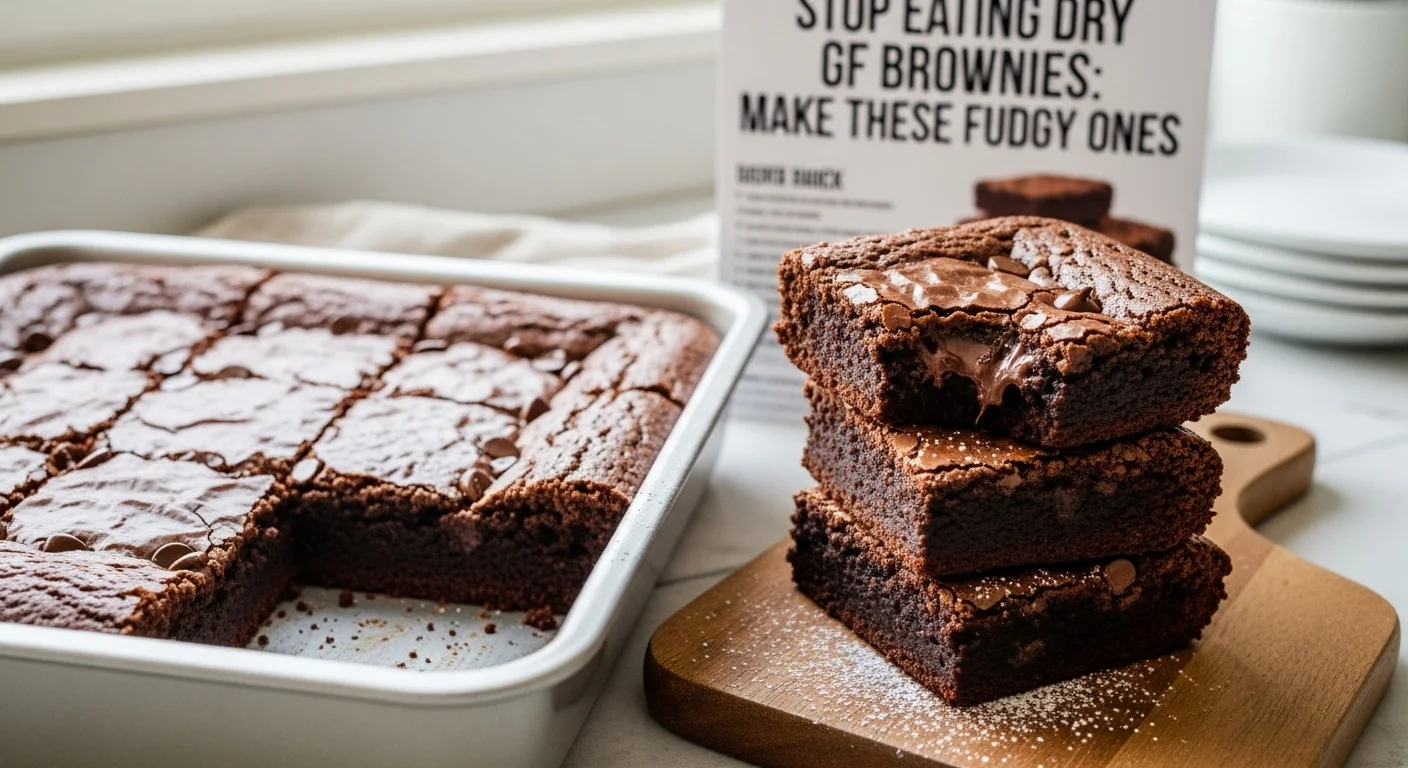
Tired of dry gluten-free brownies that crumble as soon as you take a bite? Let’s transform your baking game with fudgy, delicious brownies that everyone will love, gluten-free or not! Read Interesting article: The Ultimate Fudgy Gluten-Free Brownies (From Scratch)
Understanding Gluten-Free Brownies
When I first ventured into gluten-free baking, I was excited but also a bit intimidated. Gluten-free brownies, in particular, seemed like a challenge. I wondered what made them different and why they so often turned out dry. It turns out, understanding the basics of gluten-free brownies can make all the difference in achieving that rich, fudgy texture we crave.
What Makes Brownies Gluten-Free?
At its core, gluten-free brownies are made without wheat flour. Instead, we use gluten-free alternatives like almond flour, coconut flour, or a gluten-free all-purpose blend. It’s essential to know that gluten is a protein found in wheat that helps give baked goods their structure and chewiness. Without it, we need to rely on other ingredients to create that desired texture. For me, discovering which gluten-free flour worked best was a bit of a journey. I experimented with different types, and each had its unique flavor and texture. It was eye-opening to see how varied the results could be!
Common Ingredients in Gluten-Free Brownies
While there are many variations, the basic ingredients for gluten-free brownies often include:
- Gluten-free flour
- Cocoa powder
- Sugar
- Eggs
- Fats (like butter or oil)
- Vanilla extract
Over time, I learned that not all brands are created equal. For instance, some gluten-free flours are denser, while others might be grittier. This can significantly affect the result, so I recommend trying a few different brands until you find your favorite one. My go-to is a blend that includes brown rice flour, which gives a nice balance of fluffiness and moisture. Read Interesting article: I Tried the TikTok Chia Pudding Parfait–Shocked
Why Do Gluten-Free Brownies Often Turn Out Dry?
One of the biggest challenges with gluten-free brownies is moisture retention. I found that gluten-free flours absorb liquids differently than regular flour, which can cause brownies to become dry. Additionally, I noticed that if I baked them too long, they would harden quickly, losing that coveted fudgy texture. This was a tough lesson to learn, especially when I was so eager to enjoy my creations! Understanding this helped me tweak my baking methods, leading to much more success in producing moist, delicious brownies.
Essential Ingredients for Fudgy Gluten-Free Brownies
If we want to make fudgy gluten-free brownies, we need to pay special attention to our ingredients. Each one plays a crucial role in the final product, and I’ve found that choosing the right ones makes all the difference.
Choosing the Right Gluten-Free Flour
When I first started baking gluten-free brownies, I tried a variety of flours. While each has its unique characteristics, I discovered that a gluten-free all-purpose blend with xanthan gum works wonders. It mimics the texture of traditional flour and keeps everything together beautifully. I remember when I finally found a flour blend that gave me that chewy texture I was missing—it felt like a little victory in my baking journey!
The Role of Cocoa Powder in Fudginess
Cocoa powder is another essential ingredient. The quality and type of cocoa can influence both the flavor and texture. I recommend using Dutch-processed cocoa for a richer taste and a darker color. When I switched to using it, I noticed my brownies not only looked better but tasted more decadent. It’s amazing how a simple change can elevate the entire experience!
Importance of Eggs in Brownie Texture
Eggs are often overlooked, but they are crucial for creating the right texture. They provide moisture and richness, helping to bind the ingredients together. I’ve experimented with different egg ratios, and I found that using an extra egg in my gluten-free brownies enhances the fudginess. It’s fascinating how such a small adjustment can lead to big changes!
Using Fats: Butter vs. Oil
Choosing the right fat can significantly impact the final texture. While I love the flavor that butter brings, I’ve also had great success using oil for a moist result. When I tried a mix of both, I found the perfect balance. The key is to melt the butter and mix it with oil, which creates a deeper flavor while maintaining that fudginess.
Sweeteners: Granulated vs. Brown Sugar
Lastly, the type of sweetener you use can make a difference. Brown sugar adds moisture and a caramel-like flavor, which I really enjoy. I often combine granulated and brown sugar for the best of both worlds. The result is a sweet treat that’s not overly sugary but still rich and satisfying.
By understanding these ingredients and their roles, I’ve been able to create gluten-free brownies that are not only fudgy but also deeply satisfying. It’s all about balance and making smart choices in the kitchen to ensure that every bite is as delicious as it can be!
Step-by-Step Recipe for Fudgy Gluten-Free Brownies
Preparation: Tools and Equipment Needed
Before we dive into the recipe, let’s gather our tools and equipment. Having everything ready makes the process smoother and more enjoyable. Here’s what I typically use when making my brownies:
- Mixing bowls (one large and one medium)
- Measuring cups and spoons
- A whisk or electric mixer
- Spatula for folding
- 9×9-inch baking pan (or similar size)
- Parchment paper (optional, but helps with easy removal)
- Oven mitts for safety
These tools keep my kitchen organized and make the baking experience more enjoyable. I remember the first time I forgot to preheat my oven; it felt like an eternity waiting for it to warm up! So, having everything ready is key.
Ingredients List for Fudgy Brownies
Now, let’s talk about the ingredients. Here’s what you’ll need for a delicious batch of fudgy gluten-free brownies:
- 1 cup gluten-free all-purpose flour
- 1/2 cup unsweetened cocoa powder (Dutch-processed for best results)
- 1 cup granulated sugar
- 1/2 cup brown sugar
- 4 large eggs
- 1/2 cup unsalted butter, melted
- 1/4 cup vegetable oil
- 1 teaspoon vanilla extract
- 1/2 teaspoon salt
- Optional: 1 cup chocolate chips or nuts for added texture
As I started experimenting with my recipes, I found that having a mix of sugars and fats really enhances the flavor and texture. It’s all about finding that perfect balance!
Mixing Techniques for Optimal Texture
Now that we have our ingredients, let’s get mixing! The technique you use can affect how your brownies turn out, so I’ve learned a few tips along the way:
- In a large mixing bowl, combine the melted butter and both sugars (granulated and brown). Mix them until they’re well combined and slightly fluffy. I usually whisk this by hand for a few minutes.
- Add the eggs, one at a time, ensuring each is fully incorporated before adding the next. This helps to create an airy batter.
- Mix in the vanilla extract.
- In a separate bowl, whisk together the gluten-free flour, cocoa powder, and salt. This helps to evenly distribute the dry ingredients.
- Gradually add the dry mixture to the wet ingredients, folding gently with a spatula. Be careful not to overmix; we want to maintain that fudgy texture!
- If you’re using chocolate chips or nuts, fold them in at the end.
Mixing can be a fun part of the process, but I’ve learned that gentle folding is key to keeping the brownies soft and fudgy.
Baking Instructions: Time and Temperature
With our batter ready, it’s time to bake! Preheat your oven to 350°F (175°C). Here’s how to proceed:
- Grease your baking pan or line it with parchment paper. This makes it easy to remove the brownies later.
- Pour the brownie batter into the prepared pan, spreading it evenly with a spatula.
- Bake for 25-30 minutes. I recommend checking them around the 25-minute mark, as oven temperatures can vary.
I remember the first time I made these brownies; I was so excited to see them rise in the oven! The smell filled my kitchen, and I couldn’t wait for them to cool.
How to Check for Doneness
Knowing when your brownies are done is crucial for achieving that perfect fudgy texture. Here’s how to check:
- Insert a toothpick into the center. If it comes out with a few moist crumbs, they’re perfect!
- If it comes out clean, you may be overbaking them. Remember, they will continue to cook a bit after you take them out of the oven.
Every time I check my brownies, I feel a mix of anticipation and joy. It’s always a balancing act, but I’ve learned to trust my instincts over time. Once they’re done, let them cool in the pan for at least 15 minutes before cutting them into squares. This waiting period, though tough, is essential for getting those clean edges!
Tips for Achieving the Perfect Fudgy Texture
Adjusting Baking Time for Chewy Brownies
Getting the baking time just right is crucial for achieving that gooey, fudgy brownie texture. From my experience, even a few minutes can make a huge difference. I usually start checking my brownies around the 25-minute mark, but if I’m aiming for a chewier result, I might take them out a minute or two earlier. It’s a bit of a balancing act, but I’ve learned to trust my instincts. When they are slightly underbaked, they tend to set up nicely as they cool, maintaining that moist texture we all love.
Another tip I’ve picked up is to keep an eye on the edges. If they start pulling away from the sides of the pan but the center still looks a bit soft, it’s usually a good indication that they’re done. I remember the time I left them in just a tad too long, and while they were still tasty, they didn’t have that delightful fudginess I was after. So, keep that timer handy and don’t be afraid to experiment a bit!
Using Optional Ingredients for Extra Moisture
Sometimes, I like to add a little something extra to my brownies to keep them moist. One ingredient I often use is a small amount of unsweetened applesauce or Greek yogurt. These ingredients not only add moisture but also some nutritional value. I once got the idea to add applesauce when I found a recipe that called for it, and it turned out to be a game-changer! Just a half-cup can help keep your brownies super fudgy without altering the flavor much.
Additionally, I’ve experimented with adding a splash of brewed coffee, which can enhance the chocolate flavor and add extra moisture. I was surprised at how much of a difference it made without being overpowering. It’s these little tweaks that can elevate a simple brownie recipe into something truly special!
How to Properly Store Brownies to Maintain Moisture
Once I’ve baked my brownies, I want to keep them fresh and fudgy for as long as possible. Storing them properly is key. I’ve learned that letting them cool completely before cutting helps prevent them from drying out. After they’re cut into squares, I usually place them in an airtight container, separating layers with parchment paper to avoid sticking.
If I know I won’t finish them within a few days, I’ll often freeze half the batch. I wrap them individually in plastic wrap and then place them in a freezer bag. When I’m ready to enjoy them again, I just let them thaw at room temperature for a few hours. It’s like having a little stash of happiness waiting for me whenever I need a sweet treat!
Common Mistakes to Avoid When Making GF Brownies
Overmixing the Batter
One of the most common pitfalls when making gluten-free brownies is overmixing the batter. I’ve done it myself, thinking that more mixing would lead to a better texture, but that’s not the case. Gluten-free flours behave differently, and overmixing can lead to a tough brownie instead of the soft, fudgy one we want. I’ve learned that gentle folding is the way to go. Mixing just until the ingredients are combined is usually perfect.
Incorrect Oven Temperature
Another mistake I’ve made is not paying attention to my oven’s temperature. Oven thermostats can vary quite a bit, and I’ve had brownies come out overcooked simply because my oven was too hot. I recommend using an oven thermometer to make sure it’s accurate. If you suspect your oven runs hot, you might want to lower the temperature by 10 or 15 degrees while adjusting the baking time accordingly.
Using Expired Ingredients
Lastly, I’ve learned the hard way that using expired ingredients can really affect the outcome of my brownies. For example, I once used cocoa powder that had been sitting in my pantry for a while, and the flavor was noticeably off. I make it a point to check expiration dates and replace ingredients when necessary. Fresh ingredients can make such a difference in flavor and texture. It’s a little extra effort that’s definitely worth it!
Variations and Add-Ins for Fudgy Brownies
Nutty Add-Ins: Walnuts and Pecans
Now that we have the basics down, let’s talk about fun variations! One of my favorite ways to enhance brownies is by adding nuts. Walnuts and pecans bring a delightful crunch and complement the fudgy texture beautifully. When I added chopped walnuts to my last batch, the contrast was fantastic. I often toast them slightly beforehand for extra flavor. It’s just another way to elevate the experience!
Swapping Chocolate Types: Milk vs. Dark
Another fun twist I like to try is swapping out the type of chocolate. Dark chocolate gives a rich, deep flavor, while milk chocolate offers a sweeter, creamier taste. Depending on my mood, I might go for one or the other. I remember one time I used semi-sweet chocolate chips in the batter, and they melted perfectly, creating little pockets of gooey chocolate that everyone loved!
Incorporating Fruits: Bananas and Applesauce
Speaking of add-ins, I’ve found that incorporating fruits can create a unique twist. Mashed bananas can add natural sweetness and moisture. I once made a banana brownie that was not only delicious but also a bit healthier! Applesauce, as mentioned earlier, is another great option to maintain that fudgy consistency while adding a subtle flavor. It’s a great way to sneak in some fruit!
Enhancing Flavor with Extracts and Spices
Lastly, don’t forget about flavor enhancers! A splash of almond extract or a sprinkle of cinnamon can transform your brownies into something extraordinary. I experimented with adding a touch of espresso powder once, and it really deepened the chocolate flavor. It’s amazing how a little extra ingredient can take your brownies from ordinary to extraordinary.
These variations not only keep things exciting in the kitchen but also allow us to customize our brownies to suit our tastes. I love sharing these treats with friends, and I always enjoy hearing their reactions when they take that first bite!
Serving Suggestions for Fudgy Gluten-Free Brownies
Pairing with Ice Cream or Whipped Cream
One of my favorite ways to enjoy fudgy gluten-free brownies is by pairing them with a scoop of ice cream or a dollop of whipped cream. The warm, gooey brownie contrasts beautifully with the cold, creamy texture of the ice cream. I remember the first time I served these brownies with vanilla ice cream; the combination was heavenly! If you’re feeling adventurous, a drizzle of chocolate sauce or caramel can take it to the next level. I’ve even experimented with different ice cream flavors, like mint chocolate chip or salted caramel, and each time, it’s like a brand-new dessert experience!
Serving Warm vs. Chilled
There’s something special about enjoying brownies straight out of the oven while they’re still warm. The fudginess is at its peak, and the aroma fills the room, enticing everyone around. However, I’ve also found that chilled brownies have their own charm. They become firmer, making them easier to cut into neat squares. I often keep a batch in the fridge for a quick snack, and the flavor seems to deepen as they sit. Personally, I love alternating between warm and chilled—that way, I get to enjoy the best of both worlds!
Presentation Ideas for Special Occasions
If you’re looking to impress at a gathering, consider dressing up your brownies! I like to cut them into fun shapes with cookie cutters or top them with a sprinkle of powdered sugar for a simple yet elegant touch. Adding fresh berries on the side can provide a splash of color and freshness. If I’m hosting a special occasion, I might even layer brownies with whipped cream and fruits in a glass to create a beautiful dessert parfait. It’s all about making the dessert look as good as it tastes, and with a bit of creativity, fudgy gluten-free brownies can shine at any event!
Frequently Asked Questions About Gluten-Free Brownies
Can I Substitute Ingredients in the Recipe?
Absolutely! One of the joys of baking is experimenting with substitutions. For example, if you don’t have brown sugar, you can use more granulated sugar or even coconut sugar. If you’re dairy-free, swapping butter for coconut oil or a vegan butter alternative works well. I’ve learned that many ingredients can be tailored to fit dietary needs without sacrificing flavor, so don’t hesitate to experiment!
How Do I Know If My Brownies Are Gluten-Free?
To ensure your brownies are gluten-free, always check the labels of your ingredients. Look for certified gluten-free flour and chocolate. Cross-contamination can occur, especially in shared kitchens, so it’s wise to use dedicated gluten-free products. I make it a point to buy from trusted brands that guarantee gluten-free status to give myself peace of mind.
Can I Freeze Fudgy Brownies?
Yes, you can definitely freeze fudgy brownies! In fact, I often freeze a batch to enjoy later. Just wrap them individually in plastic wrap and place them in a freezer bag. When I’m ready for a treat, I let them thaw at room temperature, and they taste just as good as fresh-baked. It’s a great way to have a sweet indulgence ready whenever the craving strikes!
Final Thoughts
Baking gluten-free brownies has been a rewarding journey for me, filled with delicious experiments and sweet successes. I’ve learned so much about the art of gluten-free baking, and I hope my insights help you create your own perfect batch. Whether you choose to keep it classic or get creative with variations, remember that the joy of baking comes not just from the end product but from the process itself. So gather your ingredients, embrace the adventure, and enjoy the sweet rewards of your efforts!
Frequently Asked Questions
What are gluten-free brownies made from?
Gluten-free brownies are made without wheat flour and typically use alternatives like almond flour, coconut flour, or a gluten-free all-purpose blend.
Why do gluten-free brownies often turn out dry?
Gluten-free flours absorb liquids differently than regular flour, which can lead to dryness. Additionally, if baked too long, gluten-free brownies can harden quickly, losing their fudgy texture.
What ingredients are essential for fudgy gluten-free brownies?
Essential ingredients for fudgy gluten-free brownies include gluten-free flour, cocoa powder, sugar, eggs, fats (like butter or oil), and vanilla extract.
How can I ensure my brownies have the right texture?
To achieve the right texture, avoid overmixing the batter, check your oven temperature, and consider adding extra moisture with ingredients like applesauce or Greek yogurt.
Can I substitute ingredients in the brownie recipe?
Yes, you can substitute ingredients. For example, if you don’t have brown sugar, you can use more granulated sugar or coconut sugar. Dairy-free options include swapping butter for coconut oil or a vegan butter alternative.
How can I check if my brownies are done baking?
Insert a toothpick into the center of the brownies. If it comes out with a few moist crumbs, they’re perfect. If it comes out clean, they may be overbaked.
What is the best way to store gluten-free brownies?
To store gluten-free brownies, let them cool completely before cutting, then place them in an airtight container, separating layers with parchment paper. You can also freeze them for later enjoyment.
What types of sweeteners work best in gluten-free brownies?
Granulated sugar and brown sugar are commonly used. Brown sugar adds moisture and a caramel-like flavor, while a combination of both can enhance the sweetness and texture.
Can I freeze fudgy brownies?
Yes, fudgy brownies can be frozen. Wrap them individually in plastic wrap and place them in a freezer bag. Thaw at room temperature when ready to enjoy.
What variations can I try with my gluten-free brownies?
You can enhance gluten-free brownies by adding nuts like walnuts or pecans, swapping chocolate types, incorporating fruits like bananas or applesauce, and using flavor enhancers like extracts or spices.