
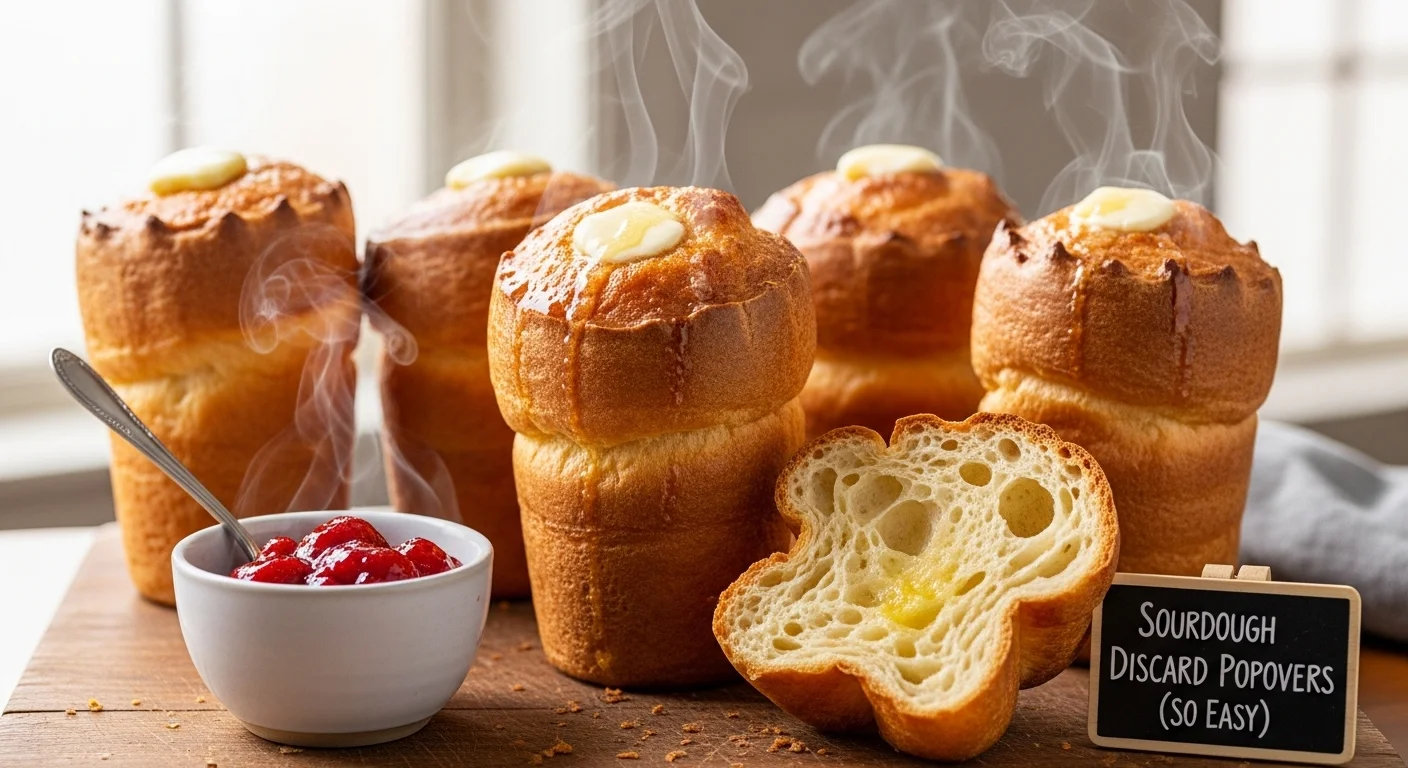
Are you ready to elevate your baking game? These Tall & Fluffy Sourdough Discard Popovers are not only easy to make but also a fantastic way to use up sourdough discard. Let’s dive into the magic of sourdough! Read Interesting article: Impressive Sourdough Popovers Recipe (A Discard Miracle)
Understanding Sourdough Discard
What is Sourdough Discard?
As someone who has dabbled in sourdough baking for a while, I can tell you that sourdough discard is simply the excess starter we remove when feeding our sourdough. It’s that gooey, bubbly mixture that we toss away, often without a second thought. However, what I’ve learned is that this discard is a hidden gem in the kitchen. It’s packed with flavor and can add a delightful tang to various recipes. Whether you’re a seasoned baker or just starting out, using sourdough discard opens up a world of culinary creativity.
Benefits of Using Sourdough Discard
There are so many reasons to embrace sourdough discard! First off, it’s a fantastic way to reduce food waste. I remember when I first heard about using it; I couldn’t believe I had been throwing away something so valuable. Not only does it help the environment, but it also enhances the flavor of baked goods. The natural fermentation adds a complex taste that you simply can’t get from regular flour. Plus, incorporating sourdough discard into recipes can give your creations a unique texture. For me, every time I whip up a batch of popovers, I smile knowing I’m making the most of my sourdough journey. Read Interesting article: What’s The Best Sourdough English Muffin Recipe? This One.
How Sourdough Discard Works in Baking
Using sourdough discard in baking is surprisingly simple. Its acidity helps to strengthen gluten, which results in a wonderful rise and airy texture. When I mix it into my popover batter, I can almost feel the excitement bubbling through the ingredients. The yeast present in the discard also contributes to the leavening process, giving those popovers that tall and fluffy profile we all crave. I’ve found that sourdough discard acts similarly to a traditional leavening agent like baking soda or baking powder, but with that extra zing. It’s a win-win, really!
Ingredients for Tall & Fluffy Sourdough Discard Popovers
Essential Ingredients Overview
Let’s talk about what you’ll need to create these incredible popovers. The beauty of this recipe lies in its simplicity. You don’t need a whole pantry full of exotic ingredients. Just a few basics—sourdough discard, flour, milk, eggs, and a bit of salt—will do the trick. I remember the first time I gathered everything; it felt like a mini celebration, knowing I was about to create something delicious with pantry staples.
Types of Flour to Use
When it comes to flour, I usually stick with all-purpose flour for my popovers. It yields a light and airy texture that I adore. However, you can experiment with different types of flour if you’re feeling adventurous. Whole wheat flour can add a nutty flavor and a denser texture, which can be delightful. I’ve even tried a mix of all-purpose and whole wheat, and it turned out fantastic! Just keep in mind that different flours can impact the final texture of your popovers.
Choosing the Right Milk and Eggs
Milk and eggs play crucial roles in your popover batter. For milk, I prefer whole milk for its richness, but you can use any milk you have on hand—almond milk, oat milk, or even buttermilk. In my experience, the richness of the milk contributes to that beautiful rise and a tender crumb. As for eggs, I recommend using large eggs, as they provide the moisture and structure needed for those fluffy popovers. I remember the first time I cracked eggs into the mixture; it felt like I was unlocking the secret to baking magic!
Optional Add-ins and Variations
If you want to get creative, consider adding cheese, herbs, or spices to your popover batter. I often toss in some grated cheese for a savory twist or fresh herbs for a pop of flavor. One day, I decided to experiment and added some garlic powder and parmesan cheese, and it was a game changer! The possibilities are endless, and I encourage you to let your imagination run wild. You can even make sweet popovers by adding a bit of sugar and vanilla extract, filling them with jam or whipped cream for a delightful treat!
Step-by-Step Instructions to Make Sourdough Discard Popovers
Preparing Your Equipment
Before we dive into mixing the batter, I want to emphasize the importance of having the right equipment ready. A popover pan is ideal because its unique shape helps create that signature tall rise, but if you don’t have one, a muffin tin can work in a pinch. Just remember, the original shape is what gives popovers their delightful puff. I also make sure to have measuring cups, a whisk, and a mixing bowl at hand. Oh, and don’t forget to preheat your oven to a whopping 450°F (232°C)! That high temperature is key for getting those popovers to rise beautifully.
Mixing the Batter
Now comes the fun part! In a large mixing bowl, I combine my sourdough discard, milk, and eggs. I usually whisk these together until they’re smooth. It’s satisfying to see the mixture come together. Then, I gradually sift in the flour and salt, folding it in gently. I’ve learned that overmixing can lead to dense popovers, so I keep it light and airy as I mix. I can feel the batter evolving, becoming a perfect blend of wet and dry ingredients. It’s like watching a transformation unfold right before my eyes!
How to Preheat the Popover Pan
Preheating the popover pan is an essential step that I can’t stress enough. I pour a tiny bit of oil into each cup of the pan, then place it in the oven while it’s preheating. The oil heats up, and when I pour the batter in, it starts cooking right away, which is crucial for achieving that rise. I remember the first time I did this and watched the batter sizzle as it hit the hot oil—it was like magic! It’s this step that creates a crispy outer layer while keeping the inside soft and fluffy.
Baking Techniques for Maximum Rise
After the pan is preheated, I remove it from the oven with caution. Be careful, as that pan is scorching hot! I quickly pour the batter into each cup, filling them about halfway. It’s a thrilling moment, knowing that I’m about to create something delightful. I return the pan to the oven and resist the urge to open the door for the first 20 minutes. I’ve learned that the heat needs to remain consistent for the popovers to rise properly. After that, I check on them, and if they’re golden-brown and puffed up, I know I’ve hit the jackpot!
Cooling and Serving Suggestions
Once they’re done baking, I take them out and let them cool in the pan for about 5 minutes. This helps them maintain their shape. I remember my first batch was a little too eager to come out of the pan, and they lost some of their height. So now, I’m patient! When I finally take them out, I place them on a wire rack to cool a bit longer. They’re best served warm, right out of the oven, so I usually have a little butter or jam ready to slather on. I love how the popovers have that crispy exterior and a soft, airy inside, perfect for pairing with sweet or savory toppings.
Common Mistakes to Avoid
Using the Wrong Ratio of Ingredients
One of the biggest mistakes I’ve encountered in baking popovers is not measuring my ingredients accurately. I’ve learned that using too much or too little flour or liquid can lead to disappointing results. It’s important to stick to the recipe, especially with the flour-to-liquid ratio, to ensure that the batter has the right consistency. If the batter is too thick, the popovers may not rise correctly, while a too-thin batter can lead to flat popovers. Trust me; keeping track of those measurements makes all the difference!
Not Preheating the Pan Properly
As I mentioned earlier, preheating the pan is crucial. I’ve made the error of skipping this step before, thinking it wouldn’t make much of a difference, but boy, was I wrong! If the pan isn’t hot enough, the popovers won’t puff up like they should. I recommend setting a timer for your preheating process to ensure you give it enough time. It’s one of those little hacks that can turn a good popover into a great one!
Overmixing the Batter
In my early baking days, I was a bit overzealous when mixing. I thought that the more I mixed, the better the batter would be, but I quickly learned that overmixing leads to a denser popover. Now, I mix until the ingredients are just combined, and I can see a few lumps. It feels counterintuitive, but it’s all about keeping that airy texture that makes popovers special. I encourage you to embrace the lumps—you’ll be amazed at how it pays off!
Tips for Perfect Popovers Every Time
Temperature Considerations
Getting the temperature just right is one of the most crucial aspects of baking popovers. I’ve noticed that using room temperature ingredients really helps. When I take my eggs and milk out of the fridge ahead of time, it makes a noticeable difference in how the batter comes together. Cold ingredients can hinder the rise, and nobody wants flat popovers! I usually take my eggs and milk out at least an hour before I start mixing. This simple step has consistently helped me achieve that tall and impressive popover structure that I love.
Another tip I learned is to keep the oven at a steady high temperature throughout the baking process. Once I put the popovers in, I make a point to avoid opening the oven door for at least the first 20 minutes. The sudden drop in temperature can ruin the rise. I sometimes set a timer to keep myself from peeking. I remember the first time I opened the door too early; I was devastated to see my popovers deflate. Now, I resist the temptation and let the heat do its magic!
Using Fresh Sourdough Discard
Freshness is key when it comes to sourdough discard. I’ve discovered that using discard that’s just a few days old yields the best results. The flavor and the fermenting power of the discard are strongest when it’s fresh, so I make it a point to use it within a week of feeding my starter. I’ve been tempted to use older discard to avoid waste, but I found out that the flavor can become too tangy, and it might not rise as well. Keeping my discard in the fridge helps preserve its quality, and when it’s time to bake, I take it out and give it a good stir to reincorporate any separation that may have occurred.
Resting the Batter: Is It Necessary?
This is a hot topic among bakers. I’ve tried letting my popover batter rest and also baking it immediately after mixing, and here’s what I found. Resting the batter for about 30 minutes can lead to an even lighter texture. It allows the flour to fully hydrate and the gluten to relax, which can enhance the final product. That said, I’ve also had delicious popovers when I was too impatient to wait. So, in my experience, while resting can be beneficial, it’s not a strict requirement. If you’re eager to indulge in those warm popovers, go for it! Just keep in mind that a little patience can pay off in texture.
Serving Suggestions and Pairings
Sweet vs. Savory Fillings
One of the best parts of making popovers is how versatile they are in terms of fillings! I’ve had countless delightful experiences experimenting with both sweet and savory options. For a breakfast treat, I love to fill them with a dollop of fresh jam or whipped cream. On lazy weekend mornings, a touch of maple syrup or honey makes for a sweet, indulgent experience. The contrast of the warm, airy popover with cold cream is simply divine.
On the savory side, I often whip up a batch with cheese and fresh herbs mixed into the batter, which creates a fantastic flavor profile. I remember once hosting a brunch where I stuffed popovers with a mixture of sautéed spinach, feta, and a sprinkle of nutmeg. They were a massive hit! I encourage you to think outside the box and try fillings that you love. The popovers will be a wonderful canvas for your culinary creativity.
Best Accompaniments for Breakfast or Brunch
Pairing popovers with the right accompaniments can elevate your meal to a whole new level. For breakfast or brunch, I often serve them alongside crispy bacon or smoked salmon. The saltiness of these proteins contrasts beautifully with the lightness of the popovers. Also, consider serving a side of fresh fruit or a light salad to balance everything out. I’ve even set up a little popover bar at home, where everyone can add their toppings—anything from cream cheese to avocado, and even a sprinkle of everything bagel seasoning!
Creative Ways to Use Leftover Popovers
If I happen to have any popovers left over (which is rare, but it happens!), I’ve found a few creative ways to repurpose them. One of my favorites is to turn them into a savory bread pudding. I cut the leftover popovers into cubes, mix them with eggs, cheese, and whatever veggies I have on hand, and then bake them until golden. It’s a delicious twist that makes use of every last bit.
Another fun idea is to transform them into mini sandwiches. I’ve sliced them in half and stuffed them with deli meats, cheese, or even a simple egg salad. They make for great finger foods during gatherings! Popovers also freeze well, so I’ll often store any extras for a quick breakfast or snack later. Just pop them in the oven for a few minutes to revive that fresh-baked texture. It’s a perfect solution for busy mornings when I need something tasty and satisfying.
Frequently Asked Questions (FAQs)
Can I use stale sourdough discard?
I’ve been asked this question quite a few times, and my answer is a cautious yes. While you can technically use older sourdough discard, I’ve noticed that it can be a bit too tangy, which might not be ideal for everyone’s taste. The leavening power also diminishes the older it gets, leading to less rise in your popovers. I recommend using discard that’s no more than a week old for the best flavor and texture. If you do find yourself with some older discard, consider using it in recipes where the tanginess will be balanced out, like pancakes or muffins.
How to store leftover popovers?
Leftover popovers, if there ever are any, can be a real treat! I like to store them in an airtight container at room temperature for a day. If I want to keep them longer, I’ll wrap them tightly in plastic wrap and pop them in the refrigerator. Just remember, they tend to lose their crispy edge as they sit. When you’re ready to enjoy them, I recommend reheating in the oven at a low temperature to help them regain some of that fluffiness and crispiness.
Can I freeze popovers?
Absolutely! Freezing popovers is one of my favorite time-saving hacks. After they’ve cooled completely, I place them in a freezer-safe bag or container. They can last in the freezer for up to three months. When I’m ready to indulge, I take them out and reheat them directly from frozen in the oven. It’s like having a warm, fresh popover ready in no time, and it makes busy mornings feel a little more special.
What if my popovers don’t rise?
Ah, the dreaded flat popovers! I’ve experienced this disappointment too. If your popovers don’t rise, it could be due to a few factors. First, check if your oven temperature was high enough. Popovers thrive on that initial heat boost! Also, make sure your batter wasn’t overmixed or that your sourdough discard was fresh. If all else fails, remember that even flat popovers can still taste delicious, and they can be repurposed in other dishes, like a savory bread pudding!
Final Thoughts
Baking Tall & Fluffy Sourdough Discard Popovers has truly become one of my favorite kitchen adventures. The process of transforming simple ingredients into delightful puffs of joy never ceases to amaze me. I love how versatile they are, whether I’m filling them with sweet jams for breakfast or savory delights for brunch. Embracing sourdough discard not only reduces waste but also elevates flavors in a way that’s both satisfying and rewarding.
As you embark on your own popover journey, I encourage you to experiment and make these popovers your own. Don’t be afraid to try different flavor combinations or fillings. From my experience, every batch is a new opportunity to learn and enjoy the process. So, grab your sourdough discard, gather your ingredients, and get ready to whip up some magic in your kitchen! Read Interesting article: The Perfect Gluten-Free Pumpkin Pie (With Flaky Crust)
Frequently Asked Questions
What is sourdough discard?
Sourdough discard is the excess starter that is removed when feeding sourdough. It is a gooey, bubbly mixture that is often thrown away but can add flavor and tang to various recipes.
What are the benefits of using sourdough discard?
Using sourdough discard helps reduce food waste and enhances the flavor of baked goods. It adds a complex taste that regular flour cannot provide and contributes to a unique texture in recipes.
What ingredients do I need to make Tall & Fluffy Sourdough Discard Popovers?
You will need sourdough discard, flour, milk, eggs, and a bit of salt. These basic ingredients create a simple yet delicious popover recipe.
Can I use different types of flour for popovers?
Yes, while all-purpose flour is recommended for a light and airy texture, you can experiment with whole wheat flour for a nutty flavor or a mix of both types for different textures.
Why is preheating the popover pan important?
Preheating the popover pan is crucial because it ensures the oil heats up, allowing the batter to start cooking immediately, which helps achieve that desired rise and crispy exterior.
How can I avoid common mistakes when making popovers?
To avoid common mistakes, ensure accurate measurement of ingredients, preheat the pan properly, and avoid overmixing the batter, as these factors significantly impact the rise and texture of the popovers.
Is it necessary to let the batter rest before baking?
Resting the batter for about 30 minutes can enhance the texture, allowing the flour to hydrate and gluten to relax. However, it’s not a strict requirement, and you can bake immediately if preferred.
How should I store leftover popovers?
Leftover popovers can be stored in an airtight container at room temperature for a day. For longer storage, wrap them tightly in plastic wrap and refrigerate. Reheating in the oven is recommended to regain fluffiness.
Can I freeze popovers?
Yes, popovers can be frozen after cooling completely. Store them in a freezer-safe bag or container for up to three months. You can reheat them directly from frozen in the oven for a fresh taste.
What should I do if my popovers don’t rise?
If your popovers don’t rise, check the oven temperature to ensure it was high enough, verify that the batter wasn’t overmixed, and ensure the sourdough discard was fresh. Even flat popovers can be delicious and repurposed into other dishes.