
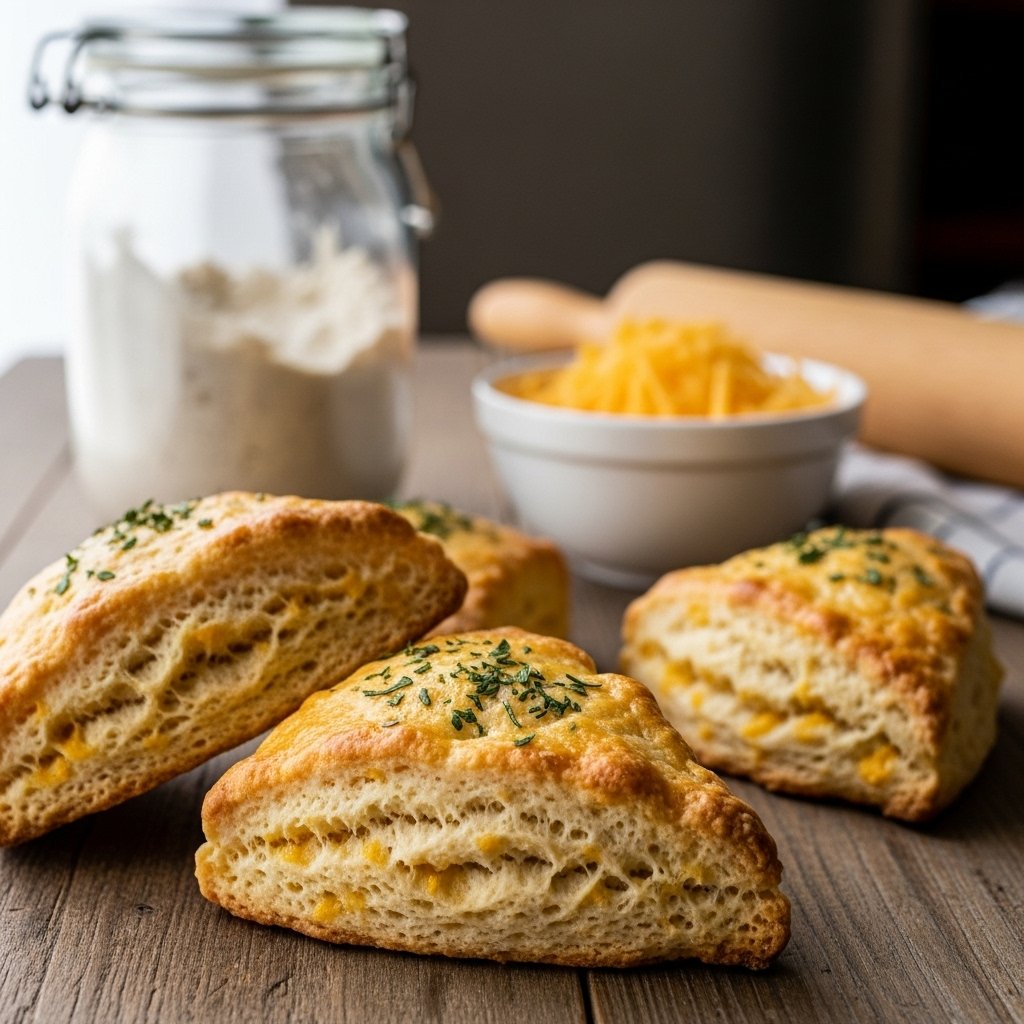
There’s something special about the warm, buttery aroma of freshly baked scones. When you add cheddar and the tang of sourdough discard into the mix, you create a savory delight that’s hard to resist! If you’re looking to explore more delicious recipes, check out The Best Sourdough Discard Scones (Quick & Fluffy).
Understanding Sourdough Discard
What is Sourdough Discard?
Sourdough discard is the portion of sourdough starter that you remove before feeding it with fresh flour and water. I remember the first time I baked with sourdough discard; I felt like I had stumbled upon a hidden treasure! Instead of tossing it away, I learned I could incorporate this flavorful, fermented mixture into various recipes. It’s not just a waste product; it’s a versatile ingredient packed with flavor and a hint of sourness that can elevate many baked goods.
Benefits of Using Sourdough Discard
Using sourdough discard in recipes is a fantastic way to reduce waste while enhancing flavor. I’ve found that incorporating discard into scones adds a unique depth that regular scones lack. The natural fermentation helps develop a tender crumb and brings a delightful tanginess. Plus, by using sourdough discard, you’re also getting some probiotics, depending on the age and health of your starter. It’s a win-win situation; you get to enjoy delicious baked goods while being more sustainable.
How to Store Sourdough Discard
Storing sourdough discard is quite simple. I usually keep mine in a clean jar in the fridge. It can last up to two weeks, but I try to use it within a week for optimal freshness. If you find you have too much, you can also freeze it! Just scoop it into an airtight container, label it with the date, and pop it in the freezer. When you’re ready to use it, simply thaw it in the fridge overnight. I’ve learned that having sourdough discard on hand means I can whip up a batch of scones or pancakes whenever the mood strikes!
Ingredients for Cheddar Sourdough Discard Scones
Essential Ingredients
Now, let’s get to the good stuff! For my savory cheddar sourdough discard scones, I typically gather the following ingredients:
- 1 cup sourdough discard (room temperature)
- 2 cups all-purpose flour
- 1 tablespoon baking powder
- 1/2 teaspoon salt
- 1/2 cup cold butter, cubed
- 1 cup shredded cheddar cheese
- 1/4 cup milk or buttermilk
- 1-2 tablespoons fresh herbs (like chives or parsley) – optional
Getting these ingredients together is part of the joy! I love the moment when I realize I have everything I need to create something delicious. For more easy recipes, consider checking out Overnight Bacon & Egg Brunch Bake: Prep Ahead, Enjoy More.
Choosing the Right Cheese
Cheddar is my go-to cheese for these scones, but the choice can truly make or break the flavor. I prefer sharp cheddar for its bold taste, but I’ve also experimented with aged cheddar, which adds a rich depth. I recommend shredding your cheese yourself, as pre-shredded cheese often contains anti-caking agents that can change the texture of your scones. There’s something so rewarding about freshly grated cheese melting into the dough!
Optional Add-ins and Variations
While cheddar is delightful on its own, I often find myself wanting to mix things up. Sometimes, I’ll throw in some cooked bacon bits or sun-dried tomatoes for an extra savory kick. Other times, I’ll add a handful of spinach or some caramelized onions. I’ve even made a batch with a hint of garlic powder for a little extra flavor. The beauty of these scones is that they can be customized to suit my taste or what I have on hand. I love the freedom that comes with baking!
Step-by-Step Recipe for Cheddar Sourdough Discard Scones
Preparation Time and Equipment Needed
When I decide to whip up a batch of cheddar sourdough discard scones, I know I need to carve out a little time for the process. Typically, I spend about 30 minutes preparing the ingredients and shaping the scones, followed by 20-25 minutes of baking. As for equipment, here’s what I usually gather:
- A mixing bowl
- A pastry cutter or two forks for cutting in the butter
- A baking sheet lined with parchment paper
- A measuring cup and spoons
- A whisk for combining dry ingredients
- A sharp knife or a bench scraper for cutting the dough
Having everything ready in advance makes the process smoother and more enjoyable. I love the rhythm of baking—the mix of sounds, scents, and the anticipation of delicious scones coming together!
Mixing the Ingredients
To start, I preheat my oven to 400°F (200°C). It’s important to get that oven nice and hot so the scones rise beautifully. In a large mixing bowl, I combine the flour, baking powder, and salt. I like to whisk these together to ensure they’re evenly mixed. Then, I take the cold, cubed butter and use my pastry cutter to cut it into the flour mixture until it resembles coarse crumbs. There’s something so satisfying about seeing those little butter pieces get incorporated. The key here is to work quickly to keep the butter cold, which helps achieve that flaky texture I adore.
Next, I gently fold in the shredded cheddar cheese. If I’m using any optional add-ins, like herbs or bacon, this is the stage where they get added too. The combination of flavors starts to come together, and I can already imagine how delicious these scones will be!
After that, I make a well in the center of the mixture and pour in the sourdough discard and milk or buttermilk. I use a spatula or wooden spoon to mix everything until just combined. I try to resist the urge to overmix; I find that’s a common pitfall that can lead to tough scones!
Shaping the Scones
Once the dough is mixed, I transfer it onto a lightly floured surface. It’s a little sticky, but that’s perfectly normal. I gently pat the dough into a rectangle, aiming for about an inch thick. The next step is my favorite: cutting the scones! I usually use a sharp knife to slice the dough into triangles, but if I’m feeling fancy, I’ll use a round cutter for classic biscuit shapes. The shape doesn’t matter too much, but I find triangles are easy to handle, and they bake up perfectly.
I place the scones on my prepared baking sheet, leaving a little space between each piece. If I want to get a little extra fancy, I’ll brush the tops with a bit of milk or an egg wash for a beautiful golden finish. It’s amazing how such a small step can elevate the look of the scones!
Baking Instructions
With the scones shaped and ready, I pop them into the preheated oven and set a timer for 20-25 minutes. I love the moment when I start to smell that incredible aroma wafting through my kitchen. It’s so tempting to peek inside the oven, but I try to hold off until the timer goes off. When they’re done, I look for a beautiful golden color on top and a slight rise. If I gently tap the bottom, it should sound hollow—this is a great sign that they’re baked through.
Once they’re out of the oven, I let them cool for a few minutes on the baking sheet before transferring them to a wire rack. I can hardly wait to enjoy one warm with a pat of butter or a drizzle of honey! The anticipation is part of the magic of baking, don’t you think?
Flavor Pairings and Serving Suggestions
Best Dips and Spreads
These cheddar sourdough discard scones are absolutely delightful on their own, but I’ve found that a good spread can take them to the next level. I’m a big fan of serving them with a rich, creamy butter or even a flavored compound butter made with herbs. Garlic herb butter is one of my favorites—it complements the cheddar perfectly! You could also try a tangy cream cheese spread or even a dollop of sour cream for a little contrast.
Pairing with Soups and Salads
If you’re looking to make a meal out of your scones, they pair beautifully with hearty soups or crisp salads. I often enjoy them alongside a bowl of tomato soup or a warm potato leek soup. The scones add a satisfying crunch and flavor that balances out the softness of the soup. I’ve also served them with a fresh garden salad, drizzled with a zesty vinaigrette. The versatility of these scones makes them a fantastic addition to any meal!
Serving for Breakfast vs. Snacks
For me, these scones are perfect any time of day. I’ve enjoyed them as a cozy breakfast, warmed up with a bit of butter and jam. They can also serve as a fantastic afternoon snack with a cup of tea. They’re filling enough to satisfy hunger but light enough that they don’t weigh you down. Whether I’m serving them at a brunch gathering or just enjoying them myself, they never fail to impress!
Common Mistakes to Avoid
Overmixing the Dough
One of the biggest pitfalls I’ve encountered when making scones is overmixing the dough. It’s so easy to get caught up in wanting everything to be perfectly combined, but I’ve learned that less is more. When I mix too much, I end up with tough, dense scones instead of the light and fluffy texture I aim for. I try to mix just until the ingredients are combined, leaving a few lumps in the dough. Trust me, those little lumps will bake up beautifully! The key is to treat the dough gently, much like I would with a delicate pastry.
Incorrect Baking Temperature
Another mistake I’ve made is not preheating my oven properly. I’ve gotten a little too excited and jumped the gun, and the results were less than stellar. Scones need that initial burst of high heat to rise properly and form that lovely golden crust. I always make sure to give my oven enough time to reach the right temperature—400°F (200°C) is just perfect for these scones. If the oven isn’t hot enough when I put them in, they won’t rise as beautifully as I’d like, and I end up with flat, sad scones.
Using Expired Sourdough Discard
Lastly, I’ve learned the hard way about the importance of using fresh sourdough discard. While it might seem like a good idea to use whatever I have on hand, using discard that’s too old can affect both flavor and texture. I make it a point to regularly check my starter and discard. If it’s been lingering in the fridge for too long, I’d rather toss it and start fresh. The flavor of the scones is intimately tied to the freshness of the discard, and I want that delightful tanginess to shine through.
Storing and Reheating Scones
How to Store Leftover Scones
After baking a batch of cheddar sourdough discard scones, I often find myself with a few leftovers (if I can resist devouring them all at once!). To store them, I usually let them cool completely, then place them in an airtight container. I’ve found they stay fresh at room temperature for about two days. If I know I won’t finish them in that time, I pop them in the fridge to keep them from drying out. Just be careful not to store them while they’re still warm, as that can create condensation and make them soggy!
Best Methods for Reheating
When it comes time to enjoy my leftover scones, I always want them to taste as fresh as possible. I’ve experimented with different reheating methods, and I find that the oven works best for restoring that lovely texture. I preheat my oven to 350°F (175°C) and warm the scones for about 5-10 minutes. This way, they regain their delightful crispness. I’ve tried microwaving them in the past, but I’ve noticed that they can become chewy and lose their flaky texture that way. So, if I want to enjoy a warm scone, the oven is my go-to method!
Creative Variations on Cheddar Sourdough Discard Scones
Herb-Infused Scones
One of the things I love about these cheddar sourdough discard scones is how easily they lend themselves to variations. For a fresh twist, I often experiment by infusing the dough with different herbs. I’ve tried adding fresh rosemary or thyme, and they bring a lovely aromatic quality that pairs beautifully with the cheddar. I remember the first time I made herb-infused scones; the whole house smelled amazing while they baked! Just a tablespoon or two of finely chopped herbs can elevate the flavor profile and make them feel special.
Spicy Cheddar and Jalapeño Scones
If I’m in the mood for something with a kick, I love to add diced jalapeños to the mix. The spicy cheddar and jalapeño combination creates a delicious contrast with the tangy sourdough. I recall a brunch gathering where I served these scones, and they were a huge hit! The heat of the jalapeños complemented the sharp cheddar perfectly, making for a savory treat that left everyone wanting more. Just be sure to adjust the amount based on your heat preference—we all have different tolerances!
Sweet and Savory Combinations
For a truly unique take, I’ve experimented with sweet and savory combinations, like adding a touch of honey or maple syrup to the dough along with some crumbled bacon. The sweetness balances nicely with the savory cheddar, creating a delightful contrast. I’ve found that drizzling a little honey on top right before serving adds a lovely finishing touch. It’s a fun way to surprise my friends and family, and it always sparks interesting conversations about flavor pairings! If you’re looking for more quick recipes, check out 5-Ingredient Magic: 10 No-Bake Energy Bite Recipes for Busy Days.
FAQs about Cheddar Sourdough Discard Scones
Can I use all-purpose flour instead of bread flour?
Absolutely! While I typically use all-purpose flour for my scones, you can certainly substitute bread flour if that’s what you have on hand. The texture might be slightly different, but I’ve found that all-purpose flour works just as well. It’s all about personal preference and what you enjoy using in your baking.
What can I substitute for cheddar cheese?
If cheddar isn’t your favorite or you want to try something new, there are plenty of other cheeses that work beautifully in these scones. I’ve used gouda, gruyère, and even feta for a different flavor profile. Each cheese brings its own unique taste, and I love the opportunity to explore different combinations!
How do I know when the scones are done baking?
Knowing when your scones are perfectly baked can be a little tricky, but I’ve learned a few tricks. They should be a lovely golden brown on top, and if I gently tap the bottom, it should sound hollow. I also like to keep an eye on the time—around 20-25 minutes in a preheated oven usually does the trick. Trust your instincts; if they smell amazing and look golden, you’re probably in good shape!