
If you’ve ever found yourself with extra sourdough starter and didn’t know what to do with it, I’ve got a delightful solution for you. Let’s dive into the world of sourdough discard scones that are quick, fluffy, and incredibly satisfying!
Understanding Sourdough Discard
What is Sourdough Discard?
I remember the first time I heard the term “sourdough discard.” It sounded almost wasteful, right? But here’s the scoop: sourdough discard is simply the excess starter that accumulates when you feed your sourdough culture. As you nurture your starter, you typically remove some to keep it healthy and manageable. Instead of tossing it out, why not turn it into something delicious? It’s a win-win situation where we can minimize waste and enjoy some scrumptious baked goods!
Benefits of Using Sourdough Discard in Baking
Using sourdough discard in baking has numerous benefits. First and foremost, it adds a unique flavor profile to your baked goods. That tangy, slightly sour taste can elevate simple recipes, making them more complex and enjoyable. I’ve found that scones made with sourdough discard have a light, airy texture that’s just delightful.
Another benefit is the nutritional aspect. Sourdough fermentation can enhance the availability of nutrients in flour, making your scones not only tastier but also healthier. For me, knowing that I’m using something that would otherwise go to waste, while also reaping health benefits, makes every bite feel special.
Lastly, it’s an incredible way to use what you have on hand. With sourdough discard, you can whip up baked goods without the need for a fresh starter, making baking more accessible and less daunting. I often find myself experimenting with what I have, and sourdough discard has opened up a world of culinary creativity! Read Interesting article: Holiday Cheer: 10 Must-Bake Cookies for the Festive Season (Free Guide!)
Common Misconceptions About Sourdough Discard
There are a few misconceptions about sourdough discard that I think we should clear up. Some people believe that discard is somehow inferior or less valuable than fresh starter. In my experience, this couldn’t be further from the truth! Discard can be just as potent and flavorful, especially if it’s been properly stored and taken care of.
Another myth is that you need to let the discard sit out and ferment for hours before using it. While a little fermentation can enhance its flavor, you can use discard straight from the fridge. I often grab mine right after feeding my starter without any issues, and the results are always fantastic.
Lastly, some folks think that using sourdough discard means sacrificing texture or rise in baked goods. I’ve learned that when you incorporate it correctly, you can achieve amazing results. My scones often turn out just as fluffy and delicious as those made with traditional methods.
Ingredients for Quick and Fluffy Sourdough Discard Scones
Essential Ingredients
Now that we understand what sourdough discard is and its benefits, let’s talk about the ingredients that make these scones shine. At a basic level, the essential ingredients for quick and fluffy sourdough discard scones include:
- Sourdough Discard: This is our star ingredient! I typically use about 1 cup of discard for a batch.
- All-purpose Flour: It provides the structure. I love using unbleached all-purpose flour for its quality.
- Baking Powder: This helps the scones rise quickly. I usually add around 2 teaspoons.
- Salt: A pinch of salt enhances flavor. I often use about ½ teaspoon.
- Butter: Cold, unsalted butter is key for that flaky texture. I cut in about ½ cup.
- Milk or Cream: For moisture and richness. I typically use about ¼ cup.
Optional Ingredients for Flavor Variations
While the essential ingredients will get you started, I love to experiment with optional ingredients to create exciting flavor variations. Here are a few of my favorites:
- Fruit: Fresh berries, like blueberries or raspberries, can add a burst of sweetness.
- Nuts: Chopped walnuts or pecans bring a delightful crunch.
- Herbs: Fresh herbs like rosemary or thyme can add a savory depth.
- Cheese: Crumbled feta or sharp cheddar can elevate the flavor profile.
Choosing the Right Type of Sourdough Discard
Not all sourdough discard is created equal! I’ve learned that the type of discard you use can affect the flavor and texture of your scones. If you have a whole wheat or rye sourdough starter, it can give a nuttier flavor to your scones. On the other hand, a white flour starter will yield a lighter scone. I recommend using what you have on hand, but if you have multiple types of discard, feel free to mix and match for unique results!
Step-by-Step Guide to Making Sourdough Discard Scones
Preparing the Dough
Now that we have all our ingredients ready, let’s get our hands dirty and make the dough! I find this part incredibly satisfying. First, I preheat my oven to 400°F (200°C). It’s always good to have the oven hot and ready when the scones are shaped. I then grab a large mixing bowl and start by combining the flour, baking powder, and salt. I whisk them together to ensure everything is evenly distributed.
Next, I cut the cold butter into the flour mixture. I like to use a pastry cutter for this, but sometimes, I just use my fingers. You want to work the butter into the flour until the mixture resembles coarse crumbs. The little bits of butter create those lovely flaky layers in the scones. Once that’s done, I add the sourdough discard and milk (or cream) to the bowl. I give it a gentle stir until everything just comes together. It’s important not to overmix – I remember my first batch came out dense because I went a little too far with the mixing!
Shaping the Scones
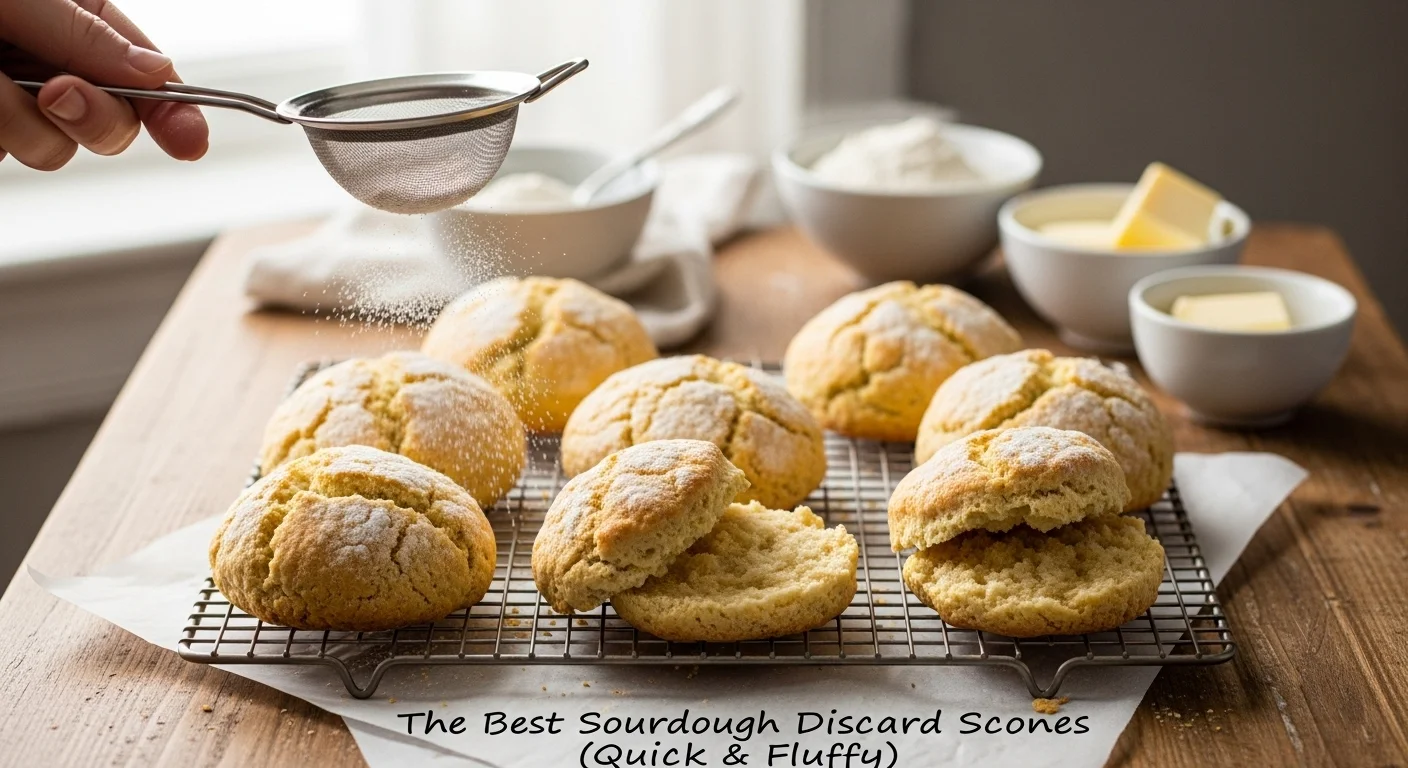
Once my dough is formed, I turn it out onto a floured surface. This part is like a mini workout, and I love it! I gently pat the dough into a rectangle about 1-inch thick. I try to keep it as uniform as possible because it helps the scones bake evenly. After that, I use a sharp knife or a bench scraper to cut the dough into triangles or squares, whichever shape I’m feeling that day. I usually end up with about eight scones, but you can adjust the size if you prefer smaller or larger ones.
To give them a little extra flair (and a golden finish), I often brush the tops with a bit of milk or cream before they go into the oven. This small step makes a big difference in the final appearance, and who doesn’t love a beautifully baked scone?
Baking Techniques for Fluffiness
The secret to fluffy scones lies in the baking process! Once my scones are shaped and brushed, I place them on a parchment-lined baking sheet, making sure to leave a little space between each one. This allows them to rise beautifully without sticking together. I pop them into the preheated oven and set a timer for about 15 minutes. I’ve learned that every oven is a bit different, so it’s always a good idea to keep an eye on them after the 12-minute mark. They should be golden brown on top and have a slight dome shape.
One tip I swear by is to avoid opening the oven door too soon. I learned this the hard way when my scones didn’t rise properly because I was too eager to check on them. Patience is key! Once they’re baked to perfection, I pull them out and let them cool on a wire rack.
Cooling and Serving Suggestions
After the scones have cooled for a few minutes, I can hardly resist breaking one apart. The aroma fills my kitchen, and I know I’m in for a treat! I’ve found that scones are best enjoyed warm, so if you can, serve them right away. They’re wonderful on their own, but I love to add a pat of butter or a drizzle of honey for that extra touch. Sometimes, I even whip up a quick cream cheese spread with a hint of lemon zest to complement the tang from the sourdough.
If I’m having guests over, I like to serve these scones with a selection of jams or fresh fruit. It creates a lovely spread for brunch or afternoon tea. I remember the last time I made these, my friends couldn’t believe they were made from sourdough discard! It’s such a fun surprise to see their reactions, and it makes me feel proud of my baking adventure.
Flavor Variations for Sourdough Discard Scones
Fruit and Nut Combinations
Once you get comfortable making the basic scone, I highly recommend playing around with different flavors. I absolutely love adding fruit. Fresh blueberries are a staple in my kitchen, and they create such a delightful burst of flavor with every bite. I typically toss about a cup of berries into the dough after I’ve combined all the wet and dry ingredients. Just be gentle while mixing so the berries don’t break apart!
Nuts are another fantastic addition. Walnuts or pecans add a lovely crunch and depth. I usually chop them coarsely and fold them into the dough in the same way I do with fruit. It’s all about finding that perfect balance of flavors and textures that you enjoy the most.
Herb and Cheese Options
If you’re looking for a savory twist, I can’t recommend adding fresh herbs enough. I’ve had great success with rosemary and thyme. The aroma as they bake is heavenly! For cheese lovers, crumbled feta or sharp cheddar adds a delightful richness. Just mix in about a cup of your chosen cheese along with the herbs. These savory scones are perfect for brunch or even as a side with soup!
Sweet Additions: Chocolate Chips and Spices
For those days when I have a sweet tooth, I love adding chocolate chips! Dark chocolate pairs wonderfully with the tangy notes of sourdough. Just about a half-cup of chocolate chips folded in after the wet ingredients makes these scones feel extra indulgent. You can also experiment with spices like cinnamon or nutmeg for a warm, cozy flavor. I often add a teaspoon of cinnamon for a lovely warmth, especially in the fall.
Common Mistakes to Avoid When Making Sourdough Discard Scones
Over-Mixing the Dough
One of the biggest mistakes I’ve made when baking scones (and one that many beginners make) is over-mixing the dough. When we mix, we develop gluten, which can lead to tough, dense scones instead of the light, fluffy texture we’re after. I remember the first time I made scones and got so excited about mixing everything together that I ended up with a dough that was more like a brick than a light pastry. Now, I’ve learned to mix just until the ingredients come together. It’s okay if there are a few lumps; they’ll bake out and give you the perfect scone.
Using Too Much or Too Little Discard
Finding the right balance of sourdough discard is crucial. I’ve experimented with different amounts, and I’ve found that using too much can throw off the ratios of flour and liquid, leading to overly wet or sticky dough. Conversely, using too little can result in dry scones that lack that lovely tangy flavor. I usually stick to about one cup of discard, but if you’re using a particularly wet or dry starter, you might need to adjust. Trust your instincts, and pay attention to the consistency of the dough!
Incorrect Baking Temperatures and Times
Baking times and temperatures can vary widely from oven to oven. I’ve had my fair share of scones that were either underbaked or overbaked because I didn’t keep a close eye on them. I recommend using a timer to check at the lower end of the baking time. If they’re not done, you can always give them a few extra minutes, but it’s tough to rescue a burnt scone! Also, make sure your oven is properly preheated before you put the scones in; a hot oven is key to getting that nice rise.
Storage and Reheating Tips for Sourdough Discard Scones
How to Store Scones for Freshness
Once I’ve baked my scones and enjoyed a few warm ones, I often wonder how to best store the leftovers. I’ve learned that the best way to keep scones fresh is to let them cool completely and then store them in an airtight container. I usually line the bottom of the container with parchment paper to absorb any excess moisture, which helps prevent them from getting soggy. They can last about 2-3 days at room temperature. If I want to keep them for longer, I wrap them tightly in plastic wrap and pop them in the freezer. This way, I can enjoy a homemade scone anytime!
Best Methods for Reheating Scones
When it comes to reheating, I’ve found that the oven is the best method to restore that freshly-baked texture. I preheat my oven to 350°F (175°C), place the scones on a baking sheet, and cover them lightly with aluminum foil to prevent them from getting too brown. A few minutes in the oven usually does the trick, and they come out warm and fluffy again. If I’m in a hurry, I sometimes use the microwave, but I only zap them for about 10-15 seconds to avoid making them chewy. Just remember, a little care in reheating can make all the difference!
FAQs About Sourdough Discard Scones
Can I freeze Sourdough Discard Scones?
Absolutely! Freezing scones is one of my favorite ways to enjoy them later. Once they’re baked and cooled, I wrap them individually in plastic wrap and place them in a freezer bag. They can last for up to three months in the freezer. Whenever I have a craving, I simply take one out, let it thaw at room temperature, and then reheat it in the oven for that fresh-baked feel.
How long do Sourdough Discard Scones last?
When stored properly, scones can last about 2-3 days at room temperature. However, if you want to keep them longer, freezing is the best option. Just be sure to store them in an airtight container or wrap them well to avoid freezer burn. I’ve experimented with keeping them in the fridge, but I find that they tend to dry out, so I stick to room temperature or the freezer.
Can I make these scones gluten-free?
Yes, you can! I’ve had success using a gluten-free all-purpose flour blend in place of regular flour. You may need to adjust the liquid slightly since gluten-free flours can absorb moisture differently. If you’re experimenting with gluten-free baking, I recommend looking for blends that contain xanthan gum or adding a small amount to help with structure. It’s always fun to try new adaptations and see what works best for your taste!
Final Thoughts
Reflecting on my journey with sourdough discard scones, I can’t help but feel a sense of accomplishment. These little treats have not only transformed my baking routine but have also allowed me to reduce waste in my kitchen. Every time I whip up a batch, it’s like a celebration of creativity and resourcefulness. I’ve learned that cooking and baking can be about more than just following recipes; it’s about experimentation, joy, and sharing moments with others.
For anyone hesitant to dive into baking with sourdough discard, I encourage you to take the plunge! The process is simple, and the results are so rewarding. Experiment with flavors, and don’t be afraid to make mistakes; every misstep is a learning opportunity. I’ve had my share of “oops” moments, but those are often the stories I find myself sharing the most.
Whether you enjoy these scones as a breakfast treat, a delightful snack, or a fancy brunch addition, they are sure to impress. The beauty of sourdough discard is that it encourages us to be innovative and resourceful in the kitchen, and who knows what new favorite flavor combinations you’ll stumble upon? So gather your ingredients, get your hands messy, and enjoy the wonderful world of sourdough baking!
As you explore this delicious avenue, remember to share your experiences with friends and family. There’s nothing quite like seeing their delight as they taste something made with love and creativity. Happy baking!
Frequently Asked Questions
What is sourdough discard?
Sourdough discard is the excess starter that accumulates when you feed your sourdough culture. Instead of tossing it out, it can be turned into delicious baked goods, minimizing waste.
What are the benefits of using sourdough discard in baking?
Using sourdough discard adds a unique flavor profile to baked goods, enhances the availability of nutrients in flour, and allows for creativity in baking without needing fresh starter.
Can I use sourdough discard straight from the fridge?
Yes, you can use sourdough discard straight from the fridge without letting it sit out to ferment for hours. It can yield fantastic results in your baking.
What are the essential ingredients for making sourdough discard scones?
The essential ingredients include sourdough discard, all-purpose flour, baking powder, salt, cold unsalted butter, and milk or cream.
What optional ingredients can I add to my sourdough discard scones for flavor variations?
You can add fresh fruit, nuts, herbs, and cheese to create exciting flavor variations in your scones.
How can I prevent my scones from being dense?
Avoid over-mixing the dough, as mixing develops gluten, which can lead to tough, dense scones. Mix just until the ingredients come together.
What is the best way to store sourdough discard scones?
Store cooled scones in an airtight container lined with parchment paper at room temperature for 2-3 days, or freeze them tightly wrapped for longer storage.
Can I make sourdough discard scones gluten-free?
Yes, you can use a gluten-free all-purpose flour blend instead of regular flour. Adjust the liquid as needed since gluten-free flours absorb moisture differently.
What baking temperature is recommended for sourdough discard scones?
Preheat your oven to 400°F (200°C) for baking the scones. Baking times may vary, so keep an eye on them after the 12-minute mark.
How long do sourdough discard scones last?
When stored properly, sourdough discard scones can last about 2-3 days at room temperature or longer if frozen.