
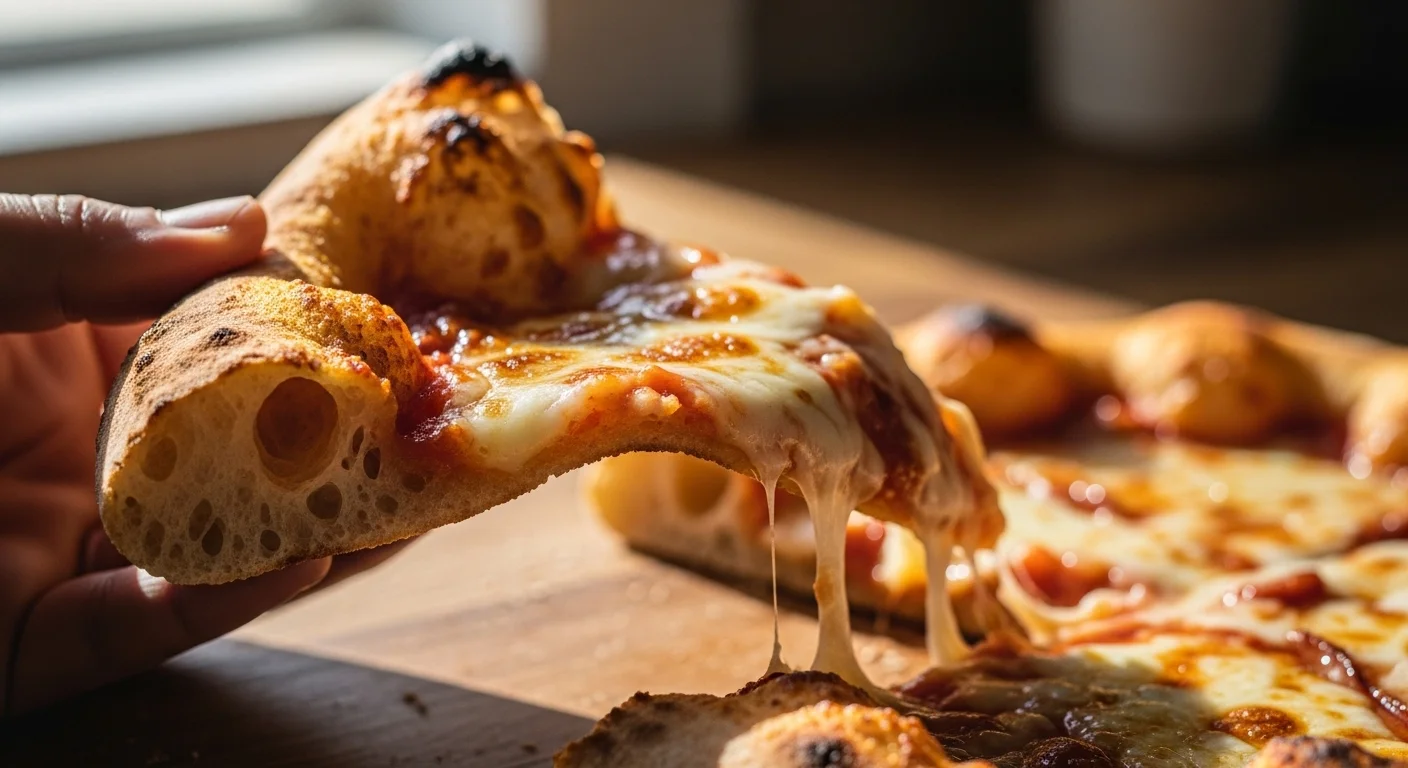
There’s something magical about sourdough pizza crust. It’s chewy, bubbly, and simply perfect. If you’re ready to elevate your pizza game, let’s dive into the wonderful world of sourdough!
Understanding Sourdough Pizza Crust
When I first heard about sourdough pizza crust, I was intrigued. It seemed like a delightful twist on the traditional pizza we all know and love. But what exactly is sourdough? I found that sourdough is not just a baking trend; it’s a centuries-old method of fermenting dough using wild yeast and bacteria. This fermentation process not only gives sourdough its distinct tangy flavor but also changes the way the dough behaves during baking.
What is Sourdough?
Sourdough is a type of bread made by fermenting dough using naturally occurring lactobacilli and yeast. Unlike commercial yeast, which can be added directly to the dough, sourdough relies on wild yeast and bacteria from the environment. I remember my first attempt at making a sourdough starter; it felt like a science experiment. Watching it bubble and grow was so rewarding! This starter becomes the backbone of our pizza crust, providing flavor and texture that’s hard to replicate. For more on how to maintain your starter, check out The Ultimate Sourdough Starter Feeding Guide (With Schedule).
Benefits of Using Sourdough for Pizza
There are numerous benefits to using sourdough for pizza crust. First, it contributes to a unique flavor profile that’s both complex and satisfying. The fermentation process breaks down gluten, making the crust easier to digest. I noticed that after switching to sourdough, my stomach felt much better after indulging in a slice. Plus, sourdough pizza crust tends to have a wonderfully chewy texture with a crispy exterior, which I think is just perfect for holding all those delicious toppings.
Another advantage is the longer shelf life of sourdough. The acidity produced during fermentation helps inhibit the growth of mold, which means you can enjoy leftover pizza without fear of it spoiling quickly. Trust me; I’ve had my share of late-night pizza sessions where I enjoyed the leftovers just as much as the fresh pie!
The Science Behind Sourdough Fermentation
Understanding the science behind sourdough fermentation was a real eye-opener for me. The process begins with mixing flour and water to create a starter, which captures wild yeast and lactic acid bacteria from the environment. Over time, this starter ferments, producing lactic acid and carbon dioxide. The carbon dioxide is what causes the dough to rise, creating those lovely bubbles we see in a well-baked crust.
What’s fascinating is how this fermentation affects flavor. The longer the dough ferments, the more complex the flavors become. I discovered that a longer fermentation also contributes to better texture. I started experimenting with different fermentation times and found that around 12 to 24 hours of bulk fermentation gives the crust a delightful chewiness, which is my favorite characteristic.
Another important aspect of sourdough fermentation is the pH level of the dough. The lactic acid produced not only adds flavor but also creates a more acidic environment, which strengthens the gluten structure in the dough. This is why sourdough can hold up to a variety of toppings without becoming soggy. I’ve learned that a well-fermented dough can support heavy toppings while still delivering that sought-after crunch.
Key Ingredients for the Perfect Sourdough Pizza Crust
Now that we’ve explored the fundamentals of sourdough, let’s talk about the key ingredients that come together to create the perfect pizza crust. Each ingredient plays a vital role in achieving that chewy, bubbly perfection.
Flour: Types and Quality
The type of flour you use is crucial for the texture and flavor of your crust. I’ve experimented with various flours, but I find that bread flour works best due to its higher protein content. This high protein helps develop gluten, which gives the crust its structure and chewiness. I also like to mix in a bit of all-purpose flour for added tenderness. When selecting flour, I recommend choosing high-quality, unbleached flour whenever possible. I’ve noticed that it makes a significant difference in the final product.
Water: The Role of Hydration
Water is another essential ingredient. The hydration level of the dough affects its texture and the ease of shaping. I tend to use a hydration level of about 70% for my sourdough pizza crust, which gives it a nice balance between chewiness and crispiness. I remember my first attempt at a wetter dough; it was definitely a challenge to handle, but the end result was worth it. The crust came out light and airy, with those beautiful bubbles that make sourdough so special.
Salt: Enhancing Flavor and Texture
Don’t underestimate the power of salt! It not only enhances the flavor of the crust but also strengthens the gluten structure. I usually add about 2% salt to the total flour weight. It’s important to dissolve the salt in the water before mixing it into the dough, as this helps distribute it evenly. I’ve learned that adding salt too late in the process can affect the dough’s development, so it’s best to incorporate it early on.
Sourdough Starter: Maintaining and Feeding
Your sourdough starter is the heart of your pizza crust. I recommend keeping it healthy by regularly feeding it with flour and water. This ensures that it’s active and bubbly when you’re ready to make your pizza. I’ve found that using a well-fed starter results in a better rise and flavor. If you’re new to sourdough, don’t worry—maintaining a starter is easier than it sounds! Just remember to keep it at room temperature if you plan to use it frequently, or store it in the fridge if you’re taking a break. For more tips, you can refer to The Ultimate Sourdough Starter Feeding Guide (With Schedule).
In my experience, the journey to creating the best sourdough pizza crust is both rewarding and delicious. We’ve learned about the fundamentals of sourdough and the key ingredients that come together to create a crust that’s chewy, bubbly, and truly perfect. The next steps will guide us through the actual process of making this delightful pizza crust. I can’t wait to share that with you!
Step-by-Step Guide to Making Sourdough Pizza Crust
Preparing Your Sourdough Starter
Before diving into making the actual pizza crust, we need to ensure your sourdough starter is in tip-top shape. I like to feed my starter about 4 to 6 hours before I plan to make the dough. This gives it enough time to become bubbly and active. If your starter has been in the fridge, take it out a day before to let it come to room temperature. I’ve found that using a starter that’s freshly fed makes a noticeable difference in the rise and flavor of the crust.
Mixing the Dough
Once your starter is ready, it’s time to mix the dough. I usually start with a large mixing bowl. First, I combine my active sourdough starter with water. I like to use lukewarm water to help wake up the yeast. Then, I add my chosen flour and salt, mixing everything together until it forms a shaggy dough. I remember my first time mixing the dough; I was surprised at how sticky it was! It can feel intimidating, but don’t worry, that’s normal. Just embrace the mess for now.
Kneading Techniques for Chewy Texture
Kneading is a crucial step in developing the gluten structure of your dough. I typically use a technique called the stretch and fold method. After letting the dough rest for about 30 minutes, I gently pull one side of the dough up and fold it over itself, then rotate the bowl and repeat on all sides. I’ve learned that this method not only helps develop the gluten but also keeps the dough airy and light. After about 4 to 6 rounds of stretching and folding, I let the dough rest again. This part is both relaxing and rewarding, as I can already envision the beautiful crust I’ll be creating.
Fermentation and Bulk Rise
Now comes the magic of fermentation. Once the dough is kneaded, I place it in a clean bowl, cover it with a damp cloth, and let it rise at room temperature for about 4 to 6 hours. During this time, I often peek at it and feel that excitement building as it grows in size. I usually look for the dough to double in volume and become puffy. If I want to plan ahead, I sometimes let it ferment in the fridge overnight. This slow fermentation enhances the flavor, and I can’t recommend it enough!
Shaping the Pizza Crust
After the bulk rise, it’s time to shape the dough into a pizza crust. I sprinkle a bit of flour on my work surface to prevent sticking, then gently transfer the dough out of the bowl. I gently flatten the dough with my hands, being careful not to deflate all the air it just worked hard to create. I use my fingers to stretch the dough outwards, gradually creating a round shape. I’ve found that the key here is to be patient. If the dough resists stretching, I let it rest for a few more minutes. This is when I notice that the dough is really coming to life!
Proofing: The Key to Bubbles
Proofing is where we give the shaped crust a little time to develop more bubbles. I place the shaped dough on a parchment-lined baking sheet or a pizza peel. Then, I cover it with a cloth and let it proof for about 30 minutes to 1 hour. I’ve discovered that this step is essential for achieving that perfect airy texture. A well-proofed crust is what delivers those delightful bubbles that everyone loves. When it’s ready, I gently poke the dough, and if it springs back slowly, I know it’s ready for the oven!
Baking the Perfect Sourdough Pizza Crust
Choosing the Right Oven Temperature
When it comes to baking sourdough pizza, the oven temperature is crucial. I always preheat my oven to the highest setting, usually around 475°F to 500°F. This high heat is what gives the crust that crispy exterior while keeping the inside nice and chewy. I remember my first pizza-making adventure; I was so eager to get it in the oven that I didn’t preheat long enough. The crust turned out undercooked, and I learned my lesson the hard way!
Using a Pizza Stone vs. Baking Sheet
One of the best tools I’ve invested in for baking pizza is a pizza stone. It retains heat beautifully and helps achieve that crispy bottom that I crave. If you don’t have a pizza stone, a heavy baking sheet turned upside down works too. Just be sure to preheat it in the oven along with the oven itself. I’ve found that the key to a successful bake is to get that stone or sheet hot enough before placing the pizza on it.
How to Achieve a Crispy Bottom
To ensure a crispy bottom, I always make sure to use parchment paper or flour on my pizza peel to prevent sticking. I slide the pizza onto the stone or baking sheet carefully. Another tip I’ve discovered is to avoid overloading the pizza with toppings. While I love a loaded pizza, too many toppings can make the crust soggy. I usually stick to a balance of sauce, cheese, and a few select toppings to allow the crust to shine.
Timing: When is the Crust Done?
Baking time can vary, but I usually find that my sourdough pizza takes about 10 to 15 minutes in the oven. I keep an eye on the crust and look for a beautiful golden-brown color. The smell that fills the kitchen during this time is simply heavenly! I also check the bottom to ensure it’s browned and crisp. Once it’s done, I can’t wait to pull it out and let it cool for just a minute before slicing into that bubbly goodness.
Toppings and Pairings for Sourdough Pizza
Toppings and Pairings for Sourdough Pizza
Once we’ve perfected our sourdough pizza crust, it’s time to have some fun with toppings! The beauty of pizza is its versatility, and I’ve learned that the right toppings can really elevate the whole experience. Whether you prefer classic combinations or something a bit more adventurous, I’m excited to share my favorites with you!
Classic Margherita Toppings
You can’t go wrong with a classic Margherita pizza. For me, it’s all about simplicity and quality ingredients. I start with a thin layer of homemade or store-bought tomato sauce, which I usually spice up with a pinch of salt, some oregano, and a dash of olive oil. Then, I add slices of fresh mozzarella cheese. I’ve found that using whole milk mozzarella gives the best melt and flavor. Finally, I scatter fresh basil leaves on top just before serving. There’s something so satisfying about the combination of fresh tomatoes, creamy cheese, and fragrant basil. It’s a pizza that reminds me of summer, no matter the season!
Creative Flavor Combinations
If you’re feeling a bit more adventurous, there are endless creative toppings to explore! One of my favorites is a fig and prosciutto pizza. I spread a thin layer of fig jam over the crust, add fresh mozzarella, and once it’s baked, I top it with crispy prosciutto and arugula. The sweet and savory contrast is simply divine! Another combination I love is a spicy chorizo and bell pepper pizza. I sauté the bell peppers beforehand to bring out their sweetness and balance the heat from the chorizo. This one always gets rave reviews from friends!
I’ve also experimented with vegetarian toppings, like roasted vegetables. Zucchini, bell peppers, and red onions drizzled with balsamic glaze make for a beautiful and delicious pie. I often roast the veggies first to enhance their flavor, which adds depth to the overall pizza.
Best Cheeses for Sourdough Pizza
Cheese is essential for the perfect pizza, and I’ve learned that not all cheeses are created equal. While mozzarella is the classic choice, I love mixing in other cheeses to add complexity. For instance, I often sprinkle some goat cheese or feta on my pizzas for a tangy kick. I’ve even tried adding a bit of grated Parmesan or Pecorino Romano after baking for an extra burst of flavor. Don’t be afraid to experiment! I’ve found that combining different types of cheese can lead to delightful surprises.
Complementary Side Dishes and Salads
To round out our pizza night, I love serving complementary side dishes or salads. A simple arugula salad tossed with lemon vinaigrette and shaved Parmesan perfectly balances the richness of the pizza. I also enjoy making a caprese salad with fresh tomatoes, basil, and mozzarella for a refreshing contrast. On occasion, I whip up a batch of garlic knots or breadsticks using the same sourdough starter. It’s a fun way to make the most of my time in the kitchen!
For a heartier option, I often prepare a roasted vegetable medley alongside the pizza. Just toss your favorite seasonal veggies with olive oil, salt, and pepper, roast them until caramelized, and serve them warm. The flavors play beautifully with the roasted notes of the pizza, creating a lovely meal that I always enjoy sharing.
As I explore the world of toppings and pairings, I continually discover new flavor profiles that surprise and delight my taste buds. This is one of the reasons I love making sourdough pizza; it’s not just about the crust—it’s about creating an entire experience that brings people together. So, gather your favorite ingredients and let your creativity shine! The next section will tackle some common mistakes I’ve encountered along the way and how to troubleshoot them, so we can all enjoy the best sourdough pizza possible.
Frequently Asked Questions
What is sourdough pizza crust?
Sourdough pizza crust is made by fermenting dough using wild yeast and bacteria, giving it a chewy, bubbly texture and a distinct tangy flavor.
What are the benefits of using sourdough for pizza crust?
Using sourdough for pizza crust contributes to a unique flavor profile, makes the crust easier to digest, and offers a longer shelf life due to its acidity, which helps inhibit mold growth.
What key ingredients are needed for the perfect sourdough pizza crust?
The key ingredients include high-quality flour (preferably bread flour), water, salt, and a healthy sourdough starter.
How does hydration level affect sourdough pizza crust?
The hydration level of the dough affects its texture and shaping ease. A hydration level of about 70% is recommended for a good balance between chewiness and crispiness.
What kneading technique is suggested for achieving a chewy texture?
The stretch and fold method is recommended, which helps develop gluten while keeping the dough airy. After resting, you gently pull and fold the dough from each side.
How long should the dough ferment for optimal flavor?
For optimal flavor, a bulk fermentation time of about 12 to 24 hours is recommended, allowing the dough to develop complexity and texture.
What temperature should the oven be set to when baking sourdough pizza?
The oven should be preheated to the highest setting, typically around 475°F to 500°F, to achieve a crispy exterior while keeping the inside chewy.
What is the purpose of proofing the shaped pizza crust?
Proofing allows the shaped crust to develop more bubbles, which results in an airy texture. It usually requires 30 minutes to 1 hour of resting time before baking.
What are some classic and creative toppings for sourdough pizza?
Classic toppings include tomato sauce, fresh mozzarella, and basil for a Margherita pizza. Creative combinations can include fig and prosciutto or spicy chorizo with bell peppers.
What side dishes complement sourdough pizza?
Complementary side dishes include arugula salad, caprese salad, garlic knots, or roasted vegetable medleys, which balance the richness of the pizza.
Read Interesting article: This Smashed Potato Salad Is Going Mega Viral—and I See Why
Read Interesting article: 12 Healthy Dinners That Heartily Satisfy