
There’s something about crispy tater tots that takes me back to childhood. With the air fryer, I’ve discovered a way to achieve that perfect crunch and flavor—better than any oven could provide! Read Interesting article: This Greek Lemon Rice Soup Trend Warms the Soul
Understanding Tater Tots: A Brief Overview
What Are Tater Tots?
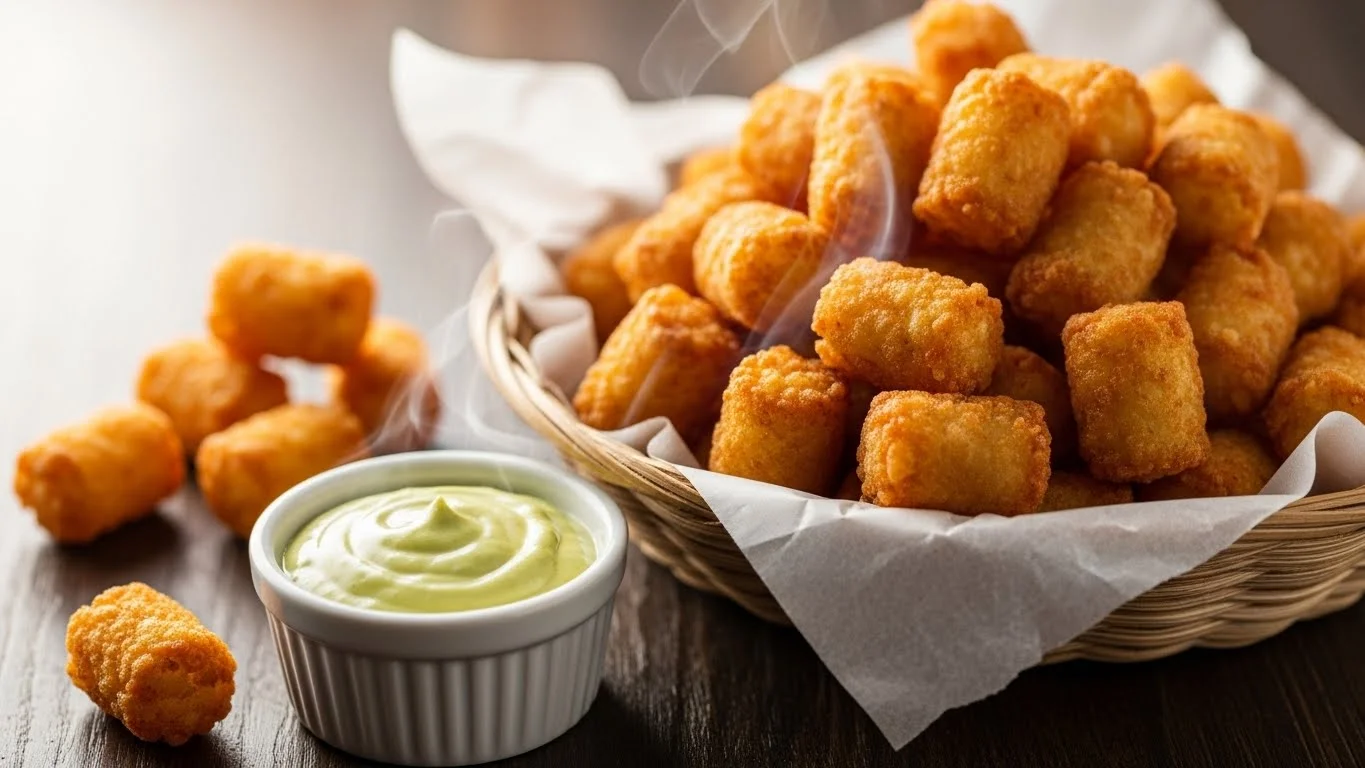
Tater tots are bite-sized pieces of grated potato that are formed into small cylinders and deep-fried until golden brown. They’re light, fluffy on the inside, and crispy on the outside. I remember the first time I tried them at a school cafeteria; they were crispy little morsels of perfection that I couldn’t get enough of. Over the years, tater tots have evolved into a beloved snack and side dish, showing up at everything from casual family dinners to upscale restaurants. Whether enjoyed alone or topped with various ingredients, they never fail to please.
History of Tater Tots
The story of tater tots begins in the 1950s when the Neperan Company, now known as Ore-Ida, sought a way to use leftover potato scraps. Invented by the founders, the tots quickly gained popularity due to their unique shape and texture. I find it fascinating how something so simple became a staple in so many households. Since their humble beginnings, tater tots have found their way into our hearts (and our freezers) as a quick and easy snack option. Over the decades, their appeal has only grown, and they’re now a beloved comfort food across America.
Traditional Cooking Methods vs. Air Frying
Traditionally, tater tots are deep-fried, which gives them that classic crunch but can also lead to greasy results. I used to make them this way, and while they were delicious, the oil made me feel a bit sluggish afterward. When I first tried making tater tots in the air fryer, I was blown away by how much better they turned out. The air fryer uses hot air circulation to cook the potatoes evenly, resulting in that crispy exterior without all the added grease. It’s a game-changer! Plus, it’s easier to clean up afterward, and I love that I can enjoy a healthier version of my favorite snack without compromising on taste.
Why Choose Air Fryer for Tater Tots?
Health Benefits of Air Frying
One of the biggest reasons I turned to air frying is health. Air fryers use significantly less oil than traditional frying methods, reducing calories and unhealthy fats. I’ve realized that I feel better when I don’t overload my meals with grease. Instead, air-fried tater tots retain that satisfying crunch while being much lighter. I often find myself snacking on them more freely, knowing they’re a healthier alternative.
Time Efficiency Compared to Oven Cooking
When I first started cooking, I would often put my tater tots in the oven and then forget about them for longer than I intended. It felt like waiting forever, and the results could be hit or miss, especially if I hadn’t preheated the oven properly. The air fryer cuts that waiting time down significantly. It heats up in a fraction of the time, and cooking tater tots takes less time as well. I can have crispy, golden-brown tater tots ready in about 15-20 minutes, which is a fraction of the time compared to traditional methods. Read Interesting article: Crispy Air Fryer Egg Rolls (Better Than Takeout)
Texture and Flavor Differences
The texture of air-fried tater tots is what really sold me. They turn out crispy and golden on the outside, with a fluffy interior that I adore. I remember making them in the oven and always worrying about them being soggy or unevenly cooked. When I switched to air frying, I noticed a significant difference in flavor too. The heat from the air fryer creates a more concentrated potato flavor, enhanced by the seasoning I choose. I’ve even started experimenting with different toppings and spices to elevate the taste!
Essential Ingredients for Crispy Air Fryer Tater Tots
Types of Potatoes (Russet, Yukon Gold, etc.)
The type of potato you use can make a huge impact on the final outcome of your tater tots. I’ve found that Russet potatoes are the best choice for that classic texture and flavor. They have a high starch content, making them fluffy inside while getting crispy on the outside. Yukon Gold potatoes also work well, offering a buttery flavor and creaminess. I sometimes mix the two for a unique twist. Choosing the right potato can change your tater tot experience drastically!
Seasoning Options (Salt, Pepper, Garlic Powder, etc.)
When I prepare my tater tots, I love to get creative with seasoning. While a simple sprinkle of salt and pepper is always a classic, I often venture into garlic powder, onion powder, or even smoked paprika for a bit of kick. Experimenting with different flavors has been a fun journey for me. I enjoy making a spicy version for gatherings, or sometimes I’ll keep it simple for a cozy family movie night. The options are endless, and it’s a great way to personalize your snack!
Oil Choices (Olive Oil, Avocado Oil, etc.)
Even though air frying uses less oil, I still like to add a touch to help achieve that golden crispiness. I usually opt for olive oil or avocado oil for their health benefits and flavor. Olive oil has a lovely, rich taste, while avocado oil has a higher smoke point, making it ideal for air frying. I often find that a light coating of oil helps the seasoning stick and enhances the overall crunch. Just a little goes a long way!
Step-by-Step Guide to Preparing Air Fryer Tater Tots
Choosing the Right Potatoes
When I first started making my own tater tots, I learned that selecting the right potatoes is key to achieving that perfect texture. I usually go for Russet potatoes because they have the right starch content that gives the tots that fluffy interior and crispy exterior I love. Sometimes, I mix in a few Yukon Gold potatoes for their buttery flavor. It’s like creating my own signature blend! If you’re new to this, I recommend trying both varieties. You might discover a combination that makes your taste buds dance.
Preparing the Potatoes (Peeling, Grating, Rinsing)
Once I’ve chosen my potatoes, the next step is prepping them. I generally peel the potatoes, although you can leave the skins on if you prefer a more rustic feel. After peeling, I grate them using a box grater or a food processor. I remember the first time I grated potatoes; it felt like a workout, but it was worth it. After grating, I rinse the potatoes under cold water to remove excess starch. This step is crucial; it helps the tots become crispier. After rinsing, I make sure to dry them thoroughly using a clean kitchen towel. I’ve learned that getting rid of moisture is vital for that crunch factor!
Mixing Ingredients and Seasoning
Now comes the fun part—mixing the grated potatoes with seasoning! I usually toss the grated potatoes in a bowl and add my favorite seasonings. A sprinkle of salt, pepper, garlic powder, and sometimes a dash of paprika usually does the trick. I enjoy getting creative here, especially if I’m making a batch for friends. Sometimes I’ll throw in some shredded cheese for extra flavor. It’s amazing how just a few ingredients can transform the simple grated potato mixture into something delicious. I often taste it before shaping the tots just to ensure the seasoning is perfect!
Shaping the Tater Tots
After mixing, it’s time to shape the tater tots. I find that using my hands is the best approach; it gives me the control I need to form them into little cylinders that are about an inch long. I remember the first time I shaped them, and they looked a bit uneven—some were thicker than others. But over time, I learned that it’s okay if they’re not all perfect. The important thing is to make sure they’re compact so they hold together during cooking. If I ever find the mixture too crumbly, I add a tiny bit of flour to help bind it. I think it’s all about finding that balance!
Cooking Air Fryer Tater Tots
Preheating the Air Fryer
Before I pop those tots into the air fryer, I always take a moment to preheat it. I typically set it to 400°F for about 5 minutes. Preheating is essential because it helps in achieving that golden brown color and crispy texture right from the start. I’ve learned that skipping this step can lead to uneven cooking, and nobody wants soggy tater tots!
Cooking Time and Temperature Settings
Once the air fryer is preheated, I arrange the tater tots in a single layer in the basket. I try to leave a little space in between them for the hot air to circulate properly. I set the timer for about 15-20 minutes, depending on how crispy I want them. Halfway through cooking, I give them a shake or a gentle flip. I remember the first time I forgot to flip them—I had some that were perfectly crispy and others that were a bit too soft. Now, I never skip this step; it ensures they cook evenly and come out looking beautiful!
Shaking or Flipping for Even Crispiness
As the timer counts down, I can hardly contain my excitement! When it’s time, I carefully remove the basket and check to see how they’re doing. If they’re not quite there, I might add another minute or two. I’ve learned to trust my instincts on this; everyone’s air fryer can be a little different. I often shake the basket once or twice during cooking to guarantee that every single tot gets that delicious crispiness. The smell wafting through the kitchen while they cook is heavenly, and it makes waiting for them even harder!
Variations and Enhancements for Tater Tots
Cheesy Tater Tots (Adding Cheese)
One of my favorite things to do with tater tots is to add cheese. Who doesn’t love a gooey, cheesy treat? When I want to elevate my tater tots, I usually mix in some shredded cheese right before I shape them. Cheddar is my go-to because it melts beautifully and offers that rich flavor I crave. Sometimes, I even throw in a bit of mozzarella for that stretchy, melty goodness. I remember the first time I pulled a batch out of the air fryer, and the cheese was bubbling and slightly crispy on top—it was a moment of pure joy! You can also sprinkle some cheese on top during the last few minutes of cooking to create a delightful cheesy crust. Trust me, this variation is a crowd-pleaser, whether it’s for a casual family dinner or a fun party with friends.
Spicy Tater Tots (Adding Spices)
If you’re like me and enjoy a bit of heat, you’ll want to try making spicy tater tots. I usually add some cayenne pepper or chili powder to the seasoning mix for a kick. The first time I tried it, I was amazed at how just a little spice could transform the flavor profile. If I’m feeling adventurous, I sometimes drizzle a bit of hot sauce into the mixture for an extra punch. I’ve noticed that the heat balances well with the crispy texture of the tots, making them even more addictive. Plus, you can adjust the level of spiciness to suit your taste. I love preparing these for gatherings, as they always spark conversation and excitement!
Vegetable-Loaded Tater Tots (Incorporating Veggies)
When I want to sneak in some extra nutrients, I often incorporate vegetables into my tater tots. Grated zucchini or carrots blend seamlessly with the potatoes and add great color and flavor. I remember the first time I added zucchini; I was pleasantly surprised at how well it worked without overpowering the classic tater tot taste. To incorporate veggies, I simply grate them along with the potatoes and squeeze out any excess moisture. This helps maintain that crispiness we all love! I’ve also experimented with adding finely chopped spinach or even corn for a touch of sweetness. It’s a fun way to make the dish a bit healthier without sacrificing taste!
Serving Suggestions and Pairings
Best Dipping Sauces (Ketchup, Ranch, etc.)
No tater tot experience is complete without the perfect dipping sauce in my opinion. Ketchup is the classic choice, and I won’t deny that I still enjoy it. However, I’ve also developed a love for ranch dressing. The creamy, herby flavor pairs so well with the crispy texture of the tots. I remember trying out a spicy ranch once, and it quickly became my new favorite! For something different, I’ve experimented with garlic aioli and even a smoky barbecue sauce. The right dipping sauce can take your tater tot game to the next level, so I always like to have a few options available when serving them.
Complementary Side Dishes
Tater tots can stand alone as a snack, but they also make an excellent side dish. When I serve them, I often think about what else complements their flavor. A fresh salad is a great option, adding some crunch and lightness to the meal. I’ve also found that coleslaw pairs beautifully with tater tots, especially if they’re spicy or cheesy. Another fantastic side dish is baked beans; the sweet and savory flavors work so well together. I love having a little variety on the plate, and tater tots can easily fit into different meal themes!
Creative Serving Ideas (Tater Tot Casserole, etc.)
If you’re looking to impress your guests or simply want to take your tater tots to a new level, consider serving them in creative ways. One of my all-time favorites is making a tater tot casserole. I layer cooked ground beef, cheese, and veggies in a baking dish and top it all off with a generous layer of tater tots before baking. The result is a comforting, hearty meal that everyone loves. I’ve also tried tater tot nachos, where I layer the crispy tots with cheese, jalapeños, and all my favorite nacho toppings. It’s a fun twist that always gets rave reviews! The possibilities are endless, and it’s a delightful way to showcase your culinary creativity. Read Interesting article: Quick & Crispy Black Bean Burgers
Frequently Asked Questions (FAQs)
Can I use frozen tater tots in the air fryer?
Absolutely! Frozen tater tots work wonderfully in the air fryer. I’ve done it many times, and they come out crispy and delicious. There’s no need to thaw them; just toss them straight into the air fryer basket. I usually set the temperature to about 400°F and cook them for 15-20 minutes, shaking the basket halfway through for even cooking. It’s such a convenient option on busy days!
How do I make tater tots without a grater?
If you don’t have a grater, don’t worry! You can use a food processor to achieve a similar texture. Just cut the potatoes into chunks and pulse them until they’re finely shredded. I’ve done this when in a pinch, and it works great. Alternatively, you can simply chop the potatoes into very small pieces, but they may not hold together as well as the grated version.
Can I store leftover tater tots?
Yes, you can store leftover tater tots! I usually keep them in an airtight container in the refrigerator for up to three days. When I’m ready to enjoy them again, I pop them back in the air fryer for a few minutes to reheat. This method helps restore their crispiness, which is a must for me!
How can I reheat tater tots for maximum crispiness?
The best way to reheat tater tots while keeping them crispy is using the air fryer. I set it to about 375°F and cook the tots for 5-8 minutes, shaking the basket halfway through. I’ve found this method works wonders in reviving that crunchy texture. If you don’t have an air fryer, the oven can also work; just make sure to spread them out on a baking sheet for even heating.
Frequently Asked Questions
What are tater tots?
Tater tots are bite-sized pieces of grated potato formed into small cylinders and deep-fried until golden brown. They are light, fluffy on the inside, and crispy on the outside, evolving into a beloved snack and side dish over the years.
When were tater tots invented?
Tater tots were invented in the 1950s by the Neperan Company, now known as Ore-Ida, as a way to use leftover potato scraps. They quickly gained popularity due to their unique shape and texture.
Why should I choose air frying over traditional frying methods for tater tots?
Air frying uses significantly less oil than traditional frying methods, reducing calories and unhealthy fats. It also results in a crispy exterior while being much lighter and easier to clean up afterward.
What type of potatoes are best for making tater tots?
Russet potatoes are the best choice for classic tater tots due to their high starch content, which makes them fluffy inside and crispy outside. Yukon Gold potatoes also work well for their buttery flavor.
How do I prepare potatoes for tater tots?
To prepare potatoes, you should peel them (if desired), grate them, rinse under cold water to remove excess starch, and dry them thoroughly to ensure a crispy texture.
What are some good seasoning options for tater tots?
Common seasoning options include salt, pepper, garlic powder, onion powder, and smoked paprika. You can also get creative by adding shredded cheese or other spices based on your preferences.
How long does it take to cook tater tots in an air fryer?
Cooking tater tots in an air fryer typically takes about 15-20 minutes at 400°F. It’s recommended to shake the basket halfway through for even cooking.
Can I add cheese to my tater tots?
Yes! Adding shredded cheese, such as cheddar or mozzarella, can enhance the flavor of your tater tots. You can mix it in before shaping or sprinkle it on top during the last few minutes of cooking.
What are some creative serving ideas for tater tots?
You can serve tater tots in various creative ways, such as in a tater tot casserole or as tater tot nachos topped with cheese and your favorite toppings. These presentations can impress guests and elevate the dish.
Can I use frozen tater tots in the air fryer?
Absolutely! Frozen tater tots work wonderfully in the air fryer without the need to thaw them. Just cook them at about 400°F for 15-20 minutes, shaking the basket halfway through for even cooking.