
If you’re looking for a quick and delicious side dish, air fryer garlic bread is your answer! It’s crispy, buttery, and packs a punch of flavor, all while being incredibly easy to make. Read Interesting article: This Air Fryer Garlic Bread Hack Is Everywhere for a Reason
What is Air Fryer Garlic Bread?
Definition and Overview
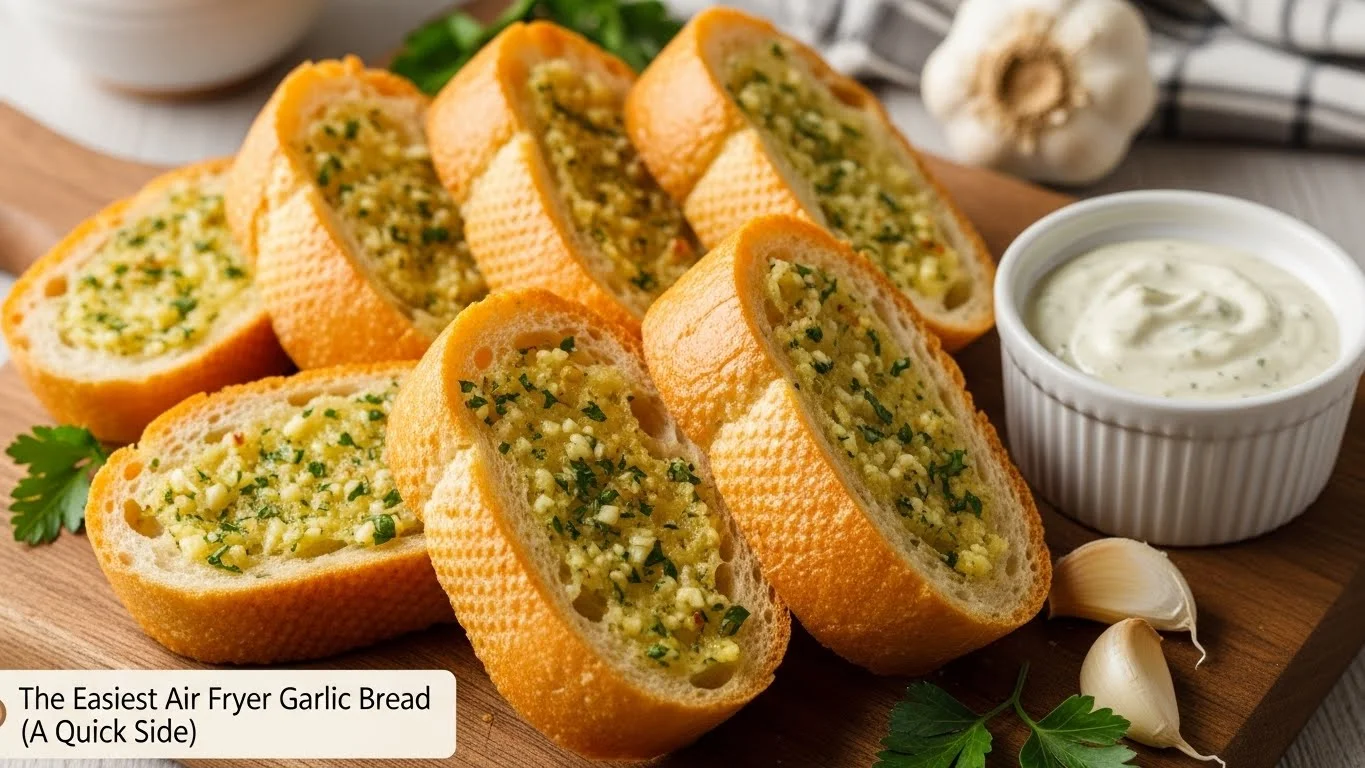
Air fryer garlic bread is a delightful twist on the classic garlic bread we all know and love. Traditionally made in the oven, this dish features bread slathered in a mixture of butter, garlic, and sometimes herbs, then toasted until golden brown. The air fryer, however, takes this culinary classic to a new level. It uses hot air circulation to achieve that perfect crunch while keeping the inside soft and flavorful. I remember the first time I tried making garlic bread in the air fryer; it was a game changer! The texture was just right, and it was so much quicker than waiting for the oven to heat up.
Benefits of Using an Air Fryer
Using an air fryer to make garlic bread comes with some fantastic benefits. First off, it’s incredibly fast—what used to take 15-20 minutes in the oven can often be done in under 10 minutes with the air fryer. Plus, the air fryer uses less energy compared to a full-sized oven, which is something I always appreciate, especially during the hot summer months when I’m trying to keep my kitchen cool.
Another advantage is the ease of cleanup. With the air fryer, I usually just have to wipe down the basket, whereas the oven can require much more effort after cooking. Also, air fryers tend to produce less grease than traditional frying methods, which is a bonus for those of us who are trying to be a bit healthier while still enjoying delicious food. I love knowing I can indulge in garlic bread without feeling guilty!
Lastly, the air fryer gives the garlic bread that perfect crispy exterior. I’ve had some pretty amazing garlic bread made in the oven, but there’s just something about the air fryer that elevates the crunch factor. It’s a little miracle worker in the kitchen!
Ingredients for Easy Air Fryer Garlic Bread
Essential Ingredients
Making air fryer garlic bread is simple, and you probably have most of the ingredients in your kitchen already. Here’s what you’ll need:
- Bread: A loaf of French bread or Italian bread works best, but you can also use slices of sourdough or even bagels.
- Butter: Unsalted butter adds richness and flavor. You can also use margarine if you prefer.
- Garlic: I often use garlic powder for convenience, but fresh minced garlic gives a more intense flavor.
- Parsley: Fresh or dried parsley adds a lovely touch of color and flavor.
- Salt: A pinch of salt enhances all the flavors.
These basic ingredients come together to create a spread that’s simply irresistible!
Optional Add-Ins and Variations
If you want to get creative, there are plenty of optional add-ins that can take your garlic bread to the next level. For example, adding a sprinkle of grated Parmesan cheese on top before air frying can give you a cheesy delight. Sometimes, I like to throw in a bit of Italian seasoning or red pepper flakes for an extra kick. If you’re feeling adventurous, try adding some sun-dried tomatoes or olives to the mix!
For a healthier twist, you can substitute the butter with olive oil or even avocado oil. This will not only lower the saturated fat but also add a unique flavor to your garlic bread. I’ve tried it this way, and it’s surprisingly delicious!
In my experience, the sky’s the limit when it comes to customizing your garlic bread. I always enjoy experimenting with different flavors, and that’s what makes cooking so much fun! Read Interesting article: Crispy Air Fryer Spam (A Surprising Treat)
How to Make Air Fryer Garlic Bread
Step-by-Step Instructions
Making air fryer garlic bread is incredibly straightforward. I remember the first time I attempted it; I was pleasantly surprised by how easy it was! Here’s how you can do it too:
- Prepare the Garlic Butter: Start by taking your unsalted butter out of the fridge and letting it soften at room temperature for about 15-20 minutes. Once it’s soft, mix in the garlic (powder or minced), parsley, and a pinch of salt in a bowl. I usually just grab a fork and mash it all together until it’s well combined.
- Slice the Bread: If you’re using a loaf of French or Italian bread, slice it in half lengthwise. For slices, just lay them flat on a cutting board. I always make sure my slices are about an inch thick to prevent them from getting too crispy.
- Spread the Mixture: Generously spread the garlic butter mixture on the cut side of the bread. Make sure to cover every corner; I’ve learned that a good amount of garlic butter makes all the difference in flavor!
- Preheat the Air Fryer: Depending on your air fryer model, you might need to preheat it. I usually set mine to 350°F (175°C) for a few minutes while I prep the bread.
- Air Fry the Garlic Bread: Place the slices or halves of bread in the air fryer basket, making sure they don’t overlap. Air fry for about 5-7 minutes, keeping an eye on them to ensure they don’t burn. I often check halfway through to see if they need a little more time.
- Serve and Enjoy: Once they’re golden brown and crispy, carefully take them out (they can be hot!) and let them cool for a minute or two. Then, dig in! I love serving them while they’re still warm.
Tips for Perfectly Toasted Garlic Bread
To get that perfect garlic bread every time, I’ve picked up a few tips along the way:
- Don’t Skimp on the Butter: A generous layer of garlic butter makes a huge difference. If you’re trying to cut back, I get it, but just a little extra can elevate the flavor to a whole new level!
- Experiment with Herbs: Besides parsley, try adding basil, oregano, or even a sprinkle of thyme. Fresh herbs can really add a pop of freshness.
- Monitor Cooking Time: Every air fryer is a bit different. I recommend checking on your garlic bread a minute or two before the recommended time. This way, you’ll know exactly how your air fryer performs and can adjust accordingly.
- Toast in Batches: If you have a larger group, consider making the garlic bread in batches. This ensures that every piece gets the right amount of crispiness!
Cooking Time and Temperature
Recommended Air Fryer Settings
For air fryer garlic bread, I’ve found that setting the temperature to 350°F (175°C) works best. Cooking it for about 5 to 7 minutes usually results in that perfect crunch on the outside while keeping the inside soft and warm. If you’re adding cheese or other toppings, you might want to increase the cooking time slightly, just keep an eye on it to prevent burning.
How to Adjust for Different Air Fryer Models
Not all air fryers are created equal! Some might cook faster or slower than others. If you’ve got a smaller air fryer, for example, you might need to adjust the cooking time slightly. I recommend starting with the lower end of the recommended cooking time and checking the garlic bread’s progress. If it looks a little pale, give it an extra minute or two. I’ve had my share of “oops” moments where I left it in too long, and it turned into a crunchy snack instead of the soft, buttery goodness I was aiming for. Learning the quirks of your specific model can make a big difference!
Serving Suggestions
Best Pairings with Garlic Bread
Garlic bread is such a versatile side! I love serving it alongside pasta dishes, especially spaghetti or fettuccine Alfredo. The buttery garlic flavor complements the richness of the sauces beautifully. It’s also a hit when served with soups, like tomato basil or minestrone. I remember one chilly evening, I whipped up a hearty vegetable soup, and the garlic bread was the star of the meal! It’s perfect for dipping.
Ideas for Dips and Sauces
If you want to get a little more adventurous, consider serving your air fryer garlic bread with some dips or sauces. A classic marinara sauce is always a crowd-pleaser, but I’ve also enjoyed it with a creamy spinach dip or even a spicy hummus. The contrast of flavors can really make your meal pop. I once served it with a homemade pesto, and it was a delightful combination! The possibilities are endless, and it’s all about what flavors you love. Read Interesting article: The Best Air Fryer Mozzarella Sticks (Perfectly Gooey)
Storing and Reheating Leftover Garlic Bread
How to Store Garlic Bread
After enjoying a delicious batch of air fryer garlic bread, you might find yourself with some leftovers. I know I often do, especially when I make a big batch for family gatherings! To keep the garlic bread fresh, I recommend letting it cool down to room temperature before storing it. I usually wrap it tightly in aluminum foil or place it in an airtight container. This helps maintain its moisture and flavor. You can store it at room temperature for a day or in the fridge for up to three days. If you’re like me and want to keep it for longer, freezing is a great option! Just wrap it well in foil or plastic wrap, and pop it in the freezer. It can last for up to three months this way.
Best Methods for Reheating
When it comes to reheating leftover garlic bread, I’ve found a couple of methods that work wonders. The air fryer is my go-to choice, as it revives that crispy texture. I set it to about 350°F (175°C) and pop the garlic bread in for about 3-5 minutes. It’s amazing how quickly it comes back to life! If I’m reheating a whole loaf, I may need to adjust the time a bit.
Another option is using the oven. I usually preheat it to 350°F (175°C), place the garlic bread on a baking sheet, and heat it for approximately 10 minutes. Covering it with foil helps to keep the inside soft while allowing the crust to crisp up nicely.
If I’m in a hurry, the microwave is an option too, but I’m cautious with this method. I wrap the garlic bread in a damp paper towel and heat it for about 10-15 seconds. This keeps it from getting tough, but I’ve noticed it doesn’t have the same crunch. It’s a quick fix but doesn’t quite compare to using the air fryer or the oven!
Common Mistakes to Avoid
Undercooking or Overcooking
When I first started making air fryer garlic bread, I learned the hard way about the importance of timing. Undercooking can leave the bread soft and chewy instead of crispy, while overcooking can lead to a burnt, hard exterior. I’ve had both experiences! I suggest keeping an eye on the bread during the cooking process. Checking a minute or two early can help ensure you achieve that perfect golden brown color without going overboard.
Another tip is to trust your air fryer’s settings. Each one is a little different, so you may need to do a few test batches to find that sweet spot. I noted how mine cooked things slightly faster than others I’d seen, which really helped me avoid those “oops” moments.
Using the Wrong Bread Type
Choosing the right bread is crucial for making the best garlic bread. I’ve made the mistake of using bread that’s too soft or flimsy, like sandwich bread, and it just didn’t hold up well. I’ve found that a good French or Italian loaf gives me the best results. The sturdiness of the bread helps it to toast perfectly without falling apart under the weight of the garlic butter. Plus, the crust adds that delightful crunch we all love!
Also, be mindful of the thickness of your slices. I’ve learned that cutting them too thin can result in overly crispy edges and a dry center. A slice about an inch thick is generally my go-to—perfect for toasting without sacrificing texture. If I’m using something like sourdough, I pay attention to the crustiness since it can vary greatly. So, I recommend sticking to the tried-and-true types of bread for the best experience.
Frequently Asked Questions (FAQs)
Can I make this garlic bread gluten-free?
Absolutely! I’ve successfully made garlic bread using gluten-free bread, and it turned out delicious. Just ensure that the bread you choose is a sturdy type to handle the garlic butter. The flavor will still be fantastic, and I promise you won’t miss the gluten!
How long does it take to cook frozen garlic bread in an air fryer?
If you’re working with frozen garlic bread, the air fryer is a fantastic option. I usually cook it at 350°F (175°C) for about 8-10 minutes. It’s a convenient way to get that crispy texture without having to defrost it first. I recommend checking it halfway through to ensure it cooks evenly.
Can I use fresh garlic instead of garlic powder?
Definitely! In fact, I often prefer fresh garlic for its bold flavor. When using fresh garlic, I recommend mincing it finely to distribute the flavor evenly. You’ll want to be careful not to overcook it, as fresh garlic can burn more easily than garlic powder. Just mix it into the butter as usual, and you’ll have a wonderfully aromatic garlic bread!
Final Thoughts
Making air fryer garlic bread is truly a simple yet rewarding experience. I’ve found that it’s not just about the delicious end result, but also the joy of creating something that can elevate any meal. There’s a certain satisfaction in pulling out that warm, crispy garlic bread from the air fryer, knowing that I whipped it up in no time at all. Whether I’m serving it at a fancy dinner or just enjoying it with a casual bowl of soup, garlic bread always hits the spot.
What I love most is that it can easily be adapted to suit different tastes and dietary needs. With all the variations and add-ins I’ve experimented with, there’s always something new to try. It’s a fun way to get creative in the kitchen! Plus, knowing that I can make a healthier version with olive oil or even customize it with my favorite cheeses or spices makes it even more enjoyable.
If you haven’t tried making air fryer garlic bread yet, I highly encourage you to give it a shot. It’s perfect for impressing guests or satisfying a simple craving. And don’t forget about those leftovers—knowing how to store and reheat them just means more delicious garlic bread to enjoy later! I think we can all agree that there’s nothing quite like the smell of garlic bread wafting through the kitchen, and with the air fryer, it’s easier than ever to bring that comfort into our homes.
So, gather your ingredients, fire up that air fryer, and indulge in this delightful treat. I can’t wait to hear how your garlic bread turns out!
Frequently Asked Questions
What is air fryer garlic bread?
Air fryer garlic bread is a delightful twist on the classic garlic bread, made by slathering bread with a mixture of butter, garlic, and sometimes herbs, then toasting it in an air fryer for a crispy exterior and soft inside.
How long does it take to make air fryer garlic bread?
Using an air fryer, garlic bread can often be made in under 10 minutes, compared to the 15-20 minutes it typically takes in a conventional oven.
What ingredients do I need for air fryer garlic bread?
You will need bread (preferably French or Italian), unsalted butter, garlic (powder or minced), parsley, and a pinch of salt. Optional add-ins include Parmesan cheese, Italian seasoning, or red pepper flakes.
How do I make air fryer garlic bread?
To make it, soften unsalted butter, mix it with garlic, parsley, and salt, spread it on sliced bread, preheat the air fryer to 350°F (175°C), and air fry the bread for about 5-7 minutes until golden brown and crispy.
Can I use fresh garlic instead of garlic powder?
Yes, you can use fresh garlic instead of garlic powder. It is recommended to mince it finely and be cautious not to overcook it to prevent burning.
What are some serving suggestions for garlic bread?
Garlic bread pairs well with pasta dishes like spaghetti or fettuccine Alfredo and soups such as tomato basil or minestrone. It can also be enjoyed with dips like marinara sauce or creamy spinach dip.
How should I store leftover garlic bread?
Let the garlic bread cool to room temperature before wrapping it tightly in aluminum foil or placing it in an airtight container. It can be stored at room temperature for a day, in the fridge for up to three days, or frozen for up to three months.
What is the best method for reheating garlic bread?
The air fryer is the best option for reheating garlic bread, set to 350°F (175°C) for about 3-5 minutes. The oven can also be used at the same temperature for about 10 minutes, covered with foil to keep it soft inside.
Can I make garlic bread gluten-free?
Yes, you can make garlic bread using gluten-free bread. Ensure that the bread is a sturdy type to handle the garlic butter for the best results.
What common mistakes should I avoid when making garlic bread?
Avoid undercooking or overcooking the bread, as undercooked bread will be soft and chewy, while overcooked bread can become burnt and hard. Additionally, using the wrong type of bread, like soft sandwich bread, can lead to poor results; it’s best to use sturdy bread like French or Italian loaves.