
Are you craving pizza but need to avoid gluten? Making a delicious gluten-free pizza crust that can hold all your favorite toppings is easier than you might think! Let’s dive into the world of gluten-free pizza.
Understanding Gluten-Free Pizza Crusts
What is Gluten-Free Pizza?
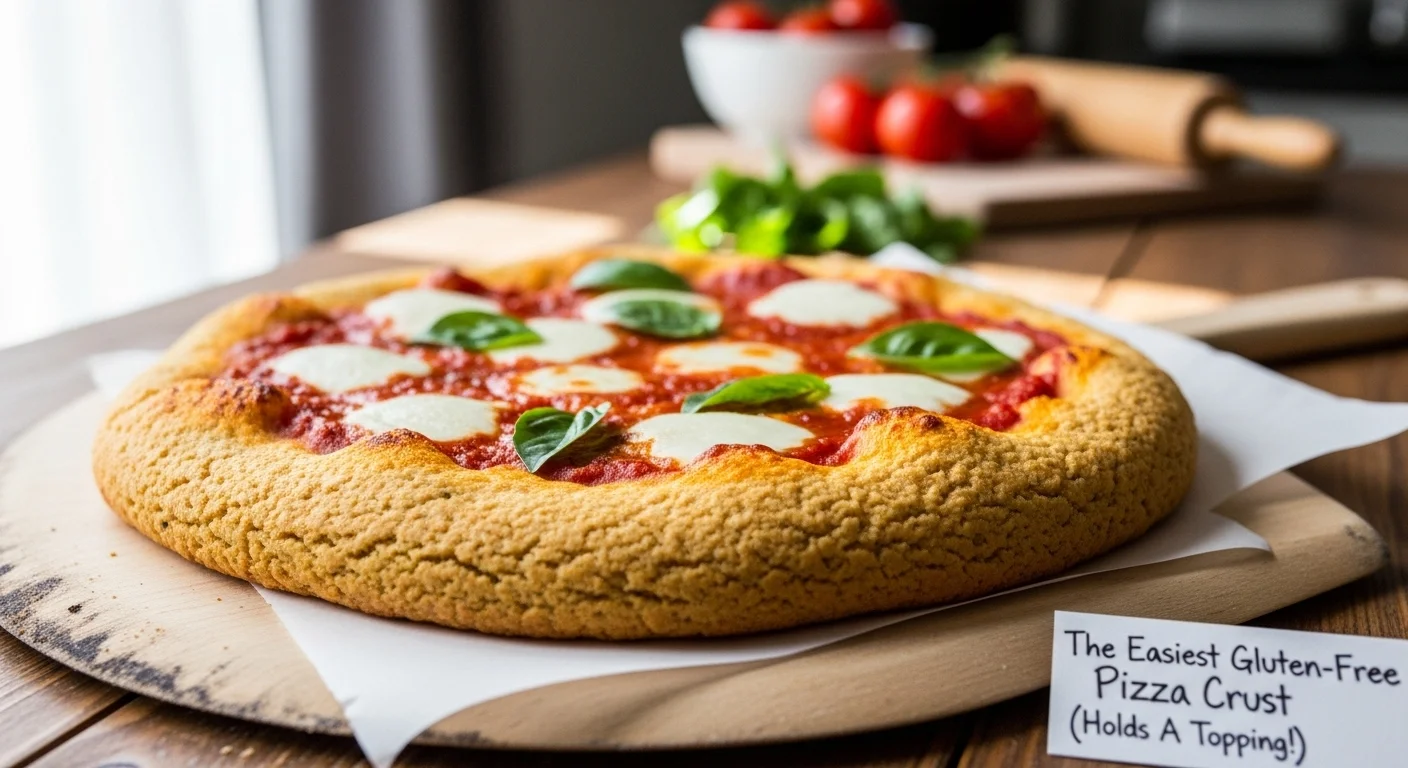
Gluten-free pizza is exactly what it sounds like: a pizza made without gluten, which is a protein found in wheat, barley, and rye. For those with gluten sensitivity or celiac disease, enjoying pizza can be a challenge, but thankfully, there are fantastic alternatives. I remember my first experience tasting gluten-free pizza; I was surprised at how delicious it could be! The crust can be made from various gluten-free flours and other ingredients that provide the right texture and flavor.
Benefits of Gluten-Free Diets
Shifting to a gluten-free diet comes with its own set of benefits, especially for those with gluten intolerance. Personally, I’ve noticed that eliminating gluten helps reduce bloating and digestive discomfort. Many people find that a gluten-free diet can lead to increased energy levels and improved mental clarity. Plus, it encourages us to explore a variety of new foods and ingredients we might have overlooked before. It’s an exciting culinary adventure!
Common Gluten-Free Flours and Ingredients
When it comes to gluten-free pizza crust, a variety of flours can be used. Some popular choices include almond flour, coconut flour, and various blends specifically made for gluten-free baking. I’ve experimented with these different options, and they each bring unique flavors and textures to the table. For instance, almond flour adds a nutty taste while coconut flour can make your crust slightly sweeter. Then there’s the classic gluten-free all-purpose flour, which often contains a mix of rice flour, potato starch, and tapioca flour. This is what I usually reach for when I want a more traditional pizza experience. This Sweet Chili Cauliflower Trend Might Replace Takeout as a delicious alternative!
Key Ingredients for the Easiest Gluten-Free Pizza Crust
Gluten-Free Flour Options
Choosing the right gluten-free flour is crucial for making a great pizza crust. Each type of flour behaves differently, which can affect the final product. I’ve found that using a combination of flours often yields the best results. For example, blending almond flour with tapioca flour gives a nice chewy texture, while adding a bit of coconut flour helps with moisture. If you’re unsure where to start, look for a gluten-free all-purpose flour blend that contains xanthan gum; it’s a game-changer!
Binders and Thickeners: Xanthan Gum vs. Psyllium Husk
In gluten-free baking, binders like xanthan gum or psyllium husk are essential. They help mimic the elasticity and structure gluten provides. I’ve personally gravitated towards psyllium husk because I love that it offers a more natural option. It’s also high in fiber, which is an added bonus! On the other hand, xanthan gum is more commonly found in many gluten-free recipes and can create a great chewy texture. Experimenting with both can help you figure out what works best for your taste.
Liquid Ingredients: Water, Milk, and Oils
The liquid ingredients you choose can significantly affect your pizza crust. I typically use a combination of water and olive oil. Olive oil not only adds moisture but also richness to the dough. Some recipes call for milk or even dairy-free alternatives, which can enhance the flavor. It’s all about finding the balance that suits your palate. I recommend starting with water and oil, then adjusting as needed based on how the dough feels.
Flavor Enhancers: Herbs and Seasonings
Don’t underestimate the power of herbs and seasonings! Adding a pinch of garlic powder, oregano, or Italian seasoning can elevate your crust to a whole new level. I love incorporating fresh herbs when I can, as they add vibrancy and freshness. During one of my pizza nights, I added fresh basil, and it made a noticeable difference. The aroma filled my kitchen, and I couldn’t wait to dig in!
Step-by-Step Guide to Making Gluten-Free Pizza Crust
Preparing Your Ingredients
Before diving into the actual making of the pizza crust, I like to gather all my ingredients. This not only makes the process smoother but also helps me stay organized. I start by measuring out my gluten-free flour and any other dry ingredients like salt and baking powder. I’ve learned the hard way that having everything ready to go can reduce stress and keep me focused on creating something delicious. I usually lay everything out on the counter so I can see what I’m working with. If I’m using fresh herbs or toppings, I prep those too, so they’re all set when it’s time to assemble the pizza.
Mixing the Dough
Once I have everything prepped, it’s time to mix the dough. I start by combining my dry ingredients in a large mixing bowl. For me, it’s crucial to ensure they are well mixed to achieve an even texture throughout the crust. Next, I create a well in the center of the dry mix and add my wet ingredients—water, olive oil, and any additional flavor enhancers like garlic powder or herbs. I use a wooden spoon or spatula to stir everything together until it forms a sticky dough. At this point, I usually get my hands in there, as it’s the best way to understand the consistency. The dough should feel slightly tacky but hold together.
Resting the Dough for Best Results
This part might seem optional, but I’ve found that letting the dough rest can significantly improve the texture. After mixing, I cover the bowl with a clean kitchen towel and let it sit for about 20 to 30 minutes. This resting period allows the flours to absorb the liquids better and helps the dough become more pliable. I often use this time to clean up my workspace or prepare my pizza toppings. Trust me, a little patience goes a long way here!
Shaping and Rolling Out the Crust
Once the dough has rested, it’s time to shape it into a crust. I usually sprinkle a little gluten-free flour on my countertop to prevent sticking. Then, I take a portion of the dough and flatten it with my hands. I find that using my fingers to press it out works best, and it gives me better control over the thickness. If I want a thicker crust, I leave it a bit more substantial; for a thinner crust, I roll it out more. I’ve also discovered that using parchment paper makes this process easier, allowing me to roll out the dough without it sticking to everything. Once I have the desired shape and thickness, I transfer it onto a pizza stone or baking sheet lined with parchment paper.
Pre-baking the Crust for Optimal Texture
Pre-baking is a crucial step that I never skip. It helps set the crust before adding toppings and prevents it from becoming soggy. I usually preheat my oven to around 425°F (220°C) and bake the crust for about 10-15 minutes until it starts to firm up and get a light golden color. This little trick has made a huge difference in the final product. After pre-baking, I take it out and let it cool slightly before adding my favorite sauces, cheeses, and toppings. This way, I know the crust can hold all those delicious ingredients without falling apart.
Tips for Topping Your Gluten-Free Pizza
Best Gluten-Free Sauces
When it comes to sauces, I think you can never go wrong with a classic marinara. Just be sure to check the label or make your own to avoid any hidden gluten. I love experimenting with different sauces too, like pesto or even a white sauce made from ricotta cheese. Recently, I tried a roasted garlic sauce, and it added such a burst of flavor! It’s all about finding what complements your crust and toppings best. You can also try The Viral Honey-Garlic Chicken That Feels Like a Hug for a unique twist!
Cheese Options for Gluten-Free Pizza
Cheese is definitely a highlight of any pizza for me! Most cheese is naturally gluten-free, but I always double-check just to be sure. My favorites include mozzarella for its meltiness and cheddar for a bit of sharpness. I’ve also experimented with dairy-free cheese alternatives, which can be a fantastic option if you’re looking to avoid dairy. Vegan cheeses made from nuts can offer a unique twist too! I’ve found that adding a mix of cheeses creates a delightful depth of flavor.
Creative Toppings: Vegetables, Meats, and More
The fun part about making pizza is choosing the toppings. I love loading my pizza with colorful veggies like bell peppers, onions, and spinach. I’ve even added artichokes and sun-dried tomatoes for an extra punch. When it comes to meats, pepperoni and sausage are classics, but I’ve also enjoyed using grilled chicken or roasted veggies as a healthier option. The key is to remember to not overload the pizza; otherwise, it can get a bit messy. I usually stick to a few quality toppings that I know will work well together.
Cooking Methods for Gluten-Free Pizza Crust
Baking in the Oven
Baking in the oven is the most common method I use for cooking gluten-free pizza. Preheating it to a high temperature, usually around 425°F (220°C), ensures that the crust gets that nice golden color and crispy texture. I’ve found that placing the pizza on the center rack allows for even cooking. Depending on the thickness of the crust, baking usually takes about 15-20 minutes. It’s amazing how just a little patience while waiting for that delicious aroma to fill the kitchen can make any pizza night feel special. I always keep an eye on the crust, looking for that perfect golden hue before taking it out.
Using a Pizza Stone vs. Baking Sheet
One of the most significant upgrades I made was investing in a pizza stone. The difference it makes in cooking gluten-free pizza is impressive! The stone retains heat beautifully, giving the crust a nice crispiness that’s hard to achieve with a regular baking sheet. When I use my pizza stone, I preheat it in the oven for about 30 minutes before placing the pizza on top. I’ve noticed that this method helps create a crust that’s crispy on the outside and soft on the inside. If you don’t have a pizza stone, a baking sheet works just fine, especially if you line it with parchment paper to prevent sticking. Just remember, if you want that authentic pizzeria feel, the stone is worth it!
Grilling Your Pizza for a Unique Flavor
If you’re looking to add a smoky flavor to your gluten-free pizza, grilling is a fantastic option! I remember the first time I tried grilling my pizza; it was a game-changer. The high heat from the grill creates those lovely char marks and a crispy crust that’s hard to replicate in the oven. To grill, I usually prepare the dough and pre-bake it as I would for the oven. Then, I transfer the partially cooked crust onto a hot grill. It takes just a few minutes on each side to get that beautiful grilled finish. After that, I add my toppings and close the lid to let everything melt together. The taste is so unique and delicious, especially during summer cookouts.
Common Mistakes to Avoid with Gluten-Free Pizza Crust
Using the Wrong Flour
One of the biggest mistakes I’ve made in my gluten-free pizza journey is not choosing the right flour. I learned the hard way that not all gluten-free flours are created equal. Some produce a dense and unappetizing crust while others yield a light and tasty one. I recommend sticking to blends specifically designed for baking or mixing your own flours to find that perfect balance. It’s worth doing some trial and error to discover which combination works best for your taste preferences.
Insufficient Resting Time
Another pitfall I’ve encountered is not allowing the dough enough time to rest. I used to rush through this step, thinking it wouldn’t make much difference. However, I quickly learned that letting the dough rest for 20-30 minutes significantly improves its texture. It allows the flours to hydrate properly, making it easier to shape and enhancing the final result. So, if you’re tempted to skip this part, trust me, don’t! Your pizza will thank you.
Overloading on Toppings
While it’s tempting to pile on all my favorite toppings, I’ve found that less is often more. Overloading can make the pizza soggy and difficult to manage. I’ve learned to choose a few high-quality toppings that complement each other rather than trying to include everything I love. For instance, I might go for a simple margherita with fresh tomatoes, basil, and mozzarella or a meat lover’s with just a couple of types of meat paired with some veggies. This approach ensures that each bite is flavorful and not overwhelmed by too many competing tastes.
Storage and Reheating Tips for Leftover Gluten-Free Pizza
How to Store Leftover Pizza
We’ve all been there—making a pizza that we just can’t finish in one sitting! I love having leftover pizza, but proper storage is key to keeping it fresh. I usually let the leftover slices cool completely before wrapping them in aluminum foil or placing them in an airtight container. If I know I won’t eat them within a day or two, I pop them in the freezer. Just remember to separate the slices with parchment paper to prevent them from sticking together. It’s a simple trick that makes for quick reheating later!
Best Methods for Reheating
When it comes to reheating, I prefer using the oven over a microwave for the best results. The microwave can leave the crust soggy, which is a total bummer. Instead, I preheat my oven to around 350°F (175°C), place the slices on a baking sheet, and heat them for about 10-15 minutes. This method revives the crust’s crispiness and melts the cheese beautifully. If I’m in a hurry, I’ll sometimes use a skillet on the stovetop. Just a couple of minutes on medium heat with a lid on works wonders to heat it through while keeping the crust crispy.
Frequently Asked Questions about Gluten-Free Pizza Crust
Can I Make Gluten-Free Pizza Crust Ahead of Time?
Absolutely! Preparing your gluten-free pizza crust ahead of time can be a real lifesaver during busy weeknights. I often make a batch of dough and roll it out, then freeze it for future use. After rolling it out, I place the crust on a piece of parchment paper, wrap it tightly in plastic wrap, and pop it in the freezer. When I’m ready to use it, I just let it thaw in the fridge overnight or on the counter for a couple of hours before pre-baking. This way, I can whip up a delicious pizza in no time!
Is Gluten-Free Pizza Crust Healthier than Regular Crust?
In my experience, the healthiness of gluten-free pizza crust compared to regular crust can depend on various factors. Gluten-free flours can often be lower in calories and higher in fiber, which is great! However, some gluten-free crusts might include more starches and sugars to compensate for the lack of gluten, which can make them less healthy. It’s essential to read labels if you’re buying pre-made crusts or be mindful of the ingredients in your homemade versions. For me, focusing on whole foods and fresh ingredients in my toppings makes a significant difference in overall nutrition.
How Can I Make My Pizza Crust Crispier?
If you’re after that perfect crispy crust, I’ve got a few tips for you! First, ensure your oven is fully preheated before baking. A hot oven is crucial for achieving that golden crunch. I also recommend using a pizza stone, as it retains heat better than a baking sheet. Another trick I use is to bake the crust for a little longer during the pre-baking step or using less moisture in the dough. Additionally, brushing the crust lightly with olive oil before baking can enhance crispiness. Trust me, these small adjustments can elevate your pizza game!
Final Thoughts
Making gluten-free pizza can be a fun and rewarding experience. Whether you’re cooking for yourself or hosting friends and family, the joy of sharing a delicious pizza is universal. I love that gluten-free options allow us to explore different flavors and textures while enjoying a classic favorite. With the right ingredients and a little practice, you can create a gluten-free pizza that’s just as satisfying as any traditional one. So gather your ingredients, get creative with your toppings, and let your pizza night shine! Also, don’t forget to check out This Creamy Cheesy Veg Bake Is All Over My Feed for more culinary inspiration!
Frequently Asked Questions
What is gluten-free pizza?
Gluten-free pizza is a pizza made without gluten, a protein found in wheat, barley, and rye. It is designed for those with gluten sensitivity or celiac disease, and it can be made using various gluten-free flours and ingredients.
What are the benefits of a gluten-free diet?
Shifting to a gluten-free diet can help reduce bloating and digestive discomfort, increase energy levels, and improve mental clarity. It also encourages the exploration of a variety of new foods and ingredients.
What types of flours can be used for gluten-free pizza crust?
Popular gluten-free flours for pizza crust include almond flour, coconut flour, and gluten-free all-purpose flour blends, which often contain rice flour, potato starch, and tapioca flour.
What role do binders play in gluten-free baking?
Binders like xanthan gum and psyllium husk help mimic the elasticity and structure that gluten provides in traditional baking. Xanthan gum is commonly used, while psyllium husk offers a more natural option and is high in fiber.
How can I enhance the flavor of my gluten-free pizza crust?
Adding herbs and seasonings such as garlic powder, oregano, or Italian seasoning can elevate the flavor of your crust. Fresh herbs can also add vibrancy and freshness to the pizza.
What is the importance of resting the dough?
Resting the dough for about 20-30 minutes allows the flours to absorb the liquids better, improving texture and making the dough more pliable for shaping.
What are some common mistakes to avoid when making gluten-free pizza crust?
Common mistakes include using the wrong type of flour, not allowing enough resting time for the dough, and overloading the pizza with too many toppings, which can lead to a soggy crust.
How should leftover gluten-free pizza be stored?
Leftover pizza should be allowed to cool completely before being wrapped in aluminum foil or placed in an airtight container. For longer storage, it can be frozen with parchment paper between slices to prevent sticking.
What is the best method for reheating gluten-free pizza?
The best method for reheating gluten-free pizza is to use the oven, preheating it to around 350°F (175°C) and heating the slices on a baking sheet for about 10-15 minutes to revive the crust’s crispiness.
Can gluten-free pizza crust be made ahead of time?
Yes, gluten-free pizza crust can be made ahead of time. The dough can be rolled out and frozen for future use, allowing for quick preparation when needed.