
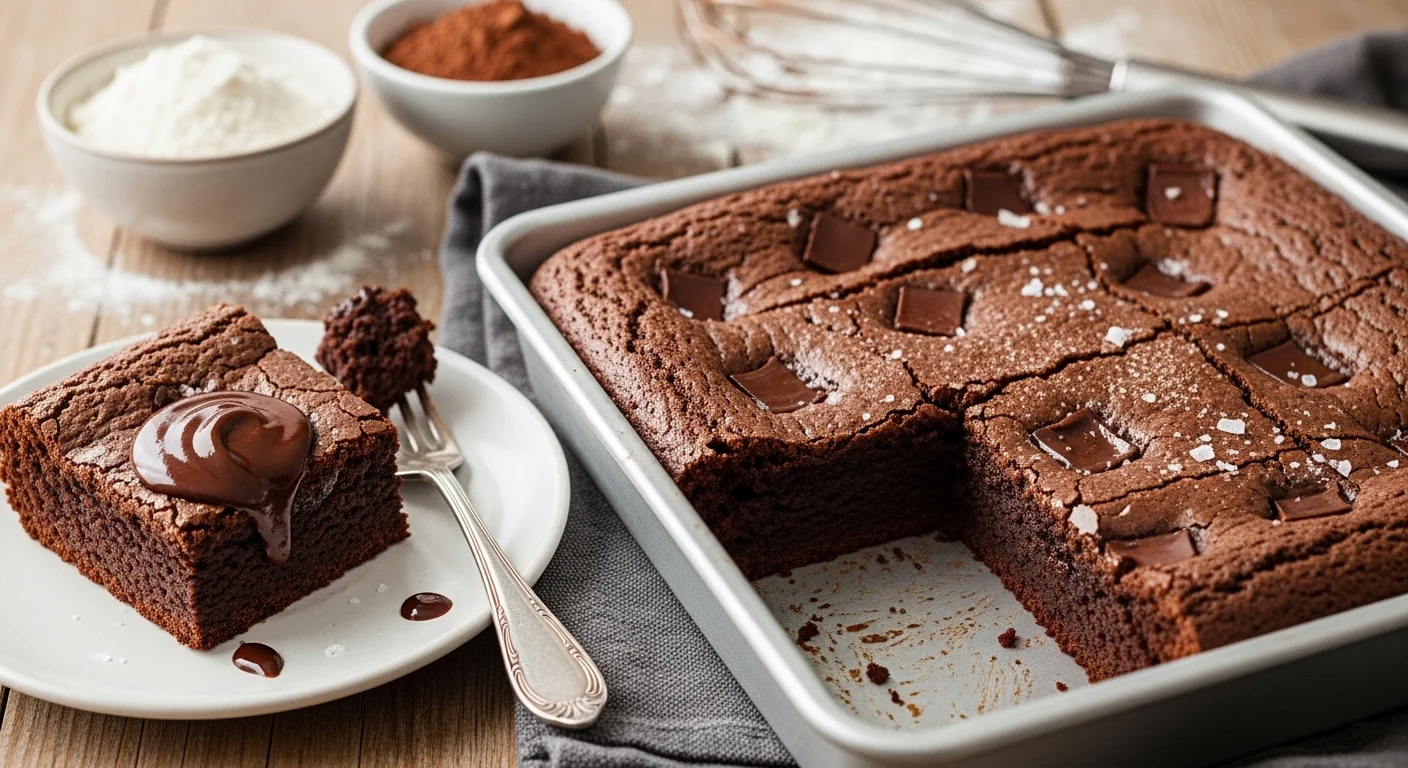
If you think gluten-free baked goods can’t be fudgy and delicious, think again! These ultimate fudgy gluten-free brownies are rich, decadent, and made from scratch, ensuring that everyone gets to indulge in a sweet treat. If you’re looking for another delicious gluten-free option, check out Chewy Gluten-Free Oatmeal Cookies (Better Than Classic).
Understanding Gluten-Free Baking
When I first started baking gluten-free, I was a bit intimidated. Would my brownies be chewy? Would they taste good? Understanding the basics of gluten-free baking has made all the difference in my journey. It’s not just about swapping out regular flour; it’s a whole new world of ingredients and techniques. Let’s get into it!
What is Gluten-Free Flour?
Gluten-free flour is a blend of different flours and starches designed to mimic the properties of traditional wheat flour, which contains gluten. Gluten is a protein that gives structure and elasticity to baked goods. When you remove gluten, you need to replace it with other ingredients that can provide similar texture and moisture. I remember my first attempt at gluten-free brownies; I used a store-bought blend that didn’t quite cut it. That experience taught me the importance of understanding what goes into my gluten-free flour.
Common Gluten-Free Flour Alternatives
There are several gluten-free flour options available, and each contributes differently to the texture and flavor of baked goods. Here are some of my favorites:
- Almond Flour: This is one of my go-to flours for moistness. It adds a slightly nutty flavor, which works beautifully in brownies.
- Coconut Flour: This flour is very absorbent, so you’ll need to adjust the liquid in your recipe. I use it sparingly, as too much can result in a dry texture.
- Brown Rice Flour: A versatile option, brown rice flour can provide a nice base for many gluten-free recipes, including brownies.
- Oat Flour: Made from ground oats, this flour adds a hint of sweetness and works well in brownie recipes.
When I mix these flours, I often see better results than with a single type. It’s all about finding the right balance!
The Role of Xanthan Gum in Gluten-Free Baking
Xanthan gum is a key player in gluten-free baking. It acts as a binder, helping to hold the ingredients together and giving the brownies that chewy texture we all love. I remember my first gluten-free baking attempt without it; my brownies turned out crumbly and dry. Now, I always keep xanthan gum on hand for my gluten-free recipes. A little goes a long way, usually about 1/4 teaspoon per cup of gluten-free flour works well for me.
Key Ingredients for Fudgy Brownies
Now that we have a handle on gluten-free baking, let’s talk about the key ingredients that make these brownies fudgy and delicious.
High-Quality Cocoa Powder
Cocoa powder is the heart of any brownie. Using high-quality cocoa powder can elevate your brownies from good to absolutely divine. I personally love using Dutch-processed cocoa for its deep, rich flavor. The first time I tried it, I was blown away by how much more intense the chocolate taste was compared to regular cocoa powder. It’s worth investing in a good brand!
Choosing the Right Sweetener
Sweeteners can make or break your brownies. While granulated sugar works perfectly, I’ve experimented with alternatives like coconut sugar and brown sugar. Each sweetener brings its own unique flavor and moisture level. Brown sugar adds a bit of chewiness and a caramel-like flavor that I absolutely adore in my brownies.
Eggs: Their Role in Brownie Texture
Eggs are essential in brownies for structure and moisture. They help bind the ingredients together and create that fudgy texture. I usually use large eggs, and I’ve noticed that adding an extra egg yolk can make my brownies even richer and denser. When testing my recipes, I’ve learned that the number of eggs can really influence the final outcome.
Butter vs. Oil: What to Use?
This is a hot debate in the baking community! I’ve used both butter and oil in my brownies, and each brings a different quality. Butter adds a rich flavor and a lovely texture, while oil can make the brownies a bit more moist. For the ultimate fudgy texture, I often choose melted butter, but there are times when I reach for oil, especially if I want a slightly lighter brownie. It really depends on what I’m in the mood for!
Essential Tools and Equipment
Having the right tools can make a big difference in gluten-free baking. I remember the first time I attempted to bake brownies without gathering all my essentials; it turned into a bit of a disaster! Here are some tools I consider must-haves for creating the perfect fudgy gluten-free brownies.
Mixing Bowls and Utensils
Mixing bowls might seem like a basic necessity, but I can’t stress enough how important it is to have a good set! I prefer glass or stainless steel bowls because they’re sturdy and easy to clean. They also don’t hold onto odors like some plastic bowls do. I use a variety of sizes, but a medium bowl is perfect for combining most brownie batters. As for utensils, a good spatula is essential for scraping down the sides and folding ingredients gently. I’ve learned that using a rubber spatula can help ensure I get every bit of batter from the bowl, which is crucial for flavor!
Measuring Cups and Scales
Accurate measurements are critical, especially in gluten-free baking. I always keep a set of dry measuring cups and a liquid measuring cup on hand. For me, a kitchen scale is even better because it allows for precise measurements, which is especially useful when using different types of flour. I’ve found that using grams rather than cups often leads to more consistent results. This little investment can elevate your baking game!
Baking Pans: Choosing the Right Size
The size and type of baking pan can significantly impact the final texture of your brownies. I usually opt for an 8×8-inch square pan for thick, fudgy brownies. However, I’ve also experimented with a 9×13-inch pan for thinner brownies. Each size alters the baking time and result, so I recommend keeping an eye on them as they bake. If you want those delicious edges and a gooey center, going with a smaller pan is my top pick!
Oven Thermometer for Accurate Baking
Ovens can be notoriously unreliable when it comes to temperature. I once pulled a batch of brownies out too early because my oven was running hot, and the results were less than desirable. That’s when I decided to invest in an oven thermometer. It’s a simple tool that hangs inside your oven and provides an accurate reading of the temperature. I can’t recommend this enough; it’s a game changer! Plus, knowing your oven’s quirks means you can adjust baking times accordingly. Trust me, this small investment can save you from future baking mishaps!
Step-by-Step Recipe for Ultimate Fudgy Gluten-Free Brownies
Now that we have all the essential tools and a good grasp of the ingredients, let’s dive into the actual recipe. I love that we’re about to create something so delicious together!
Preparation: Gathering Ingredients
First off, let’s gather everything we need. You’ll need:
- 1/2 cup (1 stick) of unsalted butter, melted
- 1 cup of high-quality cocoa powder
- 1 cup of granulated sugar (or your choice of sweetener)
- 2 large eggs
- 1 teaspoon of vanilla extract
- 1/2 cup of gluten-free flour blend
- 1/4 teaspoon of xanthan gum (if your flour blend doesn’t contain it)
- 1/4 teaspoon of salt
I like to preheat my oven to 350°F (175°C) while I’m preparing the batter. This way, it’s nice and hot when the brownies are ready to go in!
Mixing the Batter
In a large mixing bowl, I combine the melted butter and sugar first. This creates that lovely caramelized flavor that’s so essential for fudgy brownies. I use a whisk to mix them until they’re well blended. Then, I add the eggs one at a time, making sure each one is fully incorporated before adding the next. The vanilla extract goes in next, which adds an amazing aroma to the batter.
After that, I sift in the cocoa powder, gluten-free flour, xanthan gum, and salt. This step is crucial for avoiding clumps. Mixing gently, I fold everything together until just combined. If I’m using chocolate chips or nuts, I’ll fold them in at this stage. The batter should be thick and glossy, which is a sign that it’s going to be delicious!
Baking Instructions
Now it’s time to pour the batter into your prepared baking pan. I like to spread it evenly with a spatula. Pop the pan in the preheated oven and bake for about 25-30 minutes. I usually start checking around the 25-minute mark. The brownies should look set on the edges but slightly soft in the center. Remember, they will continue to cook a bit as they cool!
Cooling and Serving Suggestions
Once they’re out of the oven, let the brownies cool in the pan for about 10-15 minutes before transferring them to a wire rack. I’ve found that letting them cool completely makes cutting them into squares much easier. When serving, I love to dust them with powdered sugar or serve them warm with a scoop of my favorite ice cream. Honestly, there’s nothing quite like a fudgy brownie paired with vanilla ice cream!
Variations and Add-ins
One of the best parts about baking brownies is how versatile they are. I love experimenting with different flavors and textures by adding a few extra ingredients. Whether you’re a fan of nuts, chocolate chips, or creative toppings, there’s a way to elevate your gluten-free brownies even further. Here are some of my favorite variations and add-ins that you can try!
Nutty Brownies: Adding Walnuts or Pecans
For me, adding nuts to brownies is like giving them a little extra crunch and depth. I usually opt for walnuts or pecans, as they complement the chocolate flavor beautifully. When I add nuts, I typically fold in about a half cup of chopped walnuts or pecans right before pouring the batter into the baking pan. The combination of the fudgy texture with the crunchy nuts is simply divine! If you’re not a fan of walnuts or pecans, feel free to try almonds or hazelnuts instead. Just be sure to chop them up so they mix well into the batter.
Chocolate Chips: Dark vs. Milk Chocolate
Chocolate chips are another fantastic way to enhance your brownies. I can’t resist the gooey, melted pockets of chocolate that form when you bite into a brownie loaded with chips. Personally, I prefer dark chocolate chips for their rich flavor, but I know many who swear by milk chocolate for its sweetness. You can even mix both types for a delightful contrast! I typically add about a cup of chocolate chips to the batter, but feel free to adjust according to your chocolate cravings. They can be folded in at the end, just like the nuts.
Swirls and Toppings: Peanut Butter or Caramel
If you’re looking for something a little different, why not try swirling in some peanut butter or caramel? I love the idea of adding a rich peanut butter swirl to my brownies. To do this, I warm up about a half cup of creamy peanut butter until it’s easy to drizzle, and then I drop spoonfuls on top of the brownie batter before swirling it in with a knife. The result is a beautiful marbled effect that adds both flavor and visual appeal. Caramel is another great option; I like to drizzle it on top right before serving for that extra indulgence. It can turn your brownies into a decadent dessert that everyone will be raving about!
Common Mistakes to Avoid
Baking gluten-free brownies can be an adventure, but there are some pitfalls that can lead to less-than-perfect results. I’ve made my fair share of mistakes, and I’ve learned a lot along the way. Here are some common mistakes and how to avoid them.
Overmixing the Batter
One mistake I often made in my early baking days was overmixing the batter. I thought that mixing everything until it was perfectly smooth would give me the best results. However, gluten-free batters can become tough if overmixed. I’ve since learned that it’s best to mix until just combined and a few lumps remain. This helps maintain that delicious fudgy texture we all love!
Not Measuring Ingredients Accurately
Accurate measurements are crucial in gluten-free baking. I can’t tell you how many times I’ve tried to eyeball ingredients and ended up with disappointing results. I always recommend using measuring cups and a kitchen scale for precision. Even a small discrepancy, like adding too much flour or sugar, can change the texture and flavor of your brownies. Remember, baking is a science, so treat it as such!
Overbaking for a Fudgy Texture
Overbaking is perhaps the most common mistake I’ve seen. It’s so tempting to leave brownies in the oven for a bit longer, thinking it’ll guarantee a perfect texture. However, if you want fudgy brownies, it’s essential to pull them out when they’re slightly underbaked in the center. They’ll continue to cook as they cool, giving you that rich, gooey consistency. Trust your instincts and start checking them a few minutes before the recommended baking time!
Storage and Freezing Tips
After all that hard work baking, you’ll want to make sure your brownies stay fresh for as long as possible. I’ve discovered some great methods for storing and freezing brownies that keep them delicious and fudgy!
How to Store Brownies for Freshness
Once your brownies have cooled completely, it’s important to store them correctly. I usually cut them into squares and place them in an airtight container. If I know I won’t finish them within a few days, I’ll layer parchment paper between the squares to prevent sticking. They can last up to a week at room temperature or even longer in the fridge. Just a note, chilling them can make them a bit firmer, so if you prefer a fudgier texture, room temperature is the way to go!
Freezing Brownies: Best Practices
If you want to save some for later, freezing brownies is a fantastic option. I typically wrap each square tightly in plastic wrap and then place them in a freezer-safe bag. This way, they stay fresh and retain their flavor. When I’m ready to enjoy them, I just pull out a square and let it thaw at room temperature for about 30 minutes. They taste just as good as the day I baked them!
Frequently Asked Questions
Can I substitute ingredients in this brownie recipe?
Absolutely! One of the things I love most about baking is the flexibility it offers. If you have dietary restrictions or just want to switch things up, you can definitely substitute ingredients. For instance, if you’re out of eggs, I’ve successfully used flaxseed meal mixed with water as an egg replacement. You can also experiment with different types of sweeteners or flours. Just keep in mind that these substitutions might alter the texture or flavor slightly, but that’s part of the fun of baking! It’s all about finding what works best for you. For more ideas, check out Fudgy Almond Flour Brownies (The Best You’ll Ever Make).
How do I know when my brownies are done?
This is a question I often get, and it can be a bit tricky. I’ve learned that the best way to tell if brownies are done is by using the toothpick test. Stick a toothpick into the center of the brownies about five minutes before the suggested baking time is up. If it comes out with a few moist crumbs, they’re ready! If it’s completely clean, they might be overbaked. I usually aim for that perfect balance where the edges are set, but the center still has that gooey fudginess.
Are gluten-free brownies healthier than regular brownies?
When it comes to health, it really depends on the ingredients you use. Gluten-free brownies can be just as decadent and rich as traditional ones, especially if you use similar amounts of sugar and fat. However, they can also be made healthier by substituting in healthier fats or sweeteners. I think it’s all about moderation and making conscious choices. If you’re craving a treat, gluten-free brownies can be a fantastic option, but like all desserts, they should be enjoyed as part of a balanced diet.
Final Thoughts
Baking gluten-free brownies has been a rewarding journey for me, filled with learning experiences, delicious experiments, and a whole lot of chocolate! I believe that everyone should get to enjoy a fudgy, rich brownie, no matter their dietary restrictions. With the right ingredients, tools, and a sprinkle of creativity, you can create gluten-free brownies that are just as delightful as their traditional counterparts. So, whether you’re baking for yourself or sharing with friends and family, I hope you find joy in this process. Embrace the adventure, and remember that the most important ingredient is always love. Happy baking!
Frequently Asked Questions
What is gluten-free flour?
Gluten-free flour is a blend of different flours and starches designed to mimic the properties of traditional wheat flour, which contains gluten. It helps provide similar texture and moisture in baked goods.
What are some common gluten-free flour alternatives?
Some common gluten-free flour alternatives include almond flour, coconut flour, brown rice flour, and oat flour. Each contributes differently to the texture and flavor of baked goods.
What role does xanthan gum play in gluten-free baking?
Xanthan gum acts as a binder in gluten-free baking, helping to hold ingredients together and providing a chewy texture. Typically, about 1/4 teaspoon per cup of gluten-free flour is recommended.
What key ingredients make brownies fudgy and delicious?
Key ingredients for fudgy brownies include high-quality cocoa powder, the right sweetener, eggs for structure and moisture, and either butter or oil for texture.
What tools are essential for baking gluten-free brownies?
Essential tools for baking gluten-free brownies include mixing bowls, measuring cups and scales for accurate measurements, baking pans of appropriate size, and an oven thermometer for accurate baking temperatures.
How can I tell when my brownies are done baking?
The best way to tell if brownies are done is by using the toothpick test. Insert a toothpick into the center; if it comes out with a few moist crumbs, they’re ready. If it’s completely clean, they may be overbaked.
How should I store brownies for freshness?
To store brownies, cut them into squares and place them in an airtight container. Layering parchment paper between squares can help prevent sticking. They can last up to a week at room temperature or longer in the fridge.
What are some common mistakes to avoid when baking gluten-free brownies?
Common mistakes include overmixing the batter, not measuring ingredients accurately, and overbaking the brownies. Each of these can negatively impact the texture and flavor of your brownies.
Can I substitute ingredients in this brownie recipe?
Yes, you can substitute ingredients in the brownie recipe. For example, flaxseed meal mixed with water can replace eggs. However, substitutions may slightly alter the texture or flavor.
Are gluten-free brownies healthier than regular brownies?
The healthiness of gluten-free brownies depends on the ingredients used. They can be just as decadent as traditional brownies, but may also be made healthier by using lower sugar or healthier fats.
“`