
Are you ready to whip up a delightful treat that’s perfect for any birthday celebration? I can’t wait to share my ultimate gluten-free Funfetti cake recipe with you, a colorful and fun dessert that everyone will love! Read Interesting article: This Quick Pesto Rice Is the Only Trend I Trust Now
What is Funfetti Cake?
Funfetti cake is not just a dessert; it’s a celebration in itself! I remember the first time I saw a Funfetti cake at a birthday party. The vibrant colors of the sprinkles peeking through a fluffy, white cake instantly drew me in. This cake is all about joy and festivity, making it a favorite for birthdays and special occasions. The best part? You can easily make it gluten-free without sacrificing any of the fun or flavor!
History and Origin of Funfetti Cake
Funfetti cake made its debut in the 1980s, and its creation is attributed to the popular baking company, Pillsbury. The original idea was simple: a basic vanilla cake mix combined with colorful sprinkles, which brought a playful twist to traditional cakes. I’ve always found it fascinating how something so simple could become a beloved classic. The cake quickly surged in popularity, turning birthday celebrations into a canvas of color and delight. Over the years, Funfetti has evolved, especially with the rise of dietary preferences like gluten-free baking. I think it’s wonderful that we can enjoy this classic treat in a way that accommodates more people!
Key Characteristics of Funfetti Cake
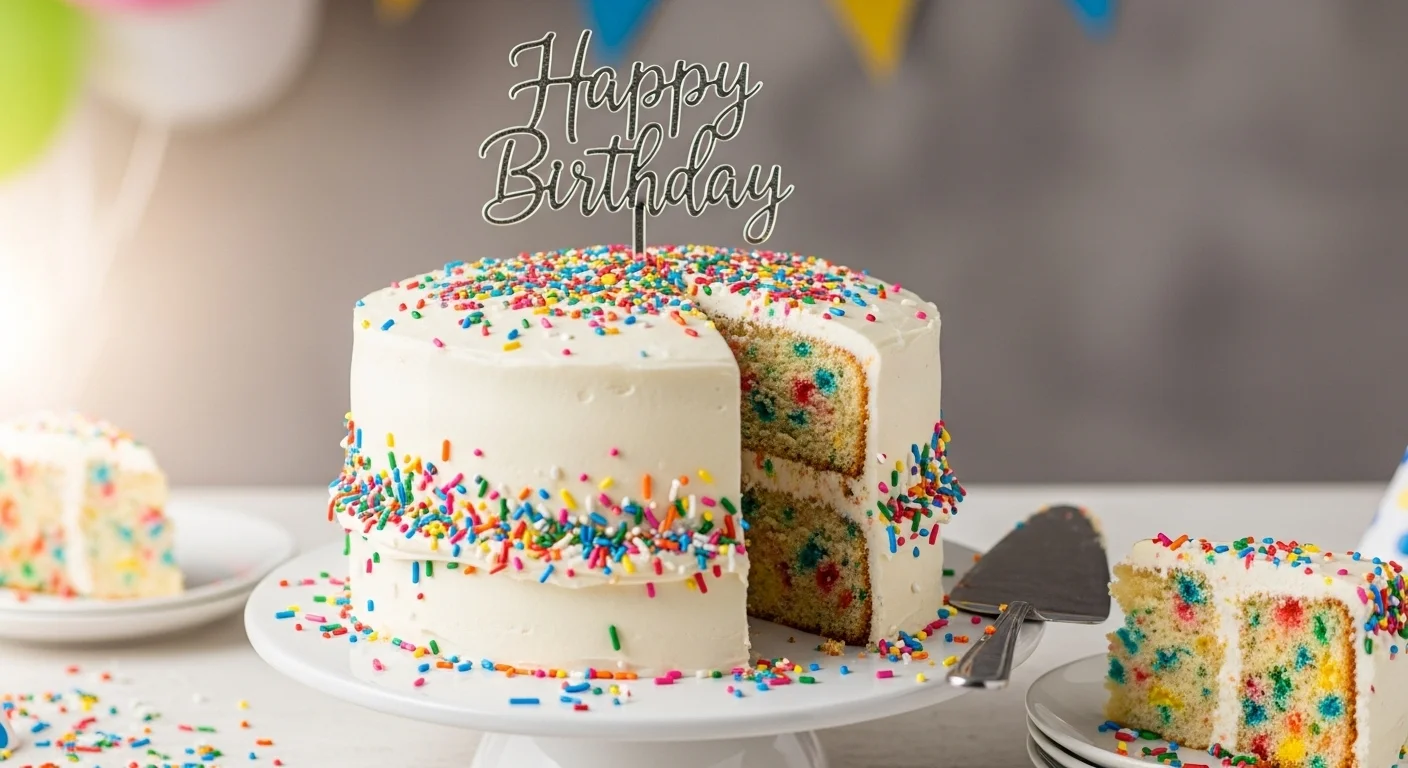
What makes Funfetti cake special? It’s all about the texture and flavor. The base is typically a light and fluffy vanilla cake, and when you bite into it, the unexpected burst of sweetness from the sprinkles is simply magical. The visual appeal is just as important; those bright specks of color scattered throughout the cake create an inviting and festive atmosphere. For me, it’s the perfect combination of nostalgia and joy, and I love that I can recreate this experience in a gluten-free version.
Why Choose Gluten-Free?
Switching to gluten-free baking has been a game-changer for many of us. Whether it’s due to dietary restrictions or a personal choice, baking gluten-free can open up a world of delicious possibilities. I’ve explored this journey myself, and I want to share why choosing gluten-free can be beneficial.
Health Benefits of Gluten-Free Baking
For some, gluten can cause discomfort or health issues, such as celiac disease or gluten sensitivity. While I don’t have these issues myself, I’ve seen friends and family members who feel so much better after switching to gluten-free options. Gluten-free baking often uses alternative flours that can be more nutrient-dense, like almond flour or coconut flour. These types of flours can add healthy fats and protein, which can be beneficial for our diets. I personally love the variety and texture they can bring to baked goods!
Common Gluten-Free Flours
When I first ventured into gluten-free baking, I was overwhelmed by the different types of flour available. Over time, I learned to appreciate a few key gluten-free flours that work wonders in cakes. Here are my favorites:
- Almond Flour: This flour has a lovely, nutty flavor and adds moisture to the cake.
- Coconut Flour: A little goes a long way with coconut flour; it’s incredibly absorbent. I love using it in combination with other flours.
- Oat Flour: Made from ground oats, it has a mild flavor and works well in many baked goods.
- Brown Rice Flour: This is a staple in gluten-free baking for its light texture, and it pairs well with other flours.
Allergen Considerations
As I’ve learned more about gluten-free baking, I’ve become aware of other allergens that can be a concern, such as dairy and nuts. When baking for others, I always recommend checking with guests about their dietary restrictions. There are plenty of substitutes available for common allergens, like using non-dairy milk or egg replacers. This ensures that everyone can enjoy the cake without worry. I find that being inclusive in our baking creates a warm atmosphere, and it makes the celebration even more special! Read Interesting article: 18 Delicious DIY Holiday Food Gifts to Share
Ingredients for the Ultimate Gluten-Free Funfetti Cake
Essential Ingredients
Creating the perfect gluten-free Funfetti cake starts with gathering the right ingredients. I’ve learned that the quality of the ingredients can really make a difference in the final product. Here’s what you’ll need:
- Gluten-Free Flour Blend: A pre-mixed gluten-free flour blend is often the easiest option, but I like to mix my own using almond flour, coconut flour, and brown rice flour for the best texture.
- Granulated Sugar: This adds sweetness and moisture to the cake. I prefer organic cane sugar for its slight caramel flavor.
- Baking Powder: Ensure it’s gluten-free to help the cake rise properly.
- Salt: Just a little enhances the flavors.
- Eggs: They provide structure and moisture. If you need an egg substitute, I recommend using flax eggs for binding.
- Non-Dairy Milk: I usually opt for almond milk, but any non-dairy milk will work beautifully.
- Vegetable Oil: This keeps the cake moist. I often use coconut oil for a hint of flavor.
- Vanilla Extract: Pure vanilla extract brings a lovely aroma and flavor to the cake.
- Rainbow Sprinkles: The star of the show! Make sure they’re gluten-free, which I’ll dive into more in the next section.
Substitutions for Common Ingredients
As I began my gluten-free baking journey, I quickly discovered that substitutions can be a baker’s best friend. Here are some alternatives I’ve found helpful:
- Gluten-Free Flour Blend: If you don’t have a blend on hand, you can make your own using equal parts almond flour, coconut flour, and potato starch.
- Sugar: For a healthier option, I’ve successfully used coconut sugar, which gives the cake a caramel flavor.
- Eggs: If you’re vegan or egg-free, a mixture of 1 tablespoon of flaxseed meal with 2.5 tablespoons of water can replace one egg. This has worked well for my cakes!
- Oil: If you prefer a lighter option, unsweetened applesauce can be used instead of oil, but I recommend sticking to oil for the best texture.
Decorative Sprinkles and Their Gluten-Free Status
When it comes to sprinkles, not all are created equal! I remember the first time I bought sprinkles for gluten-free baking; I was surprised to find that some brands contain gluten. Always check the packaging for a gluten-free label. My go-to brands include Wilton and India Tree, which offer vibrant, gluten-free options that really bring the cake to life. Adding those colorful sprinkles not only enhances the look but also adds that nostalgic crunch I love!
Step-by-Step Recipe for Gluten-Free Funfetti Cake
Preparation Tools and Equipment
Before diving into the baking process, I like to gather all my tools and equipment to make things smoother. Here’s what you’ll need:
- Mixing Bowls: A medium bowl for the dry ingredients and a large bowl for the wet ingredients.
- Whisk: For mixing the dry ingredients together.
- Electric Mixer: This makes it easier to combine wet ingredients and aerate the batter.
- Measuring Cups and Spoons: Accurate measurements are key in baking!
- Spatula: For folding in those sprinkles and ensuring everything is well-mixed.
- 9-inch Round Cake Pans: I love using two pans for a layer cake, but you can also use a single pan for a sheet cake.
- Parchment Paper: Lining the pans helps prevent sticking and makes for easy removal.
Mixing the Batter
Now comes the fun part—mixing the batter! I find that the order of mixing can make a difference in texture:
- Preheat your oven to 350°F (175°C) and prepare your cake pans by greasing them and lining with parchment paper.
- In a medium bowl, combine your gluten-free flour, baking powder, and salt. Whisk them together to ensure everything is evenly distributed.
- In a large bowl, beat the sugar and eggs together until light and fluffy. I use my electric mixer on medium speed for about 2-3 minutes.
- Add in the non-dairy milk, vegetable oil, and vanilla extract. Mix until well combined.
- Gradually add the dry ingredients into the wet mixture, mixing until just combined. Be careful not to over-mix; a few lumps are okay!
- Fold in the rainbow sprinkles gently with a spatula, making sure they’re evenly distributed throughout the batter.
Baking Instructions
Once your batter is ready, it’s time to bake:
- Divide the batter evenly between the prepared cake pans.
- Bake in the preheated oven for about 25-30 minutes, or until a toothpick inserted into the center comes out clean.
- Once done, remove the cakes from the oven and let them cool in the pans for about 10 minutes before transferring them to a wire rack to cool completely.
Cooling and Storing the Cake
While I’m waiting for my cakes to cool, I like to use this time to prepare any frosting or decorations. Once the cakes are completely cooled, I store them wrapped in plastic wrap at room temperature for up to two days, or I freeze them for longer storage. This way, I can have a delicious cake ready for any unexpected celebrations!
Frosting Options for Funfetti Cake
Classic Buttercream Frosting
Nothing quite complements a Funfetti cake like a classic buttercream frosting. I remember the first time I made it; the smooth, creamy texture and sweet vanilla flavor were just heavenly. To whip up a gluten-free buttercream that’s perfect for our cake, here’s what you’ll need:
- Unsalted Butter: Make sure it’s softened to room temperature. I usually take it out of the fridge an hour before I start baking.
- Powdered Sugar: This adds sweetness and gives that delightful creamy consistency. I often use organic powdered sugar for a cleaner taste.
- Vanilla Extract: Pure vanilla extract can elevate the flavor. I love adding a splash more than the recipe calls for because, well, why not? Vanilla is everything!
- Non-Dairy Milk (optional): If you want a lighter frosting, a little non-dairy milk can help achieve the perfect spreadable consistency.
To make the frosting, beat the butter until it’s fluffy, then gradually add the powdered sugar. Mix in the vanilla extract and a splash of non-dairy milk if needed until you reach your desired consistency. I often find myself sneaking a spoonful or two before frosting the cake!
Alternative Frosting Ideas (Vegan, Dairy-Free)
If you’re looking for something a bit different or have dietary restrictions, I’ve experimented with some fantastic alternative frosting options. One of my favorites is a coconut whipped cream. It’s light, fluffy, and perfect for a Funfetti cake. Here’s how to make it:
- Canned Coconut Milk: Use full-fat coconut milk for the best results. Refrigerate it overnight, then scoop out the solid cream.
- Powdered Sugar: Just like with buttercream, this adds sweetness.
- Vanilla Extract: Again, pure vanilla is a must!
To create the frosting, whip the coconut cream until it’s light and airy, gradually adding the powdered sugar and vanilla until it’s sweet enough for your taste. This frosting adds a tropical twist that pairs perfectly with the sweetness of the Funfetti cake.
How to Decorate the Cake
When it comes to decorating the cake, I let my creativity flow! I love using a piping bag to create swirls on top with my frosting. It feels professional and really adds a nice touch. I often sprinkle extra rainbow sprinkles on top for that fun pop of color, and if I’m feeling fancy, I might even add some edible glitter for a little sparkle!
Layering is another beautiful way to present your cake. If you’re making a two-layer Funfetti cake, I usually frost between the layers as well, using a generous amount of frosting to make each bite irresistible. You can also create a fun theme based on the occasion—using colored sprinkles or themed decorations can really enhance the cake’s festive nature.
Serving Suggestions and Pairings
Best Beverages to Serve with Funfetti Cake
Pairing your Funfetti cake with the right beverage can elevate the whole experience. I’ve found that a nice cup of coffee or a creamy latte goes wonderfully with the sweetness of the cake. It’s a classic combo that feels indulgent! For a non-caffeinated option, I recommend serving it with homemade lemonade or even a sparkling fruit-infused water for a refreshing contrast.
If you’re serving at a children’s party, a fun idea is to have a milk bar with different kinds of flavored milk. Kids love it, and it adds an extra layer of excitement to the dessert table!
Recommended Toppings and Add-Ons
For me, toppings are where the fun really begins! Fresh fruit can add a beautiful contrast to the sweetness of the cake. Strawberries, raspberries, or even a sprinkle of blueberries can bring a burst of freshness. I sometimes drizzle a bit of chocolate sauce or caramel over the top for an extra touch of decadence.
You can also consider adding some nuts if you’re not serving to those with nut allergies. Chopped pecans or walnuts can add a delightful crunch. And if you really want to take it up a notch, try adding a scoop of ice cream on the side. Vanilla or even a fruity sorbet can make a delightful pairing with the cake! Read Interesting article: I Tried the Mexican Chipotle Chicken Trend—Shocking Flavor
Tips for a Successful Gluten-Free Baking Experience
Common Mistakes to Avoid
During my gluten-free baking journey, I’ve stumbled a few times, and I want to share some of those lessons learned. One major mistake is assuming gluten-free flour can be used exactly like regular flour. Gluten-free flours behave differently, so measuring accurately and following the recipe closely is essential.
Another mistake I made was over-mixing the batter. It’s tempting to get everything perfectly smooth, but over-mixing can lead to a denser cake. I’ve learned that a few lumps are perfectly fine! Lastly, I now always ensure my baking powder is gluten-free, as some brands may contain gluten, leading to unexpected results.
How to Ensure Moistness and Flavor
Keeping the cake moist is key! I’ve found that incorporating ingredients like applesauce or yogurt can add moisture to gluten-free cakes. Also, using oil instead of butter can yield a more tender crumb. If you’re using non-dairy milk, make sure it’s at room temperature to help blend better with the other wet ingredients.
Storing Leftovers Properly
After a celebration, if you happen to have leftovers (which is rare, but it happens!), I recommend wrapping the cake slices in plastic wrap to keep them fresh. Storing them in an airtight container can also help maintain their moisture. If you freeze the cake, I suggest slicing it first so you can easily grab a piece whenever a craving strikes!
Frequently Asked Questions (FAQs)
Can I Make This Cake Ahead of Time?
Absolutely! I often bake my Funfetti cake a day in advance, especially when I know I’ll be busy on the day of the celebration. After baking, I let the cakes cool completely and then wrap them in plastic wrap. This keeps them fresh and moist. If you want to prepare even further in advance, you can freeze the layers. Just remember to thaw them in the fridge overnight before frosting and serving. I’ve found that making it ahead of time can make my day of celebration much more enjoyable and less stressful!
How Do I Know If My Cake is Gluten-Free?
Ensuring your cake is gluten-free starts with checking your ingredients. Always look for gluten-free labels on your flour and any other packaged items, like baking powder or sprinkles. I also recommend using separate utensils and baking pans to avoid cross-contamination if you bake with gluten-containing ingredients in your kitchen. I remember the first time I made a gluten-free cake for my friend; I double-checked everything just to be safe, and it was a huge relief to see her enjoy a slice without any worries!
Can I Use Other Flavors of Sprinkles?
Definitely! While classic rainbow sprinkles are a favorite, you can get creative with your sprinkle choices. I’ve used chocolate sprinkles for a fun twist, or even seasonal sprinkles that match the theme of the party. Just keep in mind to check the labels for gluten-free status. It’s all about making the cake feel personal and festive, so don’t hesitate to have fun with it!
Final Thoughts
Baking a gluten-free Funfetti cake has been such a rewarding adventure for me. The joy of creating something that not only tastes delicious but also brings people together is simply unbeatable. I’ve watched friends and family light up when they see that colorful slice, and it reminds me why I love baking so much. Whether you’re celebrating a birthday, an anniversary, or just a special day, this cake is sure to bring smiles all around, gluten-free or not.
Remember, it’s all about the experience—the laughter, the joy, and the memories we create while baking and sharing. So grab your favorite gluten-free flour, gather your sprinkles, and let’s make some magic together in the kitchen! Happy baking!
Frequently Asked Questions
What is Funfetti Cake?
Funfetti cake is a colorful and fun dessert that symbolizes joy and festivity, often associated with birthdays and special occasions. It features a light and fluffy vanilla cake with vibrant sprinkles mixed in.
Who created Funfetti Cake?
Funfetti cake was created by the popular baking company, Pillsbury, in the 1980s. It was designed as a simple vanilla cake mix with colorful sprinkles to add a playful twist to traditional cakes.
What are the key characteristics of Funfetti Cake?
The key characteristics of Funfetti cake include its light and fluffy texture, the burst of sweetness from the sprinkles, and its vibrant visual appeal created by the colorful specks throughout the cake.
Why should I choose gluten-free for baking?
Choosing gluten-free baking can be beneficial for those with dietary restrictions, such as celiac disease or gluten sensitivity. It also allows for the use of alternative flours that may be more nutrient-dense.
What gluten-free flours are recommended for baking?
Recommended gluten-free flours include almond flour, coconut flour, oat flour, and brown rice flour. These flours each bring unique textures and flavors to baked goods.
What ingredients are essential for a gluten-free Funfetti cake?
Essential ingredients for a gluten-free Funfetti cake include a gluten-free flour blend, granulated sugar, baking powder, salt, eggs (or egg substitutes), non-dairy milk, vegetable oil, vanilla extract, and rainbow sprinkles.
Can I make the Funfetti cake ahead of time?
Yes, you can make the Funfetti cake ahead of time. It’s recommended to bake the cake a day in advance and wrap it in plastic wrap to keep it fresh. You can also freeze the layers for longer storage.
How can I ensure my cake is gluten-free?
To ensure your cake is gluten-free, check for gluten-free labels on all ingredients, including flour and baking powder. Also, use separate utensils and baking pans to avoid cross-contamination.
Can I use different flavors of sprinkles in the Funfetti cake?
Yes, you can use different flavors of sprinkles. While rainbow sprinkles are traditional, chocolate sprinkles or seasonal sprinkles can also be used, as long as they are gluten-free.
What are some recommended toppings to serve with Funfetti cake?
Recommended toppings include fresh fruit like strawberries or blueberries, chocolate sauce or caramel drizzle, and chopped nuts (if there are no nut allergies). Ice cream or fruity sorbet can also make a delightful pairing.