
If you’re craving a dessert that’s both tangy and sweet, gluten-free lemon bars are the perfect treat! These delightful bars combine a zesty lemon filling with a buttery crust, creating a mouthwatering experience that everyone can enjoy. Read Interesting article: 12 Easy and Breezy Salads for Hot Summer Days
What Are Gluten-Free Lemon Bars?
Definition and Key Ingredients
Gluten-free lemon bars are a delicious dessert made without wheat flour, perfect for those with gluten sensitivities or celiac disease. They feature a rich, tangy lemon filling that sits atop a crumbly crust. The key ingredients in gluten-free lemon bars include gluten-free flour, fresh lemons, sugar, eggs, and butter or a dairy-free alternative. The freshness of the lemons truly shines through, and the sweetness balances the tartness, making them irresistibly good.
Health Benefits of Going Gluten-Free
In my experience, going gluten-free has opened up a whole new world of culinary possibilities. Many people find that they feel better when they eliminate gluten from their diets, as it can reduce bloating and discomfort. Plus, gluten-free ingredients often include a variety of whole foods, which can lead to a more nutrient-dense diet. When I switched to gluten-free options, I noticed I had more energy, and I felt lighter and more focused. Using fresh ingredients in recipes like lemon bars not only enhances flavor but also contributes to overall health and wellness. Read Interesting article: 18 Delicious DIY Holiday Food Gifts to Share
Essential Ingredients for the Perfect Lemon Bars
Gluten-Free Flour Options
Choosing the right gluten-free flour is crucial for the texture of your lemon bars. I’ve experimented with several types, and I found that a blend of almond flour and coconut flour works wonders. Almond flour gives a nice nuttiness, while coconut flour absorbs moisture and helps bind the ingredients together. If you’re looking for a more traditional approach, a gluten-free all-purpose flour mix can also be a great choice. Just make sure it contains xanthan gum or add it separately to ensure that your bars hold together well.
Sweeteners: Sugar vs. Alternatives
When it comes to sweeteners, I personally prefer using organic granulated sugar for a classic taste. However, I’ve also tried alternatives like maple syrup and honey, which can add a unique depth of flavor. Just remember, if you decide to go that route, you may need to adjust the dry ingredients to maintain the right consistency. For those who like lower-calorie options, stevia or erythritol can be used, but I recommend starting with small quantities to avoid overpowering the lemon flavor.
Fresh vs. Bottled Lemon Juice
I’ve learned that fresh lemon juice truly makes a world of difference. The vibrant flavor of freshly squeezed lemons can elevate your lemon bars from good to extraordinary. Bottled lemon juice tends to have a more muted flavor, and it can contain preservatives that alter the taste. Whenever I make lemon bars, I always buy a few fresh lemons, zest them, and then juice them right before adding to the recipe. The bright, citrus aroma that fills my kitchen is simply unmatched!
Eggs: The Binding Agent
Eggs are essential in creating that creamy lemon filling that we’re all looking for. They help bind the ingredients together and add richness to the bars. I usually opt for large eggs, and I’ve found that using room-temperature eggs allows for better incorporation into the batter. If you’re looking for a vegan option, you can substitute eggs with flaxseed meal mixed with water, but I recommend testing this out first to ensure the texture remains just right.
Butter vs. Dairy-Free Alternatives
For the crust, I typically use unsalted butter as it adds a wonderful flavor and a tender texture. However, if you’re avoiding dairy, there are great alternatives available! Coconut oil is an excellent substitute that can bring a subtle hint of coconut flavor to the bars. I’ve also had success with vegan butter, which can provide a similar taste and texture to regular butter. Whichever option you choose, just be sure to melt it before mixing it into the crust for the best results.
Step-by-Step Recipe for Gluten-Free Lemon Bars
Preparing the Crust
Getting the crust right is crucial for the perfect lemon bar, and I’ve found that it’s really all about the balance of ingredients. Start by preheating your oven to 350°F (175°C). In a mixing bowl, combine your chosen gluten-free flour with a bit of sugar and salt. The sugar adds sweetness, while the salt enhances the flavor. Then, cut in the butter (or dairy-free alternative) until the mixture resembles coarse crumbs. This step is so satisfying for me; it feels like I’m creating something from scratch! Once you have that crumbly texture, press it firmly into the bottom of a greased baking dish. I usually use a 9×9-inch square pan for the perfect thickness. Bake the crust for about 15 minutes, or until it’s just starting to turn golden. The aroma that fills my kitchen during this time is heavenly.
Making the Lemon Filling
While the crust is baking, it’s the perfect time to whip up the lemon filling. In a separate bowl, I like to whisk together the eggs, sugar, and fresh lemon juice until well combined. Then, I add a touch of gluten-free flour to thicken the mixture. Remember, the key here is to use fresh lemon juice for that bright, zesty flavor. I can’t stress enough how much better it tastes than bottled juice! After everything is mixed, pour this luscious lemon mixture over the baked crust. I find it’s best to do this step once the crust has cooled slightly, so it doesn’t melt the filling. This combination of sweet and tart is what truly makes lemon bars stand out.
Baking Instructions
Now it’s time to bake the bars! Place your pan back in the oven and bake for another 20 to 25 minutes, or until the filling is set and just slightly jiggly in the middle. This part always gives me butterflies because I can already envision how delicious they will be! To check for doneness, I gently shake the pan. If the filling looks mostly firm, you’re good to go. Once done, remove the bars from the oven and let them cool in the pan. I usually let mine cool at room temperature, and then I pop them in the fridge for a bit. Chilling them helps the flavors meld together beautifully and ensures they cut nicely.
Cooling and Serving Tips
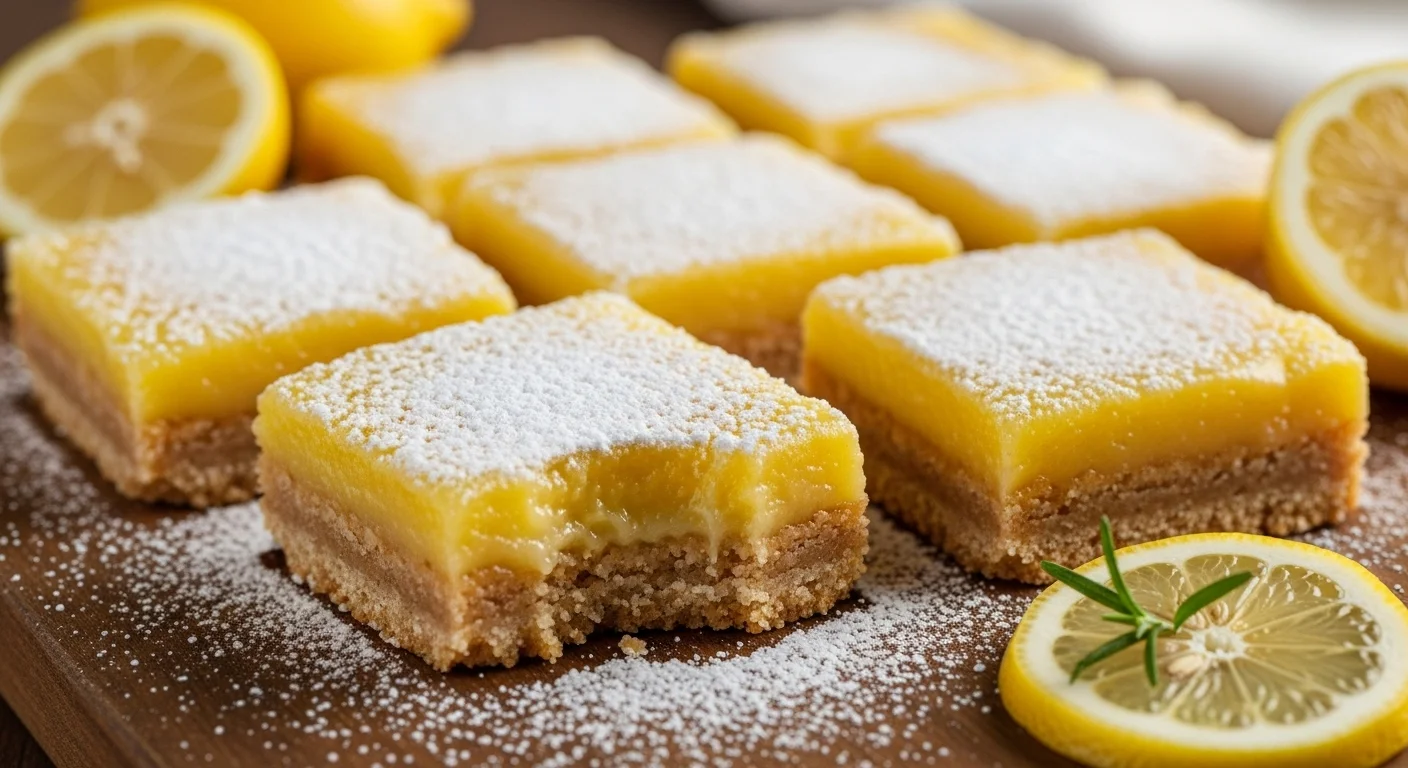
Patience is key while waiting for the bars to cool. I know it can be tempting to dig in right away, but allowing them to chill for at least two hours makes a big difference. Once they’re completely cool, I sprinkle powdered sugar on top for a lovely presentation. It adds a touch of sweetness and visually contrasts beautifully with the vibrant lemon filling. When cutting them into squares, I find that using a sharp knife and wiping it clean between cuts helps to keep the edges crisp and neat. I usually serve mine with a dollop of whipped cream or a scoop of vanilla ice cream on the side. The creamy texture pairs perfectly with the tangy bars, making for an unforgettable dessert experience!
Variations and Customizations
Adding Zest for Extra Flavor
If you’re anything like me, you love to experiment with flavors! Adding lemon zest to the filling is one of my favorite tricks. Just zest a couple of lemons before juicing them and mix it into the filling. The zest brings an extra punch of freshness that enhances the overall taste. It’s a small tweak, but it makes a noticeable difference. I find that the zest gives the lemon bars an added complexity that makes them even more delightful.
Incorporating Other Citrus Fruits
Another fun way to change things up is to incorporate other citrus fruits. I’ve tried mixing in some orange or lime juice along with the lemon juice, which results in a refreshing twist. The combination of citrus flavors creates a unique profile that’s both refreshing and exciting. If you’re feeling adventurous, go ahead and create your own citrus blend!
Gluten-Free Vegan Lemon Bars
For those who follow a vegan diet, I’ve successfully made gluten-free lemon bars using flaxseed meal as a substitute for eggs. This keeps the texture similar while accommodating dietary needs. Just mix one tablespoon of flaxseed meal with two and a half tablespoons of water, let it sit until it thickens, and then add it to your filling. It works surprisingly well, and my vegan friends have loved the bars! It feels great to know that everyone can enjoy them.
Adjusting Sweetness Levels
If you prefer your desserts on the less sweet side, you can easily adjust the sugar in the recipe. I’ve made bars with a bit less sugar, and they still turned out great. The natural tartness of the lemons shines through, making for a more refreshing treat. On the other hand, if you have a sweet tooth, feel free to add a little extra sugar or sweetener. Remember that baking is an art, and it’s all about finding what works best for your palate!
Common Questions About Gluten-Free Lemon Bars
Can I Make These Bars Ahead of Time?
I love making gluten-free lemon bars ahead of time, especially when I have gatherings or special occasions coming up. They actually taste even better after they’ve had some time to chill in the fridge. I usually prepare them a day in advance, which allows the flavors to deepen and the bars to set perfectly. Just be sure to cover them well with plastic wrap or aluminum foil so they stay fresh and retain their delightful texture. When I make them ahead, it gives me peace of mind, knowing dessert is already taken care of! Read Interesting article: 25 Delicious Baked Treats to Mail to Family
How to Store Leftover Lemon Bars?
If you happen to have leftovers (which is rare in my house!), storing them properly is important to maintain their freshness. I recommend placing them in an airtight container and keeping them refrigerated. They should last about 4 to 5 days, but honestly, I’ve never had them stick around that long! If you’re like me, you’ll find yourself sneaking bites every time you walk by the fridge. Just remember to sprinkle a little more powdered sugar on top before serving if they’ve been sitting for a while; it adds a nice fresh touch!
What to Do If the Filling is Runny?
If you ever find yourself with a runny filling, don’t panic! I’ve been there, and it’s usually just a matter of adjusting the baking time. Make sure that your bars are baked long enough until the filling is set but still has that slight jiggle in the center. If they look undercooked, pop them back in the oven for a few more minutes. Additionally, using fresh lemon juice and ensuring all your ingredients are at room temperature can help the filling firm up nicely. If the problem persists, you might want to try adding a bit more gluten-free flour to the filling next time for extra stability.
Can I Freeze Lemon Bars?
Freezing lemon bars is a fantastic option if you want to prepare them in advance or save some for later. I often make a double batch, and freezing the extras has become a lifesaver! Just make sure they are completely cooled, then cut them into squares and place them in a single layer on a baking sheet. Freeze them for about an hour, then transfer them to an airtight container or freezer bag. They can be stored in the freezer for up to three months. When you’re ready to enjoy them, just thaw them in the fridge overnight and they’ll be as good as fresh!
Pairing Suggestions for Your Lemon Bars
Best Drinks to Serve with Lemon Bars
When it comes to drinks, I love pairing my gluten-free lemon bars with something refreshing. A classic choice is iced tea, particularly a light herbal tea or lemon-infused black tea. The combination of flavors is simply delightful! If you want something a bit more festive, a sparkling lemonade or a citrusy cocktail can elevate the dessert experience. I’ve even enjoyed them with a scoop of lemon sorbet on the side, creating a fun contrast of textures and flavors. No matter what you choose, a refreshing beverage will beautifully complement the tangy bars.
Complementary Desserts and Snacks
Sometimes, I like to serve my lemon bars alongside other desserts for a mini dessert buffet. A rich chocolate mousse pairs wonderfully with the tartness of the lemon bars, creating a perfect balance of flavors. You can also consider serving a light fruit salad made with berries, which adds a refreshing touch. Another great idea is to offer some buttery shortbread cookies or a creamy cheesecake, as both provide a nice contrast to the lemony zing. Whatever you decide, it’s always fun to get creative and see what flavors work best together!
Tips for Perfecting Your Lemon Bars
Choosing the Right Baking Dish
The baking dish you choose can make a big difference in the outcome of your lemon bars. I prefer a metal or glass 9×9-inch square pan because it provides even heat distribution, which helps the crust bake perfectly. If you use a larger dish, your bars might end up thinner and overcooked, while a smaller dish may result in thicker bars that take longer to bake. If you like thicker lemon bars, go for an 8×8-inch pan, but keep an eye on the baking time to avoid overcooking. I find that having the right baking dish sets the foundation for a successful lemon bar!
How to Avoid Overbaking
Overbaking can be a common issue when it comes to lemon bars. I’ve learned that it’s better to err on the side of caution. As soon as the edges look set and the center has a slight jiggle, it’s time to take them out of the oven. Remember, they’ll continue to cook as they cool down, so pulling them out while they still have a tiny bit of wiggle will yield a perfectly creamy filling. Trust me, I’ve made the mistake of overbaking before, and it’s just not the same when the filling becomes too firm!
Testing for Doneness
To test for doneness, I recommend the gentle shake method. If you gently shake the pan and the filling looks mostly firm with just a hint of jiggle in the center, you’re in good shape! Another method I’ve used is inserting a toothpick into the filling; it should come out clean but may have a few crumbs sticking to it. This works great, but I prefer the shake test since it’s a bit less invasive. Finding that sweet spot of doneness is key to achieving the perfect gluten-free lemon bars!
Feedback and Reviews of Popular Gluten-Free Lemon Bar Recipes
Top-Rated Recipes from Food Blogs
When I was on the hunt for the best gluten-free lemon bar recipes, I stumbled upon some fantastic options from various food blogs that have received rave reviews. One standout recipe that caught my eye was a version that utilized a blend of almond and coconut flour for the crust, which many readers praised for its rich flavor and perfect texture. The feedback highlighted how the crust held up beautifully while still being tender, which is something I definitely want in my lemon bars. Another popular recipe included a unique twist by adding a hint of lavender to the lemon filling, creating a delicate floral note that many found delightful. I love finding inspiration in these variations, as they remind me of the endless possibilities when it comes to baking. It’s amazing how small changes can elevate a classic dessert into something truly extraordinary!
User Experiences and Tips
After trying out a few recipes, I also noticed that many bakers shared their personal experiences, which were incredibly helpful. A common tip I found was to make sure all ingredients are at room temperature before mixing. This seemed to make a significant difference in the final texture of the lemon bars. One user mentioned how she found that using an extra egg made her filling creamier, while another suggested adding a bit of cornstarch to thicken the mixture for an even sturdier bar. These shared insights made me realize how important it is to learn from each other in the kitchen. I’ve even started keeping a little notebook of all the tips I learn along the way to use in my baking adventures!
Final Thoughts
Making gluten-free lemon bars has become one of my favorite baking endeavors. The thrill of combining fresh ingredients and experimenting with flavors brings me so much joy. Whether I’m using a classic recipe or trying out different variations, the process always ends in a deliciously tangy treat that I love to share with friends and family. I feel that these bars are not just a dessert; they’re a way to bring people together and create lasting memories. As you embark on your own lemon bar journey, remember to have fun and make it your own. There’s nothing quite like the feeling of sharing a treat that you’ve crafted with your own hands, especially when it’s as zesty and delightful as gluten-free lemon bars!
Frequently Asked Questions
What are gluten-free lemon bars?
Gluten-free lemon bars are a delicious dessert made without wheat flour, perfect for those with gluten sensitivities or celiac disease. They feature a rich, tangy lemon filling atop a crumbly crust, made with gluten-free flour, fresh lemons, sugar, eggs, and butter or a dairy-free alternative.
Can I make these bars ahead of time?
Yes, gluten-free lemon bars can be made ahead of time. They actually taste even better after chilling in the fridge for some time. Preparing them a day in advance allows the flavors to deepen and the bars to set perfectly.
How should I store leftover lemon bars?
Leftover lemon bars should be stored in an airtight container and kept refrigerated. They can last about 4 to 5 days.
What should I do if the lemon filling is runny?
If the filling is runny, it may be due to underbaking. Ensure the bars are baked long enough until the filling is set with a slight jiggle in the center. You can also try using fresh lemon juice and ensure all ingredients are at room temperature for better results.
Can I freeze lemon bars?
Yes, you can freeze lemon bars. After cooling, cut them into squares, place them in a single layer on a baking sheet to freeze for about an hour, then transfer them to an airtight container or freezer bag. They can be stored in the freezer for up to three months.
What are the best drinks to serve with lemon bars?
Refreshing drinks like iced tea, sparkling lemonade, or citrusy cocktails pair wonderfully with lemon bars. A scoop of lemon sorbet can also complement the flavors nicely.
How can I avoid overbaking my lemon bars?
To avoid overbaking, pull the bars out of the oven as soon as the edges look set and the center has a slight jiggle. They will continue to cook as they cool down, so it’s best to err on the side of caution.
What is the best way to test for doneness?
A good method to test for doneness is to gently shake the pan; if the filling looks mostly firm with just a hint of jiggle, it’s ready. You can also insert a toothpick into the filling; it should come out clean with a few crumbs sticking to it.
What are some variations I can make to my lemon bars?
You can add lemon zest to the filling for extra flavor, incorporate other citrus fruits like orange or lime for a refreshing twist, or adjust the sugar levels to suit your taste.
Can I make gluten-free lemon bars vegan?
Yes, you can make gluten-free lemon bars vegan by substituting eggs with flaxseed meal mixed with water. This helps maintain a similar texture while accommodating dietary needs.