
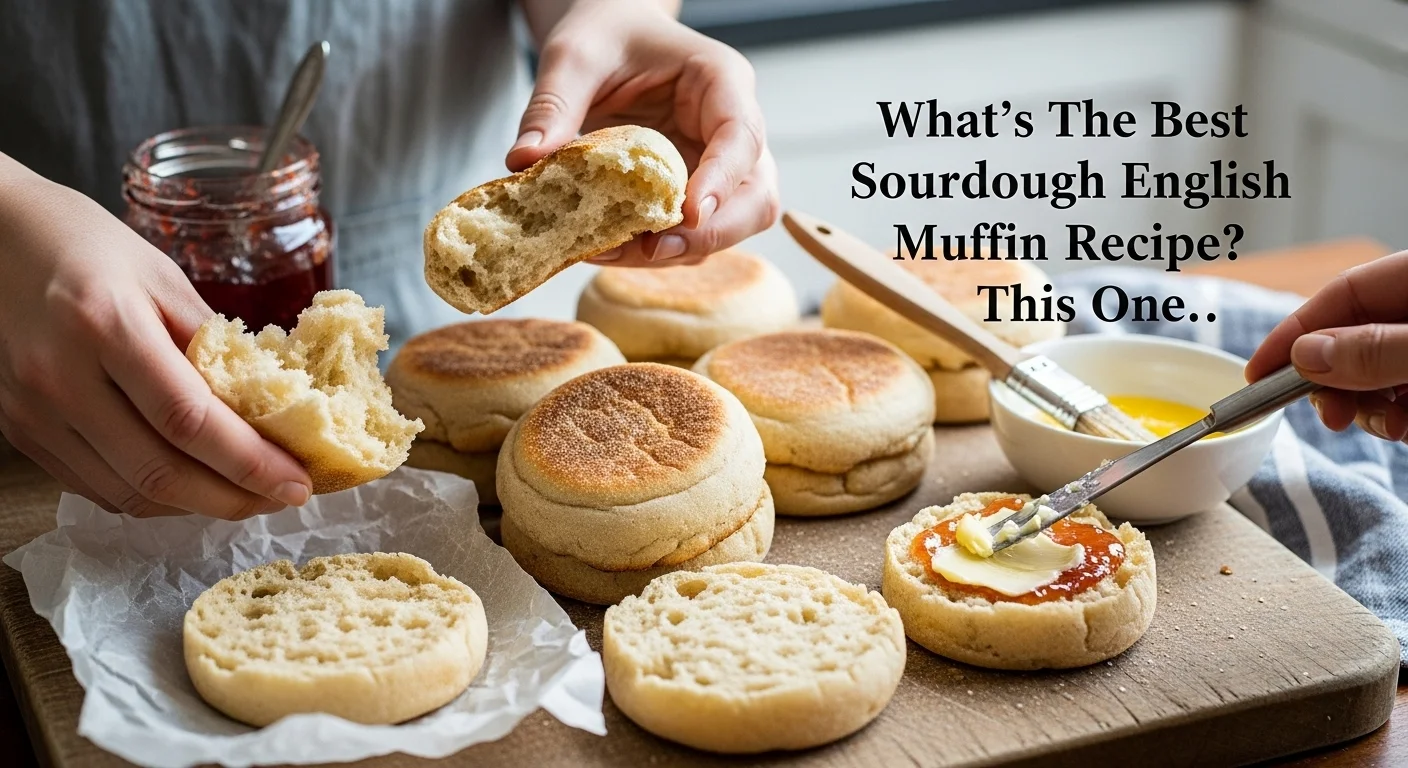
If you’ve ever bitten into a warm, toasty sourdough English muffin, you know just how heavenly they can be. The tangy flavor, the soft yet chewy texture, and those perfect nooks and crannies make them a breakfast favorite. Let’s dive into the delightful world of sourdough English muffins.
Understanding Sourdough English Muffins
What is Sourdough?
Sourdough is more than just a type of bread; it’s a fermentation method that uses wild yeast and bacteria. I remember the first time I made sourdough at home. The process felt magical, watching my starter come to life with bubbles and a slightly tangy aroma. The wild yeast in sourdough creates a unique flavor not found in other breads, making every bite special. This fermentation process also makes sourdough easier to digest, which is a major plus for many. When I bake with sourdough, I feel a connection to the age-old traditions of bread-making that have been passed down through generations. If you’re interested in making your own, check out Easy Sourdough English Muffins (Perfect Nooks & Crannies).
History of English Muffins
The history of English muffins is quite fascinating. These little treats date back to the late 19th century and are believed to have originated in the United Kingdom. I find it interesting that they weren’t even called “English muffins” until they made their way to America. Before then, they were known simply as “muffins.” They were often baked on a griddle and served toasted with butter, which is still a favorite way to enjoy them today. Learning about their history adds a layer of appreciation for every bite. It’s like tasting a piece of culinary history with each muffin!
Differences Between Traditional and Sourdough Muffins
While traditional English muffins use commercial yeast for leavening, sourdough muffins rely on a sourdough starter. This difference isn’t just in the ingredients; it affects flavor, texture, and even the health benefits. I’ve made both types, and honestly, the sourdough version has that distinct tanginess that I adore. Traditional muffins are often fluffier, while sourdough muffins have a denser, chewier texture with those delightful nooks and crannies that are perfect for holding butter or jam. If you’re someone who enjoys a rich, robust flavor, I think you’ll find sourdough muffins to be a superior choice. You can also explore other sourdough recipes like Impressive Sourdough Popovers Recipe (A Discard Miracle) for variety.
Essential Ingredients for Sourdough English Muffins
Sourdough Starter
At the heart of any sourdough recipe is the starter. It’s like the soul of the bread. I’ve grown my own starter from scratch, and it was an experience of patience and love. You’ll need a healthy, active starter for the best results. One tip I learned is to feed your starter regularly and keep it in a warm place. If you’re just starting out, you can often find a starter from friends or local bakers, which can be a fun way to connect with the baking community.
Flour Types
When it comes to flour, the type you choose can impact the flavor and texture of your muffins. I typically use a mix of all-purpose and whole wheat flour. The all-purpose flour gives a soft texture, while the whole wheat adds depth and nutrition. Experimenting with different flours has been part of my journey, and I’ve found that using a high-protein flour can lead to a chewier muffin, which I really enjoy.
Yeast vs. Starter Fermentation
This is where the magic happens. Using a starter means you’re relying on natural fermentation, which develops flavor over time. I’ve noticed that sourdough muffins take longer to rise than their yeast-based counterparts, but the wait is worth it. That slow fermentation process enhances the flavor and creates a more complex texture. If you ever feel impatient during the rise, just remember that good things take time!
Liquid Components: Water and Milk
Water is the main liquid ingredient, but I often like to add a splash of milk for extra richness. Milk can help create a softer crumb, which has been a delightful discovery in my baking. I’ve tried both whole milk and plant-based options, and each adds a unique touch. It’s all about what you have on hand and what flavors you want to highlight in your muffins.
Salt’s Role in Flavor and Texture
Salt is often underrated, but in baking, it’s essential. It enhances flavor and strengthens the dough. I always make sure to add just the right amount of salt, as too much can inhibit the yeast, while too little can lead to bland muffins. It’s a balancing act that I’ve learned to appreciate over time. A pinch of salt can truly elevate your sourdough English muffins.
Step-by-Step Guide to Making Sourdough English Muffins
Preparing the Sourdough Starter
Getting your sourdough starter ready is the first step to creating those delightful muffins. I always make sure to feed my starter about 8-12 hours before I plan to bake. The starter should be bubbly and active, which is a good indicator that it’s ready. One of my favorite things is to watch it grow, knowing that the little bubbles mean it’s alive and ready to contribute to my baking. If you want to take it a step further, you can even do a float test. Simply drop a spoonful of your starter into a glass of water; if it floats, you’re in good shape!
Mixing Ingredients
Once my starter is ready, it’s time to mix the ingredients. I typically start by combining my active starter with warm water and milk in a large mixing bowl. Then, I add the flour and salt, mixing until everything is just combined. It’s important not to overmix at this stage. I remember the first few times I made muffins, I was tempted to keep stirring until everything was completely smooth, but I learned that a little bit of flour left unincorporated is okay. It all comes together beautifully during kneading.
Kneading the Dough
Kneading is where the magic really starts to happen. I usually turn the dough out onto a lightly floured surface and knead it by hand for about 8-10 minutes. The dough should become smooth and elastic, which I find so satisfying. There’s something therapeutic about kneading; it’s almost like a workout! If the dough feels too sticky, I’ll sprinkle just a little more flour, but I try to avoid adding too much, as that can affect the texture. I love feeling the dough transform under my hands, and it’s always a joy to see it rise later on.
First Rise: Bulk Fermentation
After kneading, I place the dough in a lightly oiled bowl, cover it with a damp cloth, and let it rise. This first rise, or bulk fermentation, usually takes about 1 to 2 hours, depending on the temperature of my kitchen. I often find myself checking in on it, peeking under the cloth to see how much it has grown. This is the stage where the flavors start to develop, and I can almost taste the muffins before they’re even made. It’s a great time to clean up my kitchen and prepare my muffin tins for later.
Shaping the Muffins
Once my dough has doubled in size, it’s time to shape the muffins. I gently punch down the dough to release some of the gas, then turn it out onto a floured surface. I like to divide the dough into equal pieces, usually about 4-5 ounces each. I shape each piece into a round ball and flatten them slightly. I often use a bench scraper to help with shaping them neatly. It’s crucial not to handle the dough too roughly at this stage, as I want to keep some of that air inside for a light muffin. I place them on a floured baking sheet to rest.
Second Rise: Proofing
After shaping, I cover the muffins again and let them proof for about 30-60 minutes. This second rise is essential for achieving that light and airy texture. I sometimes use this time to prepare my cooking method, whether I’ll be using a stovetop or the oven. I love that anticipation of knowing the muffins are going to be delicious. I usually take a moment to appreciate how far the dough has come from that simple mix of flour, water, and starter.
Cooking Methods: Stovetop vs. Oven
When it comes to cooking sourdough English muffins, I’ve tried both stovetop and oven methods, and each has its charm. Cooking on the stovetop is traditional and requires a cast-iron skillet or griddle. I preheat it on low to medium heat, then cook the muffins for about 5-7 minutes on each side. The golden-brown color and crispy edges are so rewarding! If I’m using the oven, I place the muffins directly on a baking sheet and bake at 375°F for about 20 minutes. I’ve found that baking gives a more even cook, but I love the nostalgic feel of the stovetop method. It’s all about what you have time for and the texture you’re aiming for.
Cooling and Storing the Muffins
After cooking, I always let my muffins cool on a wire rack. This step is crucial because it allows the steam to escape, preventing sogginess. I usually can’t resist cutting into one while it’s still warm, slathering it with butter to see all those lovely nooks and crannies. If I have extras, I store them in an airtight container at room temperature for a few days or freeze them for later. I’ve found that they make for a perfect quick breakfast option, and even after freezing, they toast up beautifully when I’m ready to enjoy them again.
Tips for Perfecting Your Sourdough English Muffins
Adjusting Hydration Levels
One thing I’ve learned about making sourdough English muffins is that hydration levels can make a big difference. The amount of water in your dough impacts its texture and how it rises. I usually aim for a hydration level around 70%, but I’ve experimented a bit. If I want a chewier muffin, I might reduce the water slightly. Conversely, if I’m looking for something lighter, adding a bit more can help. Monitoring the dough’s consistency as I mix is key, and I find that keeping notes on my adjustments helps me refine my recipe over time. It’s sort of like discovering your own secret formula!
Using Different Flours for Flavor
Flour isn’t just a base; it’s a flavor contributor. I love exploring different types of flour in my muffins. For example, I’ve used rye flour for a nuttier taste, and it adds a lovely depth to the muffins. I also enjoy experimenting with spelt flour, which gives a slightly sweet, earthy flavor. Blending different flours is a fun way for me to personalize my baking. Don’t be afraid to mix things up! Every new combination leads to a unique batch, and that’s one of the joys of baking.
Fermentation Times and Temperature
Fermentation is one of the most crucial steps in sourdough baking. I’ve found that temperature plays a significant role in how my muffins develop. In warmer weather, my dough can rise much faster, while in cooler temperatures, I often need to be patient. I remember one particularly chilly day when I left my dough out for hours, hoping for a good rise! I’ve learned that longer fermentation at cooler temperatures can enhance flavor, so sometimes I’ll refrigerate the dough overnight. It’s all about finding that sweet spot that works for your environment. Plus, it gives me a little flexibility in my baking schedule!
Common Mistakes to Avoid
Throughout my sourdough journey, I’ve definitely made some blunders. One of the most common mistakes is not letting the dough rise long enough. I’ve been eager to get to the baking stage and skipped on the rising times, only to be left with dense muffins. Trust me, it’s worth the wait! Another pitfall is overworking the dough, which can lead to tough muffins. I’ve also learned that not preheating my cooking surface properly can affect the final product. I now always take a moment to ensure my skillet or oven is at the right temperature before cooking. Learning from these mistakes has made me a better baker, and I feel a sense of pride every time I avoid them!
Serving Suggestions and Pairings
Classic Toppings: Butter and Jam
After all the hard work of baking, it’s time to enjoy those delicious sourdough English muffins! My favorite way to savor them is with a generous spread of butter and a dollop of my favorite jam. There’s something so comforting about that combination. I often use homemade strawberry jam or even a tart raspberry preserve. The sweet and tangy flavors meld perfectly with the warm, buttery muffin. I can still remember the first time I took a bite; it felt like a hug in food form! The nooks and crannies hold the toppings perfectly, making each bite a delightful experience.
Creative Toppings: Avocado and Eggs
If I’m looking for something a bit more substantial, I love topping my muffins with smashed avocado and a sprinkle of salt. It’s a quick and nutritious meal. Sometimes, I’ll throw an egg on top, whether it’s poached, scrambled, or fried. The creaminess of the avocado plus the richness of the egg creates a flavor explosion that I can’t resist. I often serve these for brunch when friends come over, and they’re always a hit! The vibrant colors and textures make for a visually appealing dish that tastes even better.
Using Muffins for Breakfast Sandwiches
I’ve discovered that sourdough English muffins are excellent for breakfast sandwiches. They add a unique twist compared to regular bread. I love to layer them with crispy bacon, a slice of cheese, and a fluffy egg. Sometimes, I’ll even add a bit of hot sauce for a kick. It all comes together beautifully, and my family often asks for these sandwiches on busy mornings. They’re quick to prepare and satisfying, making them a staple in our home. I think the muffins hold up well to the fillings without getting soggy, which is a huge plus!
Frequently Asked Questions (FAQs)
How do I know my sourdough starter is ready?
One of the most common questions I hear is how to tell if your sourdough starter is ready for baking. I’ve learned that the best indicators are visual and aromatic. When my starter has doubled in size and is bubbly on the surface, I know it’s good to go. The aroma should be pleasantly sour, not overpowering or off-putting. A fun way to test it is with the float test: if a spoonful of your starter floats in water, it’s ready to be used! This little trick has saved me from many baking mishaps.
Can I freeze sourdough English muffins?
Absolutely! Freezing sourdough English muffins is a fantastic way to extend their shelf life. I usually let them cool completely on a wire rack, then wrap them tightly in plastic wrap or place them in an airtight container. I’ve found that they can last up to three months in the freezer. When I’m ready to enjoy one, I simply pop it in the toaster, and it tastes as good as freshly baked! This method has been a lifesaver on busy mornings when I want a quick breakfast.
What if my muffins are too dense?
If your sourdough muffins turn out denser than expected, don’t worry, you’re not alone! I’ve encountered this issue too. A few common culprits can lead to density: under-proofing the dough, using a starter that’s not quite ready, or not kneading enough to develop gluten. I’ve found that allowing for a longer rise or ensuring my starter is bubbly and active before mixing can help. If I’m feeling adventurous, I sometimes add a bit more water to the dough, which can lighten the texture.
How long do sourdough English muffins last?
When stored properly, sourdough English muffins can last about 3-4 days at room temperature. I like to keep them in an airtight container to maintain freshness. If I find I can’t finish them in that time, I’ll freeze the extras. They toast up beautifully after freezing, making them a delightful treat any time! One of the joys of baking these muffins is knowing I can always have a stash ready for breakfast or snacks.
Final Thoughts
Baking sourdough English muffins has been an incredible journey for me. From nurturing my starter to watching my dough rise, each step is filled with anticipation and joy. I’ve learned so much along the way, not only about baking but also about patience and the art of fermentation. Every muffin I make brings a sense of accomplishment and a delicious reward at the end. If you’ve been thinking about trying your hand at sourdough English muffins, I wholeheartedly encourage you to dive in. The process may seem daunting at first, but with each attempt, you’ll grow more confident and creative in the kitchen. Plus, the satisfaction of enjoying a warm, homemade muffin is truly unmatched. So grab your starter, gather your ingredients, and let’s get baking — you won’t regret it! You might also enjoy making Spiced Sourdough Hot Cross Buns (An Easter Treat) for a festive twist!