
Making your own sourdough starter from scratch can feel daunting, but it’s a rewarding journey that brings a unique flavor to your baking. Let’s dive into the magic of sourdough and get started! Read Interesting article: How To Make A Sourdough Starter From Scratch (7 Days)
Understanding Sourdough Starter
What is a Sourdough Starter?
A sourdough starter is a mixture of flour and water that captures wild yeast and bacteria from the environment. Unlike commercial yeast, which is cultivated and packaged, a sourdough starter relies on natural fermentation. It’s like having a living organism in your kitchen, constantly evolving and developing unique flavors. When I first learned about starters, I was fascinated by how simple ingredients could transform into something so dynamic.
How Does a Sourdough Starter Work?
The magic of a sourdough starter lies in the fermentation process. When flour is mixed with water, enzymes break down the starches into sugars. Wild yeast and lactic acid bacteria present in the air start to feast on these sugars, producing carbon dioxide and acids in the process. This not only makes the dough rise but also contributes to the characteristic tangy flavor of sourdough bread. I remember the first time I saw bubbles forming in my starter; it felt like I was witnessing a small miracle! The bubbles indicate that fermentation is happening, and it’s one of the most exciting parts of the process.
Benefits of Making Your Own Starter
Crafting your own sourdough starter has numerous benefits. For one, it gives you complete control over your bread’s flavor and texture. Store-bought options can’t compare to the depth of flavor that a homemade starter offers. Additionally, the process of nurturing your starter can be incredibly rewarding. I found that it became a little ritual for me, a moment of mindfulness in my day. There’s also a practical side: once you have a healthy starter, you can bake fresh bread at any time without needing to rely on store-bought yeast. Plus, there’s something special about sharing your homemade starter with friends or passing it down to family, creating a little piece of your kitchen that lives on in others. Read Interesting article: The Ultimate Sourdough Starter Feeding Guide (With Schedule)
Key Ingredients for Sourdough Starter
Flour Types: All-Purpose vs. Whole Wheat
When choosing flour for your sourdough starter, you have a couple of fantastic options. All-purpose flour is commonly used because it’s easily accessible and works well to create a robust starter. However, I learned that whole wheat flour can kickstart fermentation even faster. It contains more nutrients and wild yeast, giving your starter a head start. In my experience, mixing both types yields the best results; I often use whole wheat for the initial stages and then switch to all-purpose as my starter stabilizes.
Water Quality: Tap vs. Filtered
Water quality is another crucial factor in creating a successful sourdough starter. I’ve found that using filtered water is often better than tap water, which can contain chlorine or other chemicals that inhibit yeast activity. If you do use tap water, try letting it sit out overnight to allow the chlorine to dissipate. In my case, switching to filtered water made a noticeable difference in the vitality of my starter.
Temperature and Its Effects on Fermentation
The temperature of your kitchen can greatly influence how quickly your starter develops. Ideally, a warm environment (between 70°F and 75°F) speeds up fermentation. I’ve experimented with placing my starter near a sunny window or a warm stovetop, and I noticed it bubbles more vigorously in these spots. However, keep an eye on it; if it gets too hot, it might ferment too quickly or even spoil. It’s all about finding that sweet spot that works for you and your kitchen environment.
Step-by-Step Guide to Creating a Sourdough Starter
Day 1: Initial Mixture
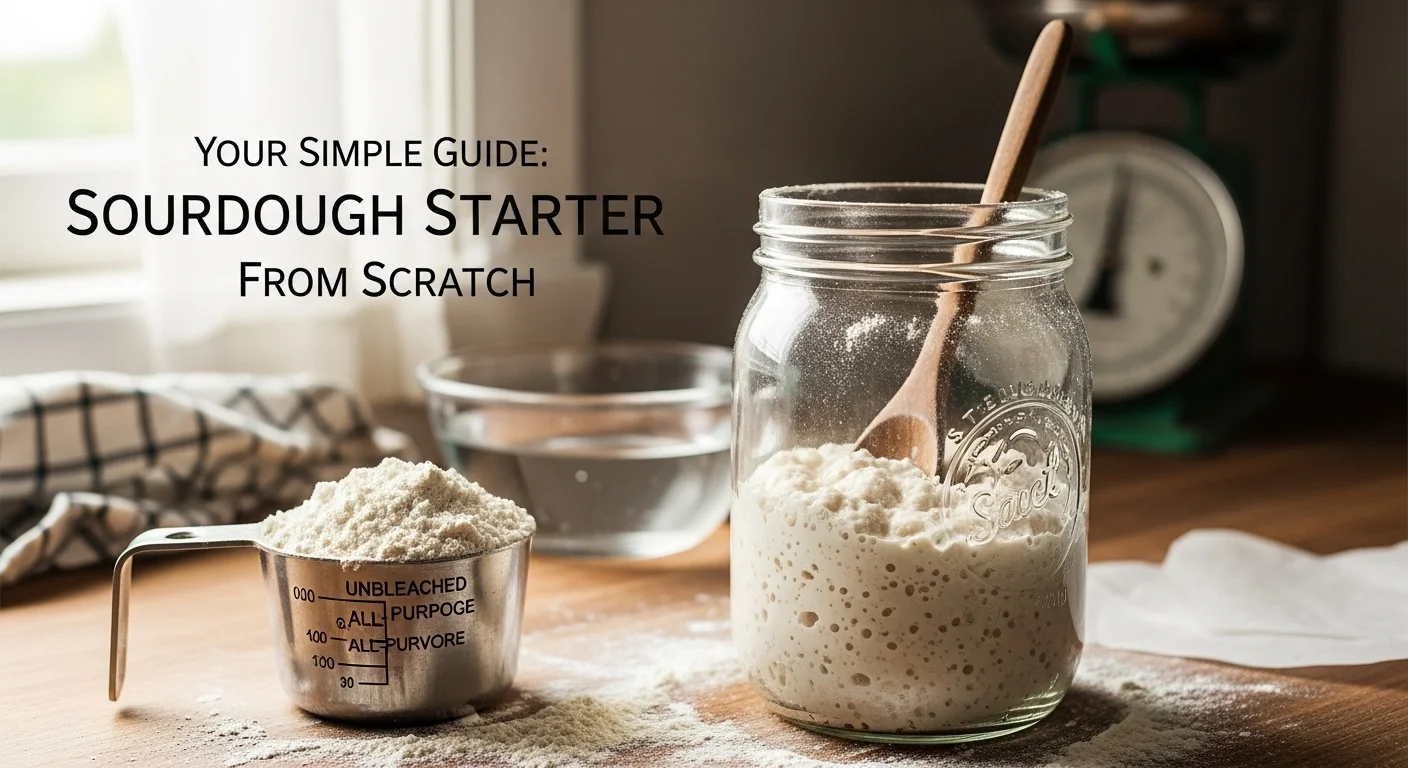
To start your sourdough journey, combine equal parts flour and water in a clean jar. I typically start with 100 grams of each. Mix until there are no dry bits of flour left. Cover the jar with a cloth or loose lid to allow air in while keeping dust out. On day one, you might not see much action; that’s perfectly normal!
Day 2: First Feeding
On the second day, you might notice some bubbles forming. This is a sign that wild yeast is starting to take hold. Discard half of your mixture (about 100 grams) and add another 100 grams of flour and 100 grams of water. This feeding process helps to keep the yeast healthy and encourages it to multiply. I remember feeling a sense of excitement when I saw those first bubbles; it was proof that my starter was alive!
Days 3-7: Daily Feedings and Monitoring
Continue the daily feeding for about a week. Each day, discard half and feed it with equal parts flour and water. You’ll notice your starter becoming more bubbly and doubling in size within a few hours. It’s during this time that I really developed a connection with my starter; it felt like nurturing a little pet. It’s important to keep an eye on it—if it starts to smell off or develop a layer of liquid on top, you might need to adjust your feeding schedule or ingredients.
Signs of a Healthy Starter
By the end of the week, your sourdough starter should be active, bubbly, and have a pleasant, slightly tangy smell. I’ve learned that a healthy starter will approximately double in size after feeding within four to six hours. When it reaches this point, you’ll know it’s ready to use in your baking adventures!
Common Issues and Troubleshooting
What to Do If Your Starter Won’t Bubble
One of the most disheartening experiences I faced during my sourdough journey was when my starter simply refused to bubble. I remember the frustration as I peered into the jar, hoping for some sign of life. If you find yourself in the same boat, don’t panic! There are a few things you can check. First, consider the temperature. Is your kitchen too cold? A warm spot can really help kickstart those bubbles. I once moved mine near a heater for a few hours, and it made a world of difference. Read Interesting article: Sourdough Starter Troubleshooting (Why Isn’t It Rising?)
Another factor to consider is the type of flour you’re using. I’ve noticed that some flours work better than others in capturing wild yeast. If you’re using all-purpose flour, try mixing in a bit of whole wheat flour for extra nutrition. Lastly, if your starter hasn’t bubbled after several days, it may need a fresh start. Discard half and feed it again, ensuring you’re using filtered water and giving it the warmth it craves.
Dealing with Unpleasant Smells
It’s completely normal to encounter some funky smells when working with a sourdough starter. However, if you notice a smell that’s downright unpleasant or off-putting, it’s a red flag. I’ve found that a healthy starter usually has a tangy aroma, but if it smells like rotten or spoiled food, it might be time to take action. First, check your feeding schedule. Sometimes, a simple adjustment can help. I realized that I was feeding mine too infrequently, which contributed to the off smell.
If the odor persists even after adjusting your feeding routine, consider discarding a larger portion of the starter before feeding it again. I once had a starter that developed a layer of liquid on top, which can happen when it sits too long. I discarded the liquid and the top layer, fed it fresh flour and water, and was pleasantly surprised when the smell returned to its usual tanginess.
How to Revive a Neglected Starter
Life happens, and sometimes our sourdough starters get neglected amidst the hustle and bustle. If you find yours has been sitting for too long, don’t worry! I’ve successfully revived a starter that had been forgotten for weeks. First, assess its condition. If it’s simply a little sluggish, you can usually bring it back to life with a good feeding. Start by discarding half and giving it a fresh feed of flour and water. Place it in a warm spot and give it time to bounce back.
If the starter has developed a layer of hooch (that liquid I mentioned earlier), it’s a sign that it’s hungry. I’ve learned that hooch can be stirred back in for a tangier flavor, but if it smells off, it’s best to discard it. After a couple of feedings, my neglected starter was bubbling away again, reminding me that it has a resilient spirit just like us!
Maintaining Your Sourdough Starter
Feeding Schedule: Daily vs. Weekly
Once your starter is thriving, maintaining it becomes a bit of a lifestyle. I’ve found that keeping a consistent feeding schedule is crucial. If you’re baking regularly, daily feedings are ideal. I remember the first time I went on vacation and had to leave my starter behind; I felt guilty! If you’re in a similar situation, consider switching to a weekly feeding schedule. Just feed it, let it sit at room temperature for a few hours, and then store it in the refrigerator.
When I returned from my trip, my starter was still alive and well! I simply took it out, let it come to room temperature, and gave it a few feedings to revive it before baking. It’s amazing how adaptable these little organisms are.
Storing Your Starter: Countertop vs. Refrigerator
Deciding where to store your starter can depend on how often you bake. I used to keep mine on the countertop, but I learned that it can be a bit demanding. If you’re someone who bakes bread frequently, keeping it out allows you to feed it daily and keep it active. For me, though, I found that storing it in the refrigerator was more practical when life got busy. Just remember, if you decide to refrigerate it, you’ll need to bring it back to life with a feed or two before using it in your baking.
In my experience, it’s vital to keep your starter in a clean, glass container with a lid that allows for some air exchange. When I first switched to a jar with a loose lid, I noticed my starter thrived even better, as it had the space to breathe while still being protected.
Signs Your Starter Needs More Attention
Over time, I’ve learned to recognize the signs that my starter needs a little extra TLC. If it’s sluggish, not bubbling like it used to, or has developed an off smell, these are all cues that it’s time to give it more attention. I’ve noticed that during the colder months, my starter requires more frequent feedings, so I keep a close eye on it. The key is to be in tune with its needs.
Another sign to look out for is if your starter isn’t rising as it used to. If it’s not doubling in size after a few hours of feeding, it could be time to switch up your flour or water, or even change the feeding ratio. I often experiment with different flours and ratios to see what my starter responds to best, and it’s been a fun way to connect with the process.
Using Your Sourdough Starter
When to Use Your Starter for Baking
Knowing when to use your sourdough starter can be a game-changer in your baking experience. I’ve learned that the best time to use your starter is when it’s at its peak activity. This usually occurs about 4 to 6 hours after a feeding, when it has doubled in size and is bubbling enthusiastically. I remember the first time I was unsure about whether my starter was ready; I ended up waiting too long, and it deflated! Since then, I’ve made it a point to pay close attention to the signs showing it’s ready, like those beautiful bubbles and that delightful tangy smell.
Recipes That Highlight Sourdough Starter
Once your starter is ready, the possibilities for baking are endless! One of my all-time favorite recipes is a classic sourdough bread. The crusty exterior paired with a soft, chewy interior is simply unbeatable. I also love making sourdough pancakes on lazy Sunday mornings. They are fluffy and have a slight tang, which is a welcome surprise compared to regular pancakes. Another great use for your starter is in sourdough pizza dough. The flavor it adds is just incredible, and when I bake it in my oven, the aroma fills my home and makes my mouth water!
In addition to bread and pancakes, you can also use your starter for muffins, waffles, and even sourdough crackers! I once tried a recipe for sourdough chocolate chip cookies, and let me tell you, they were a hit! The combination of the sourdough’s tanginess with sweet chocolate was heavenly. I encourage you to experiment and find what works best for you; the joy of baking with a starter is in the creativity it inspires.
Tips for Baking with Sourdough Starter
Baking with sourdough can be a little different than using commercial yeast, but that’s part of the fun! I’ve found that patience is key—allowing the dough to rise slowly leads to better flavor and texture. When I first started, I was eager to see quick results, but I learned that letting the dough rise overnight in the fridge often yields the best outcomes. This cold fermentation really enhances the flavor.
Another tip is to keep track of hydration levels. If you’re following a recipe, be mindful of the hydration of your starter, as this can affect the dough’s consistency. I once made the mistake of not adjusting my water content based on the starter’s hydration, and it resulted in a dough that was way too sticky. Measuring accurately and adjusting based on your environment can make a huge difference.
Finally, don’t be afraid to embrace the unique characteristics of sourdough! Each batch of bread, pizza, or pancakes will have its own personality based on your starter’s quirks. I’ve come to love the little surprises that come with each bake. Sometimes, my bread might have a stronger tang, and other times it’s milder, depending on how my starter was fed and cared for. It’s all part of the adventure!
Frequently Asked Questions
How Long Does It Take to Make a Sourdough Starter?
Creating a sourdough starter from scratch typically takes about a week. I remember feeling both excited and anxious during that time, watching each day for bubbles and signs of life. Some might get impatient, but it’s important to give it that time to develop fully. I found that taking notes throughout the week helped me understand the progress and the unique characteristics of my starter. Just remember, patience pays off with sourdough!
Can I Use Whole Wheat Flour for My Starter?
Absolutely! In fact, I’ve found that whole wheat flour can be quite beneficial for your starter. It tends to contain more nutrients and wild yeast, which can help jumpstart the fermentation process. I often began my starters with whole wheat flour and later transitioned to all-purpose for regular feedings. So, if you have whole wheat flour on hand, don’t hesitate to use it!
Is My Starter Ready to Use?
Determining if your starter is ready to use is all about observing its activity. If it has doubled in size within 4 to 6 hours after feeding and is bubbly with a pleasant tangy aroma, you’re good to go! I like to do the “float test” as an extra assurance: take a small spoonful of the starter and drop it in a glass of water. If it floats, that means it’s filled with gas and is ready for baking. If it sinks, it might need more time or a few more feedings. Trust me, once you get the hang of it, you’ll feel much more confident in using your starter in your baking adventures!