
If you’ve ever craved the delightful taste of sourdough bread but felt daunted by the long process, you’re in for a treat! This guide will take you through the exciting world of same-day sourdough, giving you the tools to bake fresh, tangy bread without the wait.
Understanding Sourdough Bread
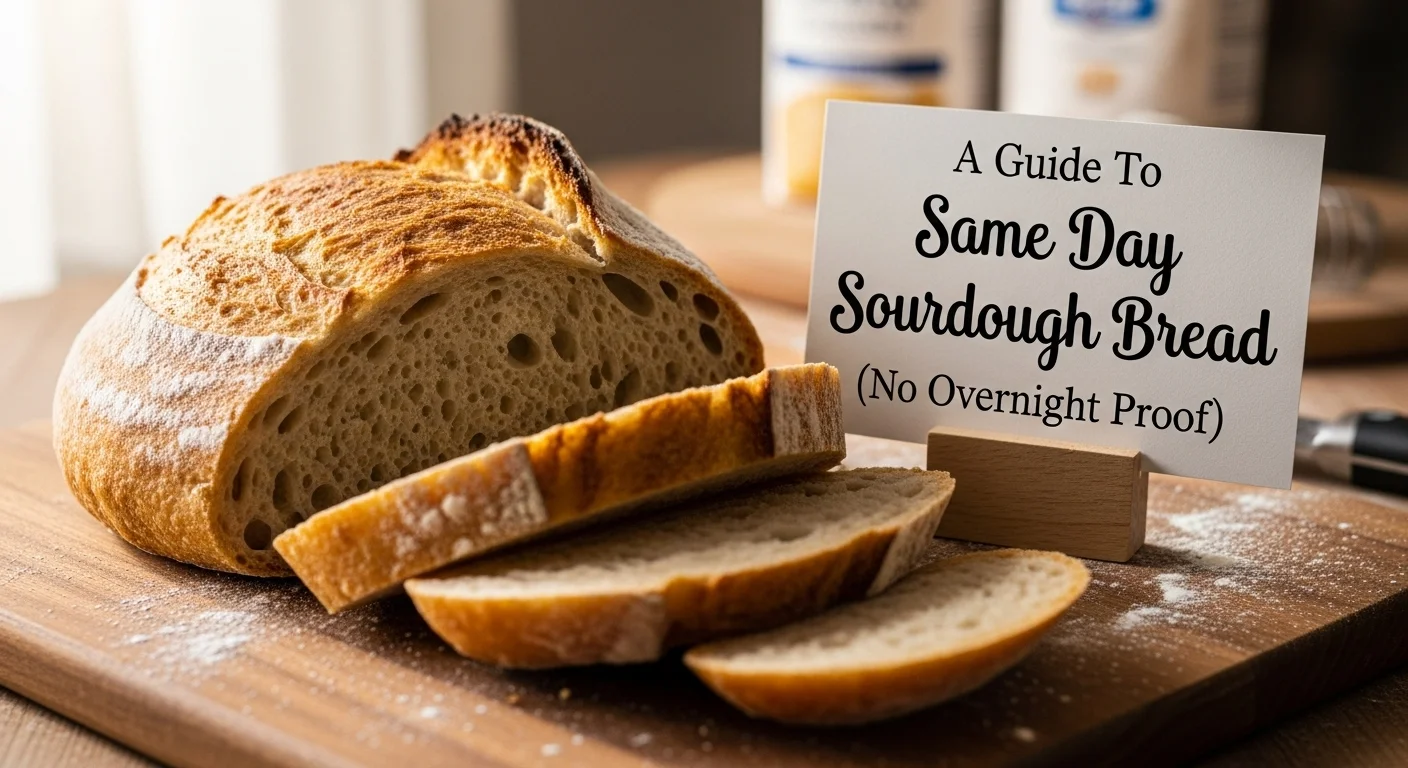
What is Sourdough Bread?
Sourdough bread is a type of bread made using a naturally fermented dough. Unlike conventional bread that often relies on commercial yeast, sourdough utilizes wild yeast and bacteria, which create its unique flavor and texture. The fermentation process not only leavens the bread but also contributes to its distinctive tangy taste, which many people adore. For me, nothing beats the experience of cutting into a warm loaf and enjoying the crusty exterior and soft, flavorful interior. It’s a bread that tells a story with every bite.
History and Origin of Sourdough
The history of sourdough dates back thousands of years, making it one of the oldest forms of leavened bread. It’s believed that ancient Egyptians were among the first to discover the fermentation process by accident when they left some dough out and it fermented naturally. This method spread throughout Europe and beyond, eventually becoming a staple in many cultures. I often find myself marveling at how this humble bread has evolved over the centuries. It’s fascinating to think that the same technique used by our ancestors is still celebrated in kitchens today.
The Role of Wild Yeast and Bacteria
Wild yeast and bacteria play a crucial role in sourdough bread. The wild yeast, which is present in the environment, ferments the sugars in the flour, while lactic acid bacteria contribute to the bread’s sour flavor. This symbiotic relationship is what gives sourdough its unique characteristics. I remember when I first started baking sourdough; I was amazed by how a simple mixture of flour and water could come alive with flavor and texture. Understanding how these microorganisms work together has deepened my appreciation for this age-old craft.
Same Day Sourdough Bread: An Overview
What Does ‘Same Day’ Mean?
When we talk about same-day sourdough, we refer to the process of creating sourdough bread in one day, without the lengthy overnight proofing that traditional methods use. This approach allows us to enjoy homemade sourdough bread in just a few hours, which is a game-changer for those of us who don’t have the luxury of waiting overnight. I remember the first time I tried making same-day sourdough; the thrill of having fresh bread in just a few hours was exhilarating!
Benefits of Same Day Sourdough
There are several benefits to making same-day sourdough. For starters, it’s accessible for beginners who might feel intimidated by the longer processes. It also allows for flexibility in timing; I’ve found that it fits much better into my busy schedule. Plus, the flavor and texture can still be wonderfully satisfying, proving that delicious bread doesn’t have to take days to prepare. I’ve often been surprised by how much I enjoy these quicker versions just as much as their longer counterparts. Read Interesting article: The Best Sourdough Baguettes (A Taste Of Paris At Home)
Differences Between Overnight and Same Day Proofing
The main difference between overnight and same-day proofing is the duration and depth of fermentation. Overnight proofing allows the dough to develop more complex flavors and a chewier texture due to the longer fermentation process. In contrast, same-day sourdough is typically quicker, leading to a lighter texture with a slightly different taste profile. However, from my experience, same-day sourdough can still produce a wonderfully flavorful loaf, especially when you tweak the timing and ingredients just right. It’s all about finding that balance that works for you.
Essential Ingredients for Same Day Sourdough
Flour Types: Bread Flour vs. All-Purpose Flour
When it comes to choosing flour for your same-day sourdough, I’ve found that the type of flour you use can significantly impact the texture and flavor of the final loaf. Bread flour, with its higher protein content, creates a stronger gluten structure, which helps in achieving that lovely chewy crust and airy crumb. I remember the first time I used bread flour instead of all-purpose flour; the difference was striking! The bread rose more beautifully and had that authentic sourdough texture I was after.
All-purpose flour can work too, especially if that’s what you have on hand. It tends to yield a softer loaf, which some might prefer. I often mix the two to balance the characteristics. It’s like a little experiment every time, and I love discovering the nuances in flavor and texture.
Water Quality and Temperature
Water is a key player in the sourdough game. I’ve learned that using filtered or bottled water can make a difference, especially if your tap water has a strong chlorine taste or is too hard. The temperature of the water is another factor that I’ve come to pay attention to. Warm water can help kickstart the fermentation process, which is crucial for same-day sourdough. I usually aim for water around 100°F (37°C) to encourage that lively bubbling action in the dough.
It’s also good to remember that the water temperature can affect the overall timing of your bake. If the water is too cold, the dough will take longer to rise, which might not work well for our same-day plan. Finding that sweet spot has become part of my routine, and I think it’s one of those little details that can elevate your bread.
Salt’s Role in Flavor and Structure
Ah, salt! It’s not just for seasoning; it plays a vital role in sourdough bread. I’ve discovered that salt enhances flavor and strengthens the gluten structure, giving the bread that desirable elasticity. When I first started baking, I thought I could skip the salt for a healthier version, but I quickly learned that it’s essential for both taste and texture. Without it, the bread can taste flat and lack depth.
Typically, I use about 1.5% to 2% of the flour weight in salt. This ratio seems to work well for me, and I’ve found that it helps achieve a beautifully balanced loaf. It’s amazing how something so simple can have such a profound impact on the end product.
Starter vs. Yeast: Which to Use?
Now, let’s talk about the leavening agent. For same-day sourdough, you have the option to use a sourdough starter, commercial yeast, or even a combination of both. Personally, I prefer using my sourdough starter because it adds that lovely tang and unique flavor profile that you can only get from wild yeast. It’s like a pet that requires care and attention, but the rewards are so worth it.
However, if time is of the essence, I’ve also experimented with a bit of instant yeast to speed up the fermentation. Combining a small amount of yeast with my starter can give me the best of both worlds. I remember the first time I tried this method; the bread was ready in no time, and I was thrilled to have that fresh sourdough aroma wafting through my kitchen!
Ultimately, the choice between using a starter or yeast depends on what you’re aiming for and how much time you have. I love the flexibility in sourdough baking, as it allows for creativity and experimentation. Each loaf can be a little different, and that keeps things exciting!
Tools and Equipment Needed
Mixing Bowls and Measuring Tools
Let’s dive into the tools you’ll need to make your same-day sourdough a reality. First up are mixing bowls. I find that a large, sturdy bowl is essential. Ideally, it should be glass or stainless steel, which makes it easy to see the dough rise. I’ve had some mishaps with plastic bowls that weren’t quite big enough—what a mess! Measuring cups and a kitchen scale are also must-haves. Accurate measurements can make or break your bread, and I’ve found that using a scale yields the best results.
Proofing Baskets and Baking Stone
Next, let’s talk about proofing baskets. These help shape the dough while it rises and can give your bread that lovely artisan look. I love my round banneton; it’s like a little nest for my dough. If you don’t have a proofing basket, a bowl lined with a well-floured kitchen towel will do the trick. I’ve used both successfully, and it’s all about what you have available.
A baking stone or a cast-iron skillet can help achieve that crispy crust we all crave. I remember the first time I baked on a stone; the difference in crust was incredible! Preheating the stone is key, and it mimics the effect of a professional oven.
Oven Setup: Baking with Steam
Finally, let’s not forget about the oven setup. Creating steam in the first few minutes of baking is crucial for a great crust. I’ve found that placing a pan filled with hot water in the oven while it preheats does the trick nicely. Alternatively, you can use a spray bottle to mist the oven just after placing the bread inside. These little techniques have really helped me elevate my sourdough game, and I can’t recommend them enough!
Step-by-Step Guide to Making Same Day Sourdough Bread
Preparing the Dough
Now that we have all our ingredients and tools ready, it’s time to dive into making that delicious same-day sourdough bread! I find that the first step, preparing the dough, is where the excitement begins. Gather your flour, water, salt, and starter (or yeast) before you start mixing. I usually like to start with a clean workspace; it makes everything feel more organized and enjoyable.
In a large mixing bowl, combine the flour and water. I often use my hands to mix everything together initially, which helps me feel the consistency of the dough. You want it to come together but still be a bit shaggy at this point. It’s amazing how just flour and water can create such a satisfying texture right from the start! Once the flour and water are mostly combined, add in your salt and starter (or yeast). This is when things start to get aromatic, and I can hardly wait to see how it develops.
Mixing and Kneading Techniques
After the ingredients are combined, it’s time to knead. I’ve learned that kneading is where the magic happens. It’s a labor of love that helps develop gluten, which gives the bread its structure. I usually knead the dough for about 8-10 minutes, until it feels smooth and elastic. One technique I love is the “stretch and fold” method—this involves stretching the dough out and then folding it over itself. It’s a gentler approach that allows the dough to retain air while still developing strength.
While kneading, I enjoy paying attention to how the dough feels. It’s almost like a conversation. Sometimes, if it feels too sticky, I’ll add a little more flour, but I try to keep it minimal. Once the dough is smooth, I shape it into a ball and place it back into the bowl, covering it with a damp towel to keep it from drying out. I find this part so satisfying, knowing that my dough is on its way to becoming something delicious!
Short Proofing Methods
As we’re making same-day sourdough, we need to speed up the proofing process. For me, this is where creativity comes into play. I typically let my dough rest for about 30 to 60 minutes, giving it a chance to rise. To speed things up, I often place it in a slightly warm area of my kitchen. If your oven has a proofing setting, that can work wonders too! I love the warmth that surrounds the dough, making it feel cozy and ready to grow.
During this time, I find it helpful to take a moment to relax, maybe clean up my workspace or prepare for the next steps. It’s a great way to keep the flow going. I’ve noticed that the dough should puff up a bit but not double in size during this short proofing. Watching it come to life is one of my favorite parts of the process!
Shaping the Dough
After the dough has had its initial rise, it’s time to shape it. This step can be so gratifying! I gently turn the dough out onto a lightly floured surface. I usually pat it down gently to remove any large air bubbles while being careful not to flatten it completely. Then, I shape the dough into a round or oval loaf, depending on what I feel like that day. It’s like molding clay, and I’ve learned that the more I practice, the better I get at shaping it.
Once shaped, I place the dough into my proofing basket, seam side up for a round loaf, or seam side down for an oval loaf. If I don’t have a proofing basket handy, I’ve also successfully used a bowl lined with a floured towel. It’s all about what works for me! Covering the dough again, I let it rest for another 30 minutes. I always feel a rush of anticipation at this point, knowing that soon I’ll be enjoying that freshly baked bread.
Baking the Bread
The final steps are where all the hard work pays off! Preheating my oven is crucial here. I usually set it to 450°F (230°C) and let it heat up thoroughly. If I’m using a baking stone, I place it in the oven while it preheats. I’ve found that a hot oven is essential for a crusty exterior!
Before placing the dough in the oven, I like to score the top with a sharp knife or a bread lame. This not only looks beautiful but also helps control how the bread expands as it bakes. I remember my first few attempts when I was too timid to score deeply enough—my loaves ended up bursting in odd places! With practice, I’ve learned to give it a nice, confident score.
I usually add steam to the oven by placing a pan of hot water at the bottom or using a spray bottle to mist the walls right after I put the bread in. This steam helps to create that gorgeous crust we all love. After about 25 to 30 minutes, I take a peek, and my heart swells with joy when I see the golden crust forming. Once baked, I carefully remove the bread from the oven and let it cool on a wire rack. The aroma fills my kitchen, and I can hardly wait to slice into it!
Common Troubleshooting Tips
Why Your Bread Didn’t Rise
We’ve all been there—after all the mixing, kneading, and shaping, you open the oven to find a loaf that barely rose. It can be disheartening! From my experience, there are a few common culprits for this. One major reason can be the health of your starter or yeast. If it’s not active enough, it won’t do its job. I remember the first time I used a starter that had been in the fridge for too long; it just didn’t bubble like it should have. Regular feedings and keeping it at room temperature can help keep it vigorous.
Another factor to consider is the temperature of your dough and the environment. Yeast loves warmth; if your kitchen is cold, the dough may struggle to rise. I usually find a cozy spot for my dough—like near a warm oven or in a sunny spot. If it’s too cold, the yeast just takes its sweet time. I’ve learned to be patient and adjust my environment accordingly.
Dealing with Dense or Gummy Texture
If your bread turns out dense or gummy, it might be a sign you added too much water or didn’t knead it enough. I’ve made this mistake a few times, thinking a stickier dough would yield better bread. Instead, I found that a well-kneaded, perfectly hydrated dough made all the difference. If you’re unsure, try sticking with the 75% hydration level for beginners until you get more comfortable with your dough’s feel.
Another thing to check is your baking time and temperature. Sometimes I’ve been overly eager and pulled the bread out too soon, leading to an undercooked center. A good rule of thumb is to use an instant-read thermometer; your bread should be around 200°F (93°C) when it’s done. This little trick has saved me from many rubbery loaves!
Adjusting for Temperature and Humidity
Temperature and humidity can significantly affect your sourdough baking. I’ve noticed that on particularly humid days, my flour absorbs moisture differently. When this happens, I adjust the amount of water I add. It’s all about learning to read your dough. If it feels too wet, I might hold back on the water or add a little extra flour until it feels just right. Keeping a log of my baking conditions has really helped me understand how to tweak my recipes.
Conversely, if the weather is dry, I might increase the hydration. I’ve found that keeping a spray bottle with water nearby can also help me adjust during the kneading process. It’s like a little dance with the dough, and it makes the whole process feel much more intuitive!
Creative Variations and Add-Ins
Herbs and Spices for Flavor
One of the things I love most about sourdough is how versatile it can be. Adding herbs and spices can elevate your loaf to a whole new level. I often toss in dried rosemary or thyme when I mix the dough. The aroma that fills my kitchen while it bakes is simply divine! I recommend starting with about a tablespoon of dried herbs for a subtle flavor boost. It’s fun to experiment with different combinations, and I’ve had great success with garlic powder, onion powder, or even a sprinkle of paprika.
Incorporating Seeds and Nuts
Another fantastic way to add texture and flavor is by incorporating seeds and nuts. I particularly enjoy adding sunflower seeds or pumpkin seeds to my dough. Not only do they offer a delightful crunch, but they also add a nutty flavor that complements the sourness. When I add nuts, I like to toast them slightly first to enhance their flavor. It’s amazing how a handful of seeds can transform an ordinary loaf into something extraordinary!
Making Sweet Sourdough Bread
If you’re in the mood for something sweeter, consider making a sweet sourdough bread. I’ve tried adding ingredients like honey, raisins, or even chocolate chips, and it’s a game changer! When I want a treat, I often mix in a little cinnamon and a handful of chocolate chips for a delightful breakfast option. Just remember to adjust the sugar levels in your recipe accordingly, so it doesn’t throw off the yeast. The result is a lovely, tender loaf that’s perfect with a cup of coffee. Read Interesting article: Chewy Sourdough Discard Cookies (An Easy Treat)
Storing and Serving Your Sourdough Bread
Best Practices for Storage
After all that hard work, you’ll want to make sure your sourdough bread stays fresh. I’ve learned a few best practices over time. First, I usually let the bread cool completely before slicing it. This helps maintain the texture and moisture. I typically store my bread in a paper bag or a bread box to keep it from getting too dry. I find that plastic bags can lead to a soggy crust, which isn’t pleasant.
How to Reheat Sourdough Bread
If you have leftover bread, reheating can help bring back that fresh-out-of-the-oven taste. I often pop slices in the toaster or place the whole loaf in a preheated oven at 350°F (175°C) for about 10 minutes. The oven method warms it up beautifully and revives that lovely crust. It’s like giving the bread a second life!
Serving Suggestions and Pairings
When it comes to serving sourdough, the options are endless! I love pairing it with a good quality butter and a sprinkle of sea salt. It’s simple yet so satisfying. For more elaborate meals, sourdough makes a fantastic base for sandwiches or bruschetta topped with fresh tomatoes and basil. I’ve also enjoyed using it to soak up soups and stews—there’s just something about that crusty exterior making every bite a bit more delightful!
FAQs About Same Day Sourdough Bread
How long does it take to make same day sourdough?
Typically, from start to finish, making same-day sourdough can take around 4 to 6 hours, depending on your specific process and the environment.
Can I use whole wheat flour?
Absolutely! Whole wheat flour can add a delightful nuttiness to your bread. However, it might absorb more water, so be prepared to adjust the hydration level.
What if I don’t have a sourdough starter?
If you don’t have a starter, you can still make delicious bread using commercial yeast. Just remember to adjust your timing, as commercial yeast works faster than wild yeast. Read Interesting article: How To Make A Sourdough Starter From Scratch (7 Days)
Final Thoughts
Baking same-day sourdough has truly transformed my kitchen experiences. It brings joy, creativity, and a satisfying aroma that fills my home with warmth. Each loaf is a testament to the age-old craft of bread-making, and I love how it allows for personalization and experimentation. Whether you’re a seasoned baker or just starting, I encourage you to dive into the world of sourdough. It’s more than just bread; it’s a journey of flavors, textures, and memories waiting to be made. So grab your ingredients, roll up your sleeves, and let’s get baking!
Frequently Asked Questions
What is sourdough bread?
Sourdough bread is a type of bread made using a naturally fermented dough that utilizes wild yeast and bacteria, creating its unique flavor and texture.
What does ‘same day’ mean in the context of sourdough?
‘Same day’ refers to the process of creating sourdough bread in one day, without the lengthy overnight proofing that traditional methods use, allowing for fresh homemade bread in just a few hours.
What are the benefits of making same-day sourdough?
The benefits include accessibility for beginners, flexibility in timing, and the ability to enjoy flavorful bread without lengthy preparation times.
What are the differences between overnight and same-day proofing?
The main difference is the duration and depth of fermentation; overnight proofing develops more complex flavors, while same-day sourdough is quicker, leading to a lighter texture.
What type of flour should I use for same-day sourdough?
Using bread flour is recommended for a stronger gluten structure, but all-purpose flour can work as well, yielding a softer loaf. Mixing the two can also provide a balance in flavor and texture.
How does water quality and temperature affect sourdough?
Using filtered or bottled water can enhance flavor, and warm water (around 100°F or 37°C) can help kickstart the fermentation process, which is crucial for same-day sourdough.
What role does salt play in sourdough bread?
Salt enhances flavor and strengthens the gluten structure, which is essential for the bread’s texture and elasticity. It’s typically used at about 1.5% to 2% of the flour weight.
Can I use commercial yeast instead of a sourdough starter?
Yes, you can use commercial yeast, but be aware that it will work faster than wild yeast from a sourdough starter. Combining both can also yield good results.
What are some common troubleshooting tips if my bread didn’t rise?
Common reasons for bread not rising include an inactive starter or yeast, and the dough being in a cold environment. Ensuring your starter is healthy and finding a warm spot for the dough can help.
How should I store my sourdough bread to keep it fresh?
Allow the bread to cool completely before slicing, then store it in a paper bag or bread box to prevent drying out. Avoid plastic bags, as they can lead to a soggy crust.